> ## Documentation Index
> Fetch the complete documentation index at: https://docs.abbyy.com/llms.txt
> Use this file to discover all available pages before exploring further.
# Set up Single Sign-On with Azure Active Directory
> Set up SAML Single Sign-On for ABBYY FlexiCapture Cloud with Azure Active Directory by creating an enterprise application and exporting the certificate.
You can set up SAML-based Single Sign-On for ABBYY FlexiCapture Cloud web stations using Azure Active Directory. First register an application in Azure Active Directory, and then provide the configuration details to cloud support.
## Register an application in Azure Active Directory
Go to [https://portal.azure.com/](https://portal.azure.com/) and log in to your Microsoft Azure account.
Go to the **Azure Active Directory > Enterprise applications** section.
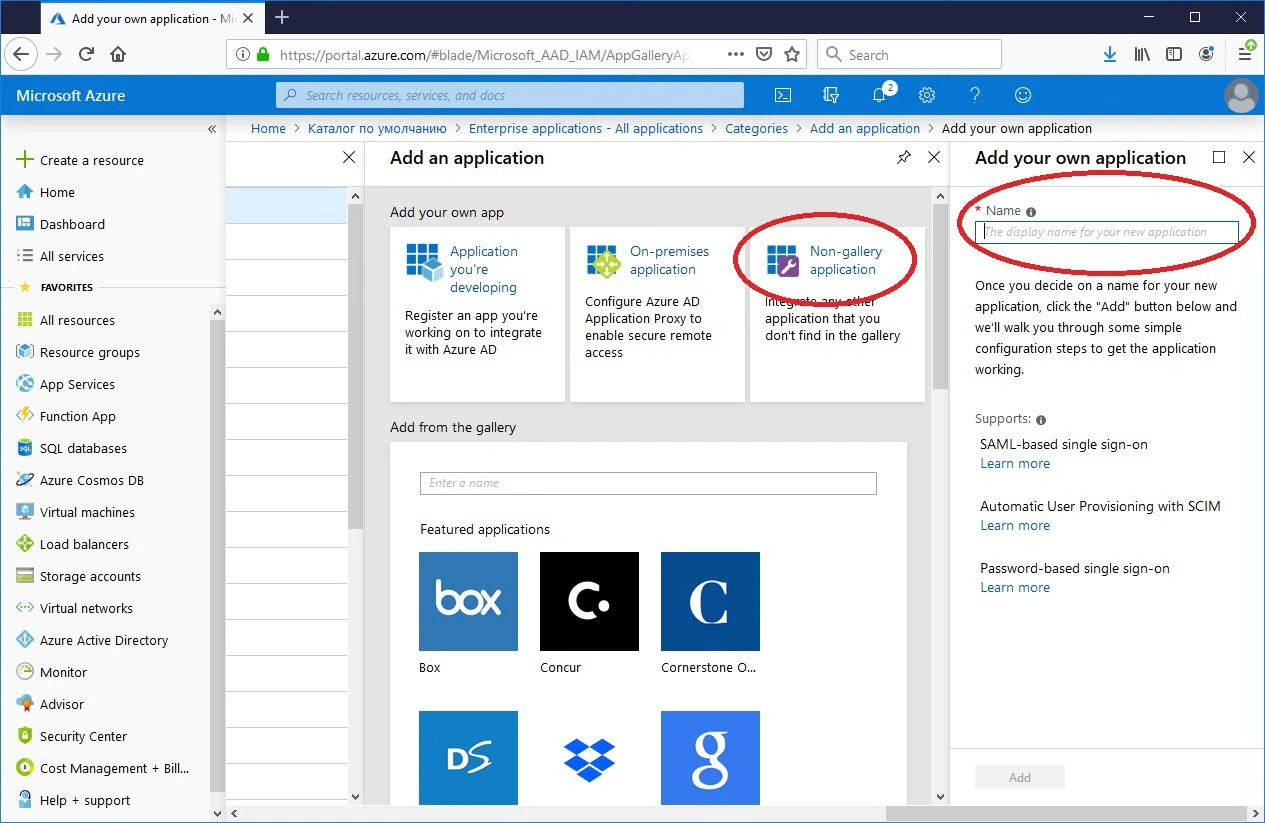
In the **Add an application** window, go to the **Non-gallery application** section and specify a name for the new application. If several tenants are used, create a separate application for each.
 Go to the **Users and groups** section and add all required users. Give them the **User** role.
Go to the **Single sign-on** subsection and select **SAML**.
Go to the **Users and groups** section and add all required users. Give them the **User** role.
Go to the **Single sign-on** subsection and select **SAML**.
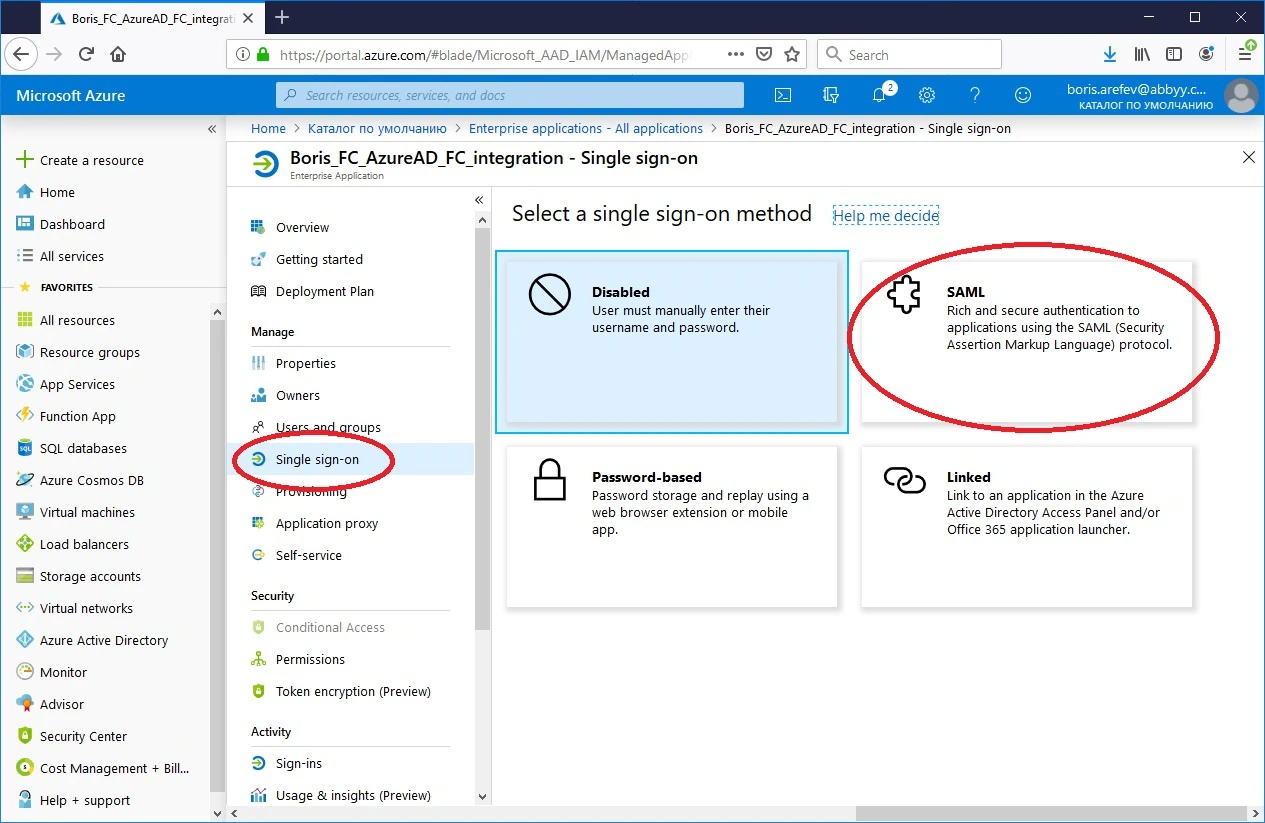 Edit the **Basic SAML Configuration** section. In the **Identifier (Entity ID)** and **Reply URL (Assertion Consumer Service URL)** fields, enter the URL in the following format, and leave the rest of the fields blank:
```text theme={null}
https:///FlexiCapture12/Login//AccessToken/Saml
```
Here, `` is the host name of the SaaS URL of your [processing location](https://flexicapture.com/data-processing-location/), and `` is the name of your tenant in FlexiCapture Cloud.
Edit the **Basic SAML Configuration** section. In the **Identifier (Entity ID)** and **Reply URL (Assertion Consumer Service URL)** fields, enter the URL in the following format, and leave the rest of the fields blank:
```text theme={null}
https:///FlexiCapture12/Login//AccessToken/Saml
```
Here, `` is the host name of the SaaS URL of your [processing location](https://flexicapture.com/data-processing-location/), and `` is the name of your tenant in FlexiCapture Cloud.
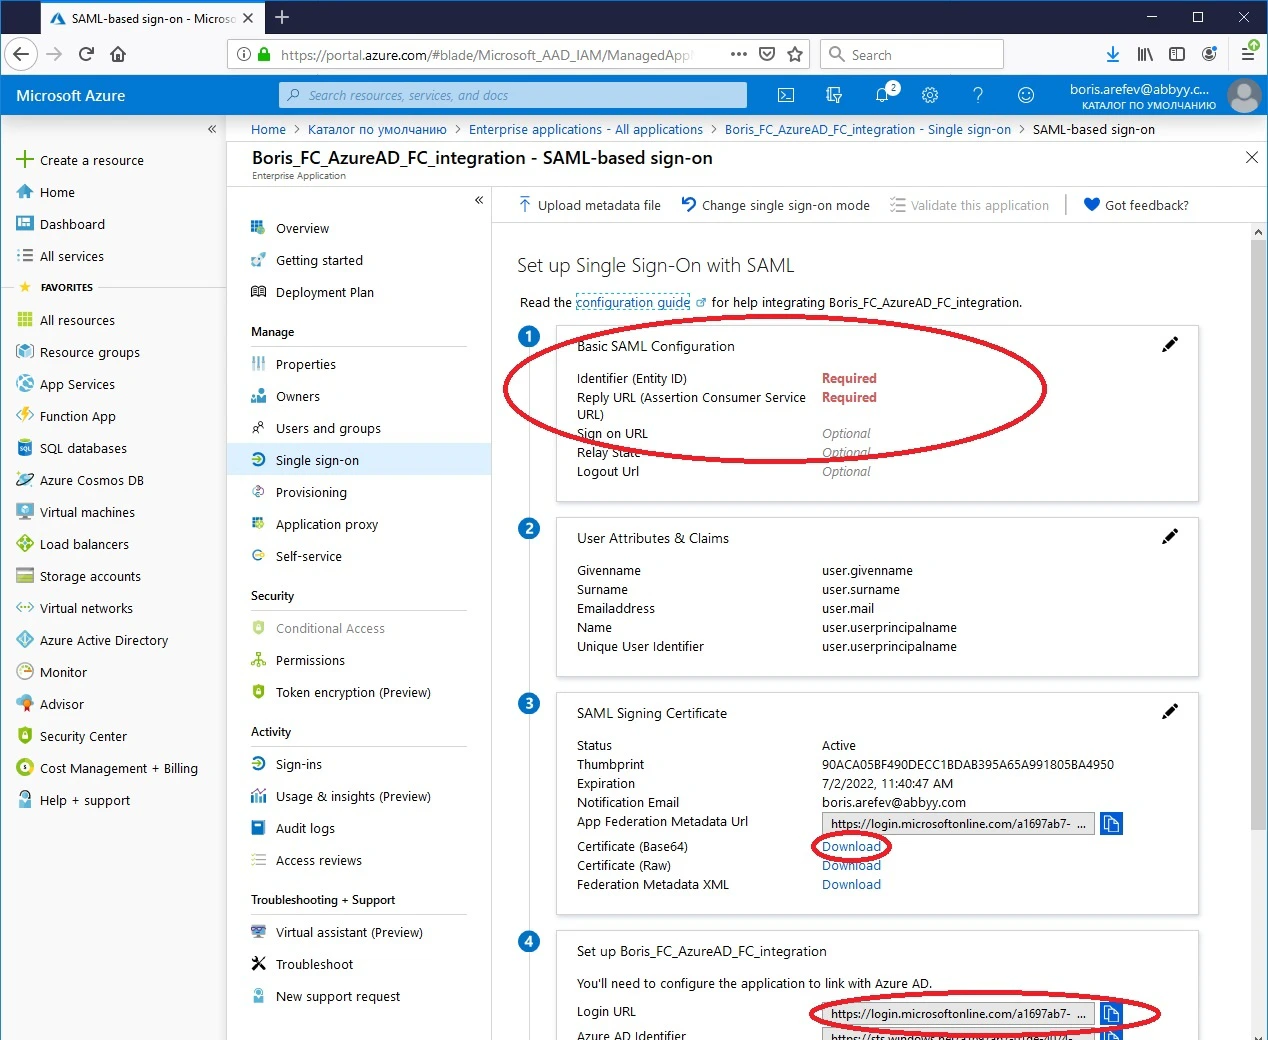 In the **SAML Signing Certificate** section, download your public certificate in Base64 format by clicking the link next to **Certificate (Base64)**.
From the **Login URL** field in the **Set up \[application name]** section, copy the URL for accessing the server of the external identity provider.
## Provide details to cloud support
Provide the following information to cloud support or the account manager:
* The URL of your FlexiCapture Cloud region and your tenant name
* The public key certificate
* The login URL
* The image for the new **Log in with…** button (images in `.svg`, `.jpg`, and `.png` formats are supported)
* The name of the external identity for the **Log in with…** button
Once cloud support completes the setup, an additional login button appears on your login page: **Log in with \[IdP Name]**.
For more technical details about the SAML authentication requests and responses that Azure Active Directory supports for Single Sign-On, see [this article on Microsoft.com](https://docs.microsoft.com/en-us/azure/active-directory/develop/single-sign-on-saml-protocol).
In the **SAML Signing Certificate** section, download your public certificate in Base64 format by clicking the link next to **Certificate (Base64)**.
From the **Login URL** field in the **Set up \[application name]** section, copy the URL for accessing the server of the external identity provider.
## Provide details to cloud support
Provide the following information to cloud support or the account manager:
* The URL of your FlexiCapture Cloud region and your tenant name
* The public key certificate
* The login URL
* The image for the new **Log in with…** button (images in `.svg`, `.jpg`, and `.png` formats are supported)
* The name of the external identity for the **Log in with…** button
Once cloud support completes the setup, an additional login button appears on your login page: **Log in with \[IdP Name]**.
For more technical details about the SAML authentication requests and responses that Azure Active Directory supports for Single Sign-On, see [this article on Microsoft.com](https://docs.microsoft.com/en-us/azure/active-directory/develop/single-sign-on-saml-protocol).