> ## Documentation Index
> Fetch the complete documentation index at: https://docs.abbyy.com/llms.txt
> Use this file to discover all available pages before exploring further.
# Configuring and starting the components
> Configure connection variables and input and output folders for the Multi-Task Package processes in Blue Prism, and then assign and start Batch Monitor and Saver.
Before you start configuring the Multi-Task Package components, make sure that the [.bprelease file has been successfully imported](/flexi-capture/connectors/blue-prism/bp-installation) and the [ABBYY FlexiCapture project has been configured](/flexi-capture/connectors/blue-prism/bp-configuring-fc).
## To configure the processes in Blue Prism:
1. In Blue Prism, open the **System** tab and expand the **Environmental Variables** group in the **Processes** node. For the values of the variables, specify the settings required to connect to FC and click **Apply**.
2. Open the **Studio** tab and expand the **FlexiCapture 12 Processes** group in the **Processes** node to see the imported sample processes.
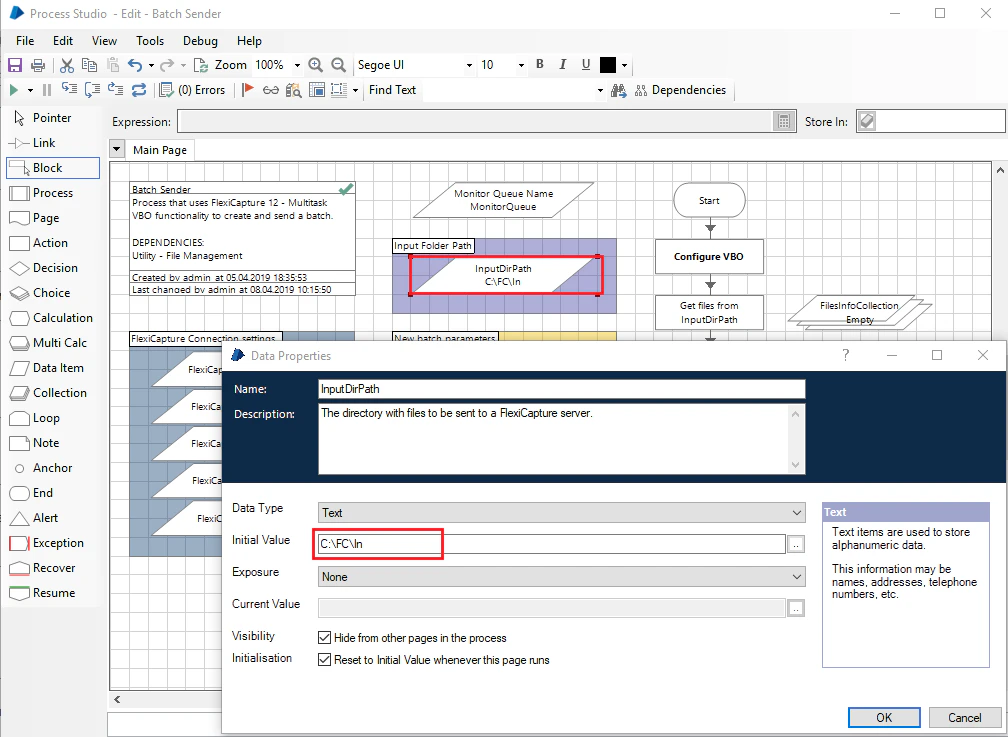
3. Open the **Batch Sender** process and then open the properties of the **InputDirPath** data item. In **Initial Value**, specify the path to the folder from which the process should pick up files to be sent to FC. Save the changes.
 4. Place the images to be processed into the folder you specified in step 3 above.
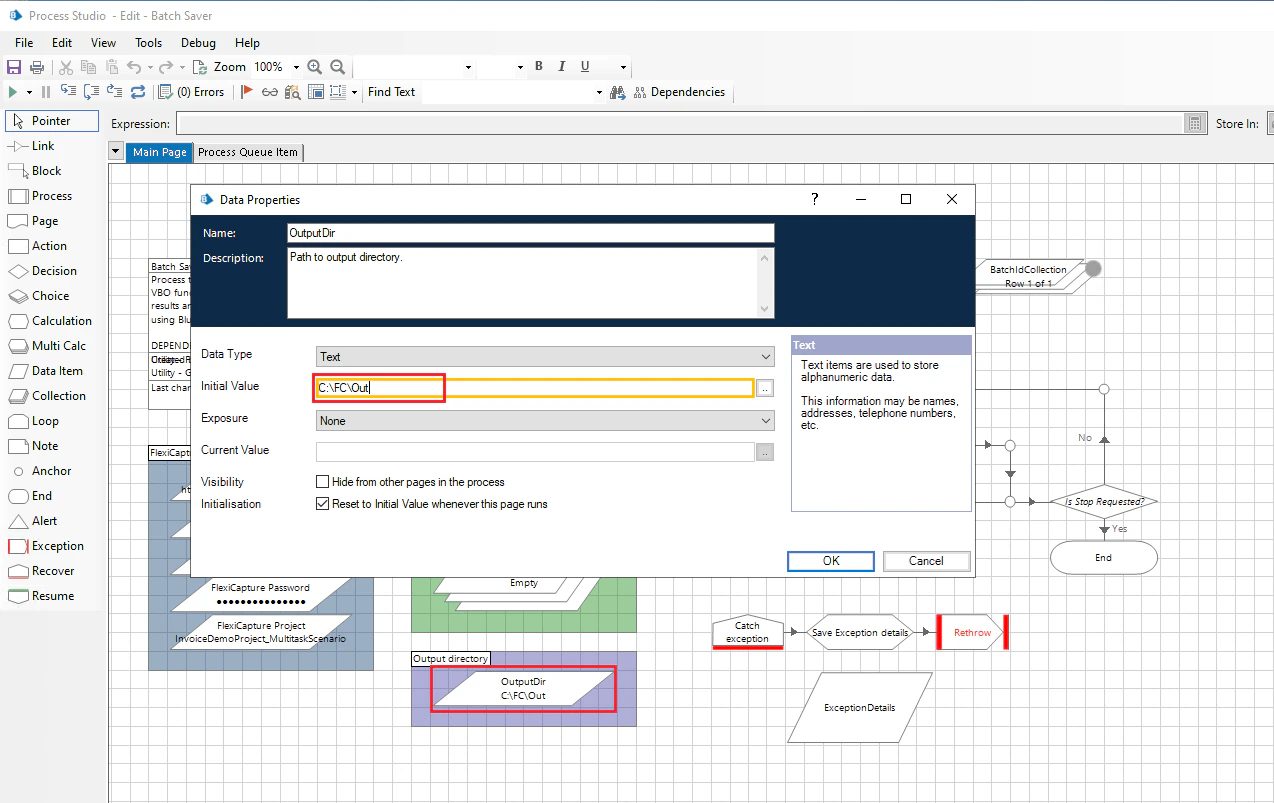
5. Open the **Batch Saver** process and then open the properties of the **OutputDir** data item. In **Initial Value**, specify the path to the folder where the process should save processing results. Save the changes.
4. Place the images to be processed into the folder you specified in step 3 above.
5. Open the **Batch Saver** process and then open the properties of the **OutputDir** data item. In **Initial Value**, specify the path to the folder where the process should save processing results. Save the changes.
 ## To start the processes in Blue Prism:
1. Open the **Control** tab. In the **Available Processes** pane, find the processes used by FC. Additionally, make sure that there is a resource with the "Yes - Connected" status in the **Resources** pane.
## To start the processes in Blue Prism:
1. Open the **Control** tab. In the **Available Processes** pane, find the processes used by FC. Additionally, make sure that there is a resource with the "Yes - Connected" status in the **Resources** pane.
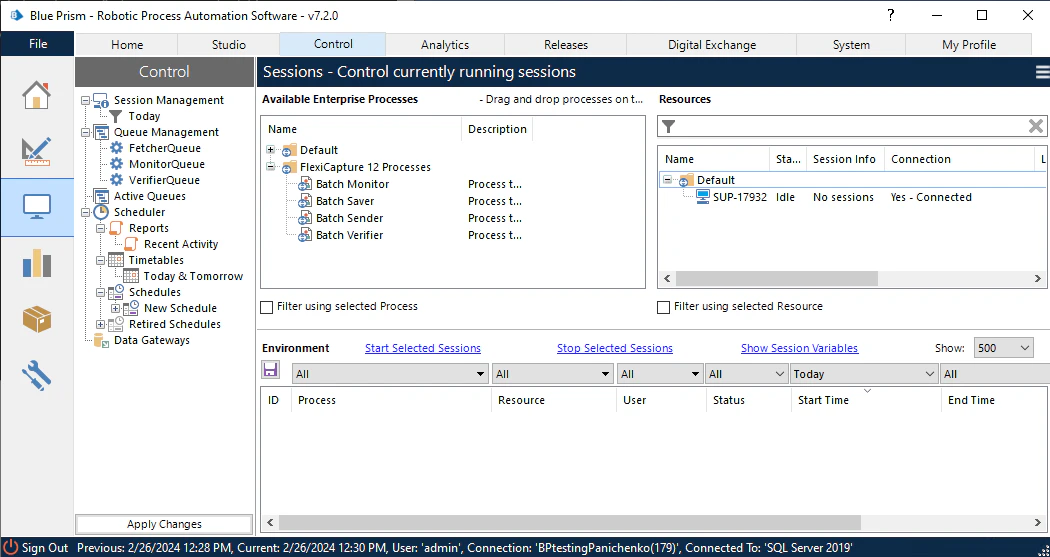 2. Using drag-and-drop, assign the **Batch Monitor** and **Batch Saver** processes to the connected resource. The processes will appear in the **Environment** window, with "Pending" indicated in the **Status** column.
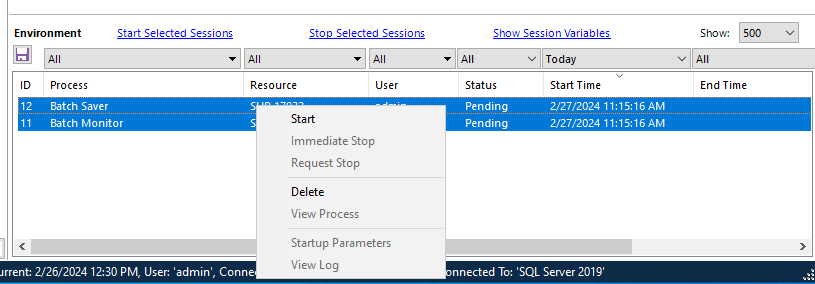
3. Select the above processes, right-click them, and select **Start** on the shortcut menu. The processes will run in the background, checking items in the **MonitorQueue** and **FetcherQueue** queues.
2. Using drag-and-drop, assign the **Batch Monitor** and **Batch Saver** processes to the connected resource. The processes will appear in the **Environment** window, with "Pending" indicated in the **Status** column.
3. Select the above processes, right-click them, and select **Start** on the shortcut menu. The processes will run in the background, checking items in the **MonitorQueue** and **FetcherQueue** queues.
 4. Repeat the steps above to start the **Batch Sender** process. This process will pick up files from the input folder, send them to FC and write the ID of the newly created batch to the **MonitorQueue** queue.
5. Wait until the **Batch Monitor** process has checked the status of the batch. If the batch has been processed successfully, the **Batch Monitor** process will add its ID to the **FetcherQueue** queue. Next, the **Batch Saver** process will place the files containing the processing results into the output folder. If the batch ends up in the "Verification" stage, the **Batch Monitor** process will add its ID into the **VerifierQueue** queue. If this is the case, start the **Batch Verifier** process to verify the batch on the Web Verification Station.
4. Repeat the steps above to start the **Batch Sender** process. This process will pick up files from the input folder, send them to FC and write the ID of the newly created batch to the **MonitorQueue** queue.
5. Wait until the **Batch Monitor** process has checked the status of the batch. If the batch has been processed successfully, the **Batch Monitor** process will add its ID to the **FetcherQueue** queue. Next, the **Batch Saver** process will place the files containing the processing results into the output folder. If the batch ends up in the "Verification" stage, the **Batch Monitor** process will add its ID into the **VerifierQueue** queue. If this is the case, start the **Batch Verifier** process to verify the batch on the Web Verification Station.