> ## Documentation Index
> Fetch the complete documentation index at: https://docs.abbyy.com/llms.txt
> Use this file to discover all available pages before exploring further.
# Updating Laserfiche workflow activity
> Update the ABBYY FlexiCapture activity in the Laserfiche Workflow Administration Console and Designer, reassign project settings, and then republish the workflow.
First, update the activity in the Workflow Administration Console:
1. Open the Workflow Administration Console.
2. In the navigation pane on the left, select **Server Configuration → Custom Activities**.
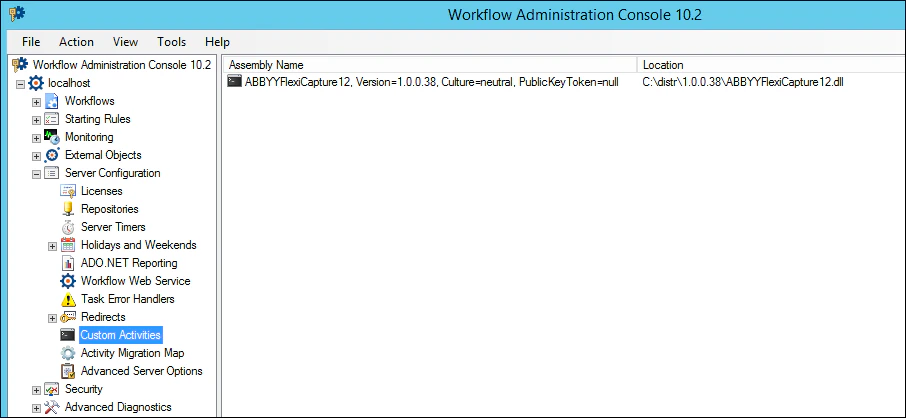 3. In the **Actions** list on the right, select and delete the outdated version of the ABBYY FlexiCapture activity.
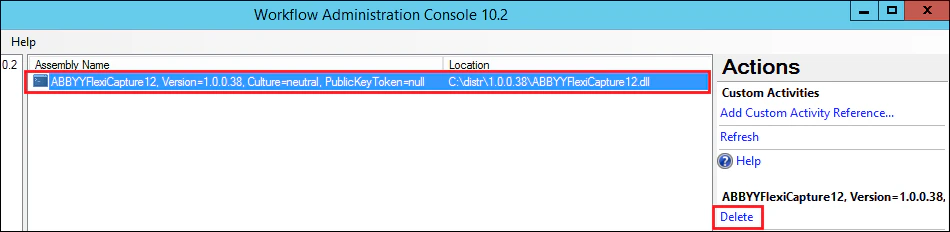 4. Open Windows Services by pressing WIN+R and then entering the “services.msc” command. Next, restart the Laserfiche Workflow 10.2 service.
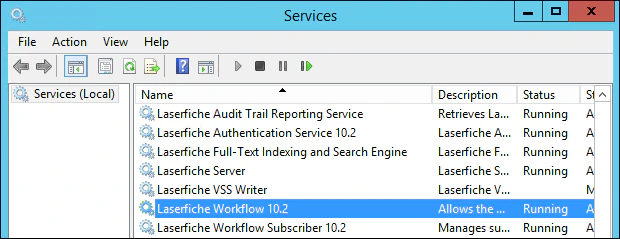 5. Select **Add Custom Activity Reference…** and specify a path to an activity file for the new version.
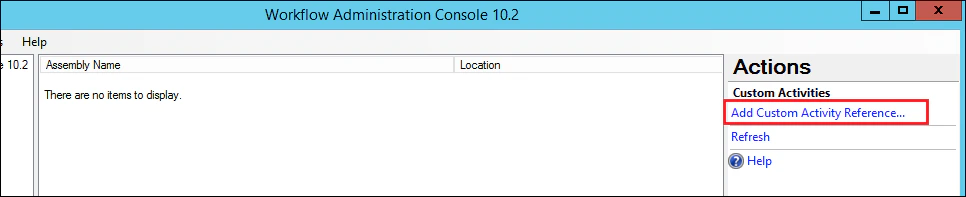 6. The new activity version should now be displayed in the **Assembly Name** column.
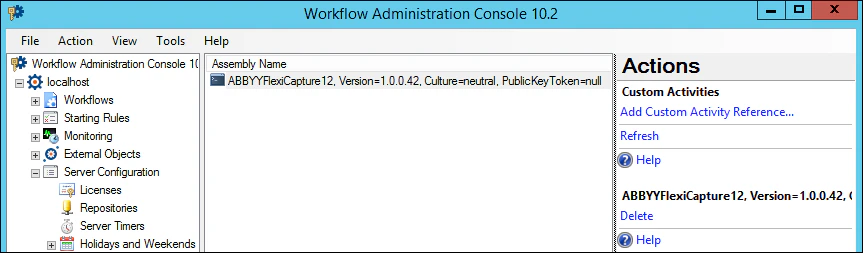 7. Close the Workflow Administration Console.
Next, you must update the activity in Workflow Designer. Do the following:
1. Open Workflow Designer.
2. Click any of the activity groups in the left pane to open the context menu, and then select **Toolbox → Add/Remove Activities…**.
7. Close the Workflow Administration Console.
Next, you must update the activity in Workflow Designer. Do the following:
1. Open Workflow Designer.
2. Click any of the activity groups in the left pane to open the context menu, and then select **Toolbox → Add/Remove Activities…**.
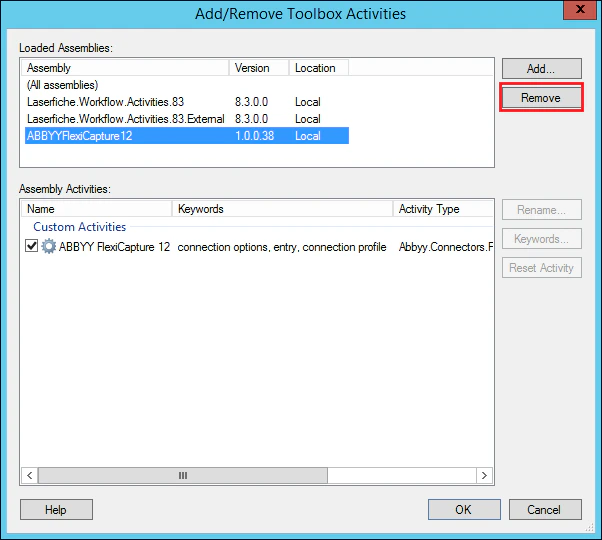
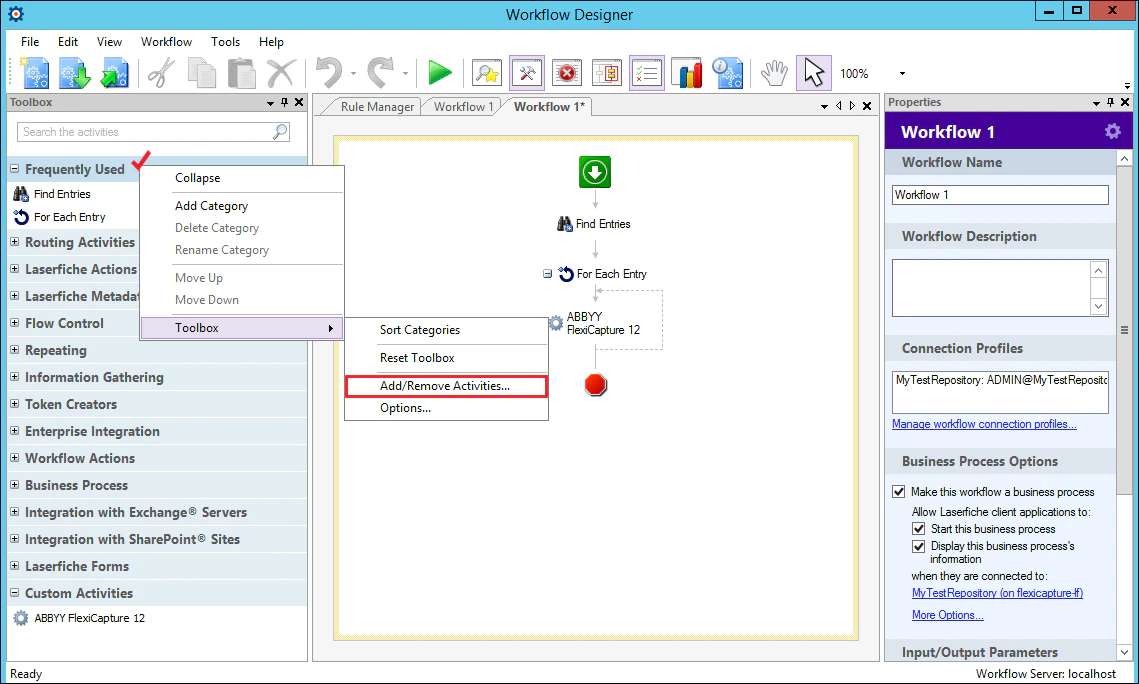 3. In the **Add/Remove Toolbox Activities** dialog box, choose the outdated *ABBYYFlexiCapture12* assembly and click **Remove**.
 4. Click **Yes** in the **Remove Assembly** dialog box. Then click **OK** in the **Confirm Changes** dialog box to confirm the changes you have made.
5. Close and then open the Workflow Designer again and select **Toolbox → Add/Remove Activities…** from the context menu for any activity group.
6. Click **Add…** and specify a path to an activity file for a new version.
7. Make sure that the new assembly version is specified for *ABBYYFlexiCapture12* activity in the **Version** column.
4. Click **Yes** in the **Remove Assembly** dialog box. Then click **OK** in the **Confirm Changes** dialog box to confirm the changes you have made.
5. Close and then open the Workflow Designer again and select **Toolbox → Add/Remove Activities…** from the context menu for any activity group.
6. Click **Add…** and specify a path to an activity file for a new version.
7. Make sure that the new assembly version is specified for *ABBYYFlexiCapture12* activity in the **Version** column.
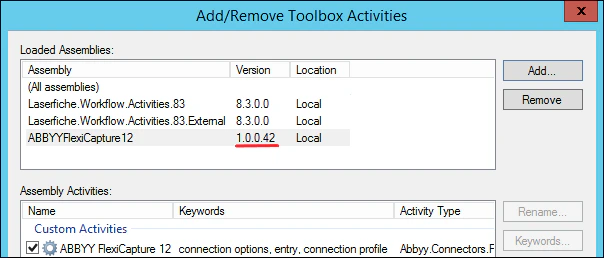 8. Click **OK** to confirm the changes you have made.
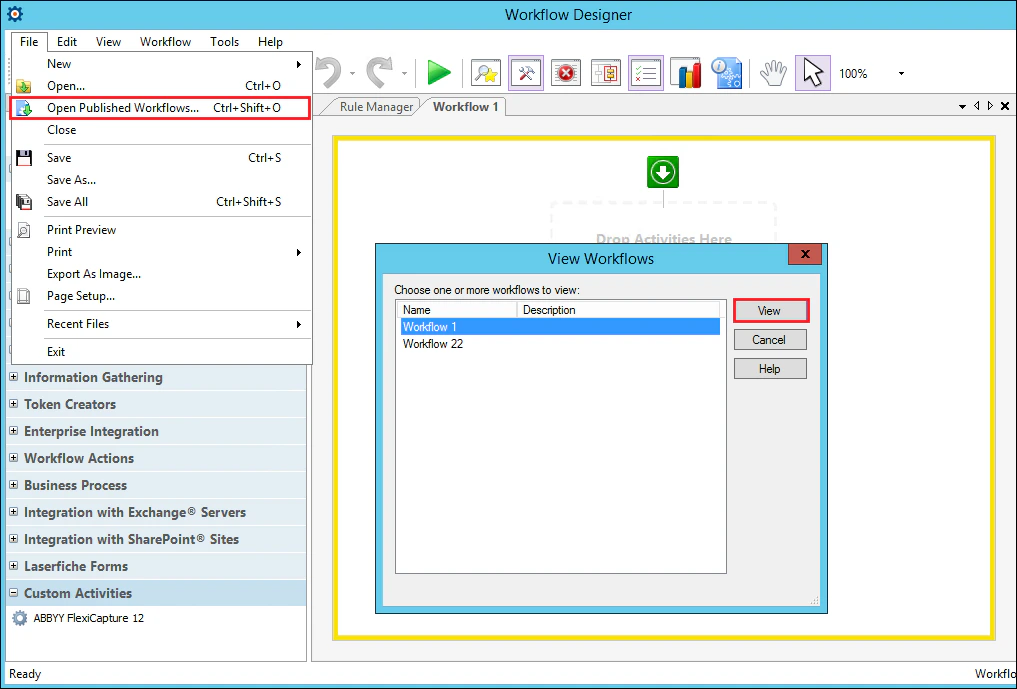
9. Next, click **File → Open Published Workflows…** and select a workflow that uses an *ABBYYFlexiCapture12* activity, and then click **View**.
8. Click **OK** to confirm the changes you have made.
9. Next, click **File → Open Published Workflows…** and select a workflow that uses an *ABBYYFlexiCapture12* activity, and then click **View**.
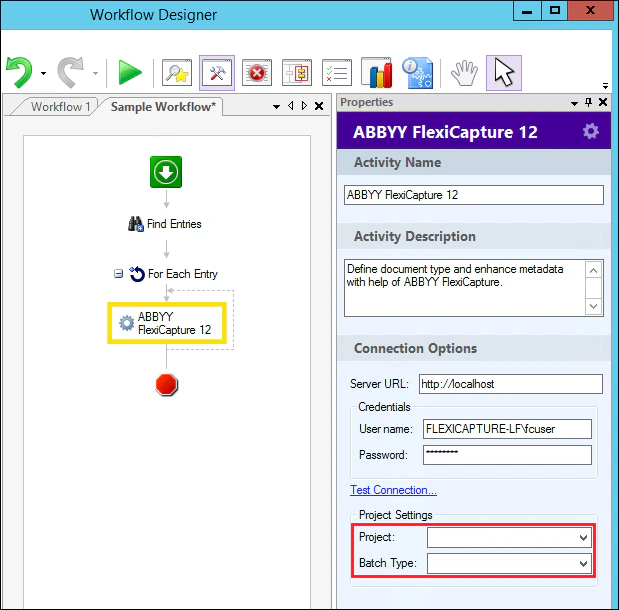
 10. In the workflow pane, select an *ABBYYFlexiCapture12* activity and specify the FC project name and Batch Type in the **Properties** panel.
 11. Save and publish the workflow.