> ## Documentation Index
> Fetch the complete documentation index at: https://docs.abbyy.com/llms.txt
> Use this file to discover all available pages before exploring further.
# Configuring the user interface
> Build the Pega UI for a single-document case: add file attachments, embed the FlexiCapture verification page via iframe, and add the pyCaseInformation.
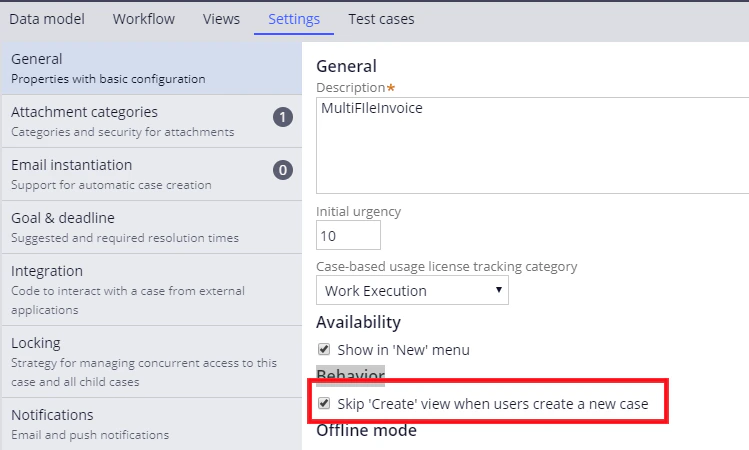
In order to skip the **Create** view when creating a new case and go straight to case configuration, do the following:
1. Open the case in **Case types** and click **Settings**.
2. On the **General** tab, select **Skip ‘Create’ view when users create a new case**.
 ## Adding files to a case
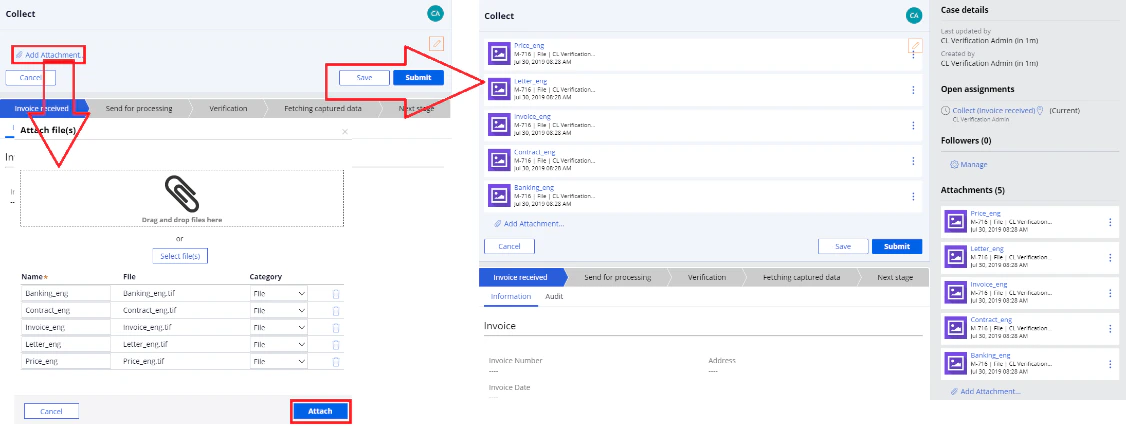
To add files to a configured case:
1. Click **Add attachment… → File from device**.
2. Select the files and click **Attach** in the dialog box that opens.
3. Click **Submit** to run the workflow.
## Adding files to a case
To add files to a configured case:
1. Click **Add attachment… → File from device**.
2. Select the files and click **Attach** in the dialog box that opens.
3. Click **Submit** to run the workflow.
 To create an interface for adding files, do the following:
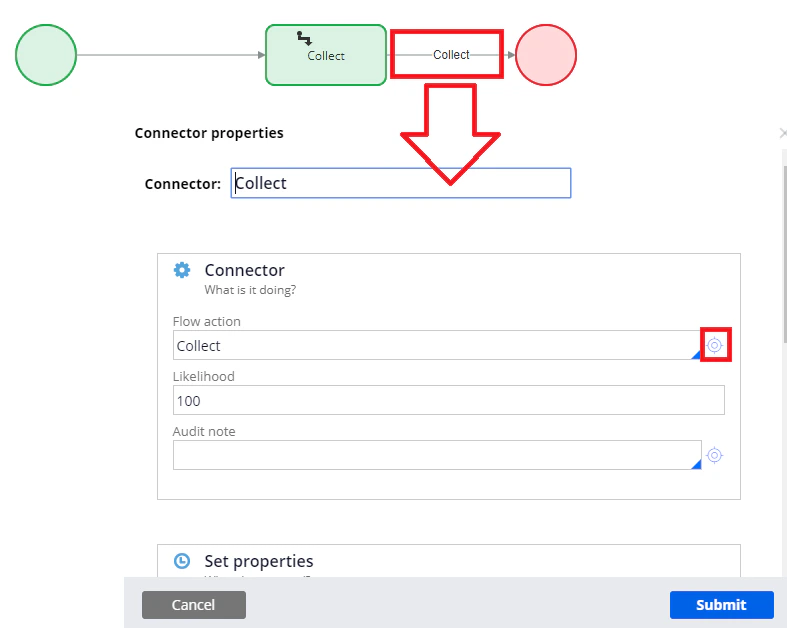
1. Open the *InvoiceReceived\_Flow* flow in **Dev Studio** by clicking **Record → Process → Flow** or **App → \ → Process → Flow**.
2. Open the properties for the connector of the two stages. In the **Flow action** field, add a flow action for adding files. For more details, see [Creating a flow action](/flexi-capture/connectors/pega/pega-flow-action).
To create an interface for adding files, do the following:
1. Open the *InvoiceReceived\_Flow* flow in **Dev Studio** by clicking **Record → Process → Flow** or **App → \ → Process → Flow**.
2. Open the properties for the connector of the two stages. In the **Flow action** field, add a flow action for adding files. For more details, see [Creating a flow action](/flexi-capture/connectors/pega/pega-flow-action).
 ## Verification page
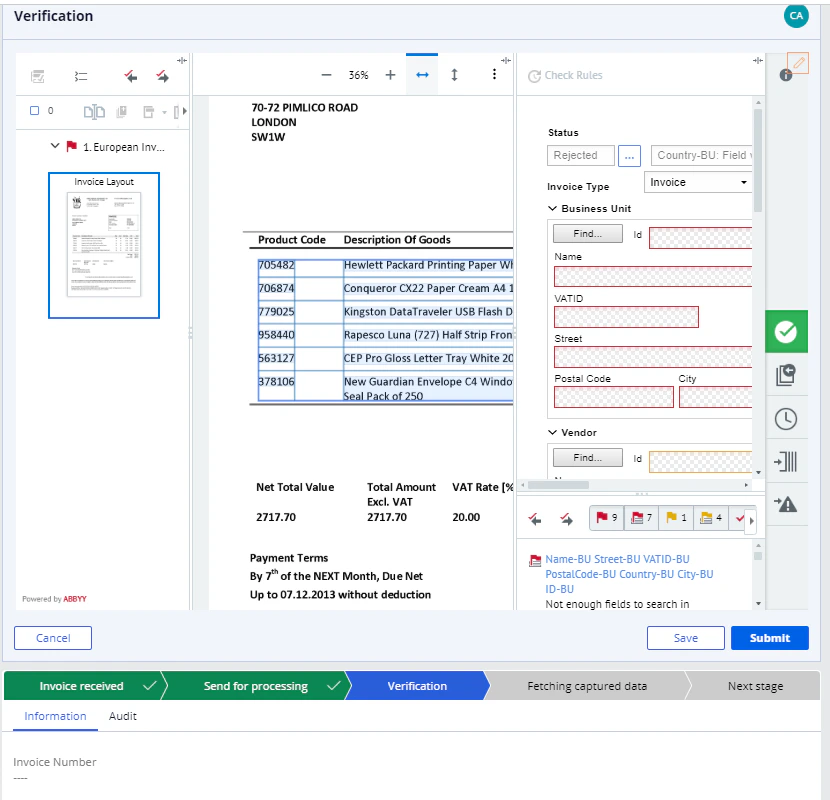
The verification page is displayed in the case header when the document arrives at the verification stage. To continue processing the document after the verification is finished, click **Complete Task**, wait for a message that says "Task completed," and then click **Submit**.
## Verification page
The verification page is displayed in the case header when the document arrives at the verification stage. To continue processing the document after the verification is finished, click **Complete Task**, wait for a message that says "Task completed," and then click **Submit**.
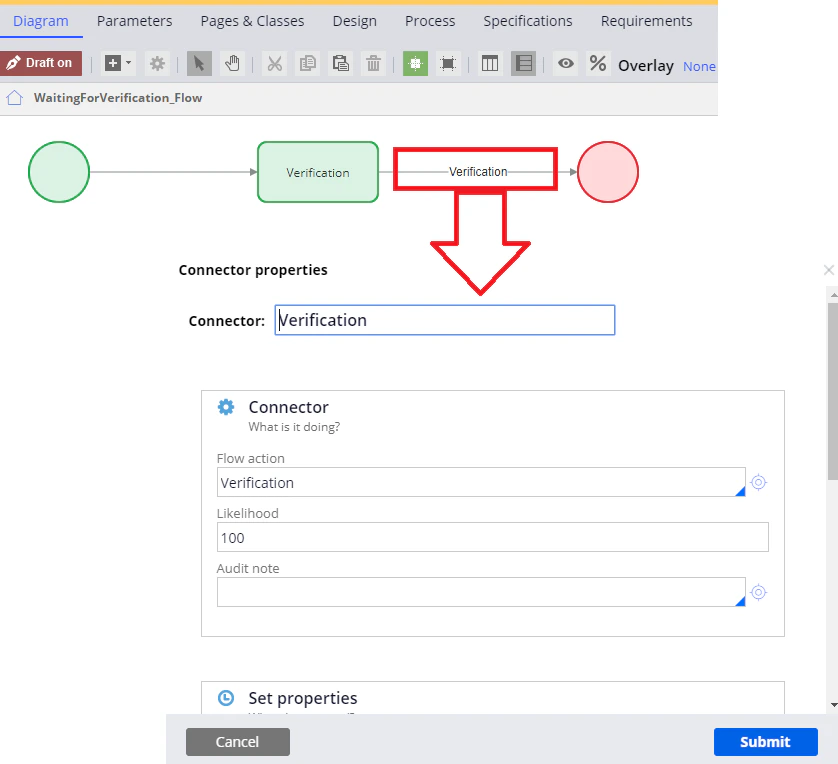
 To create a verification page interface, do the following:
1. Open the *Verification\_Flow* flow in **Dev Studio** by clicking (**Record → Process → Flow** or **App → \ → Process → Flow**.
2. Open the properties for the connector of the two stages. In the **Flow action** field, add a flow action containing a verification page. For more details, see [Creating a flow action](/flexi-capture/connectors/pega/pega-flow-action).
To create a verification page interface, do the following:
1. Open the *Verification\_Flow* flow in **Dev Studio** by clicking (**Record → Process → Flow** or **App → \ → Process → Flow**.
2. Open the properties for the connector of the two stages. In the **Flow action** field, add a flow action containing a verification page. For more details, see [Creating a flow action](/flexi-capture/connectors/pega/pega-flow-action).
 ## Skipping the verification stage
If no verification stage is set up on the FC side or if a batch skips verification for other reasons and goes straight to the *Processed* stage, then you don't need to verify this batch in this case either.
To skip the verification stage in a workflow, do the following:
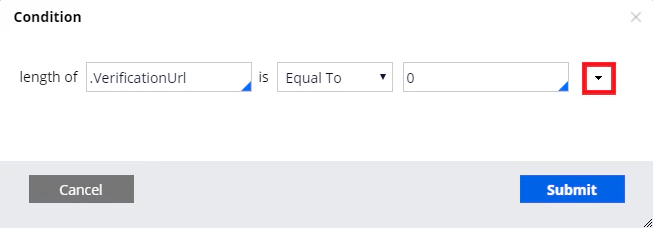
1. Select the verification stage in the workflow, click the **Validation** tab and create a new *VerificationUrlEmpty*.
2. Create a *length of .VerificationUrl is Equal To 0* rule.
## Skipping the verification stage
If no verification stage is set up on the FC side or if a batch skips verification for other reasons and goes straight to the *Processed* stage, then you don't need to verify this batch in this case either.
To skip the verification stage in a workflow, do the following:
1. Select the verification stage in the workflow, click the **Validation** tab and create a new *VerificationUrlEmpty*.
2. Create a *length of .VerificationUrl is Equal To 0* rule.

 ## The pyCaseInformation section
For the data received from FC to be displayed in a Pega case, you need to create and configure a section.
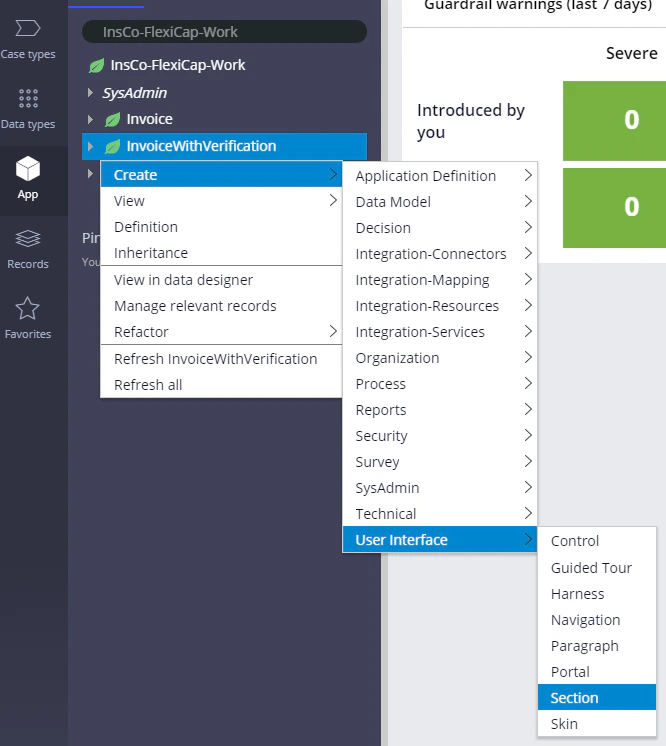
To create a user interface section, do the following:
1. On the **App** tab, click **Create → User Interface → Section**.
## The pyCaseInformation section
For the data received from FC to be displayed in a Pega case, you need to create and configure a section.
To create a user interface section, do the following:
1. On the **App** tab, click **Create → User Interface → Section**.
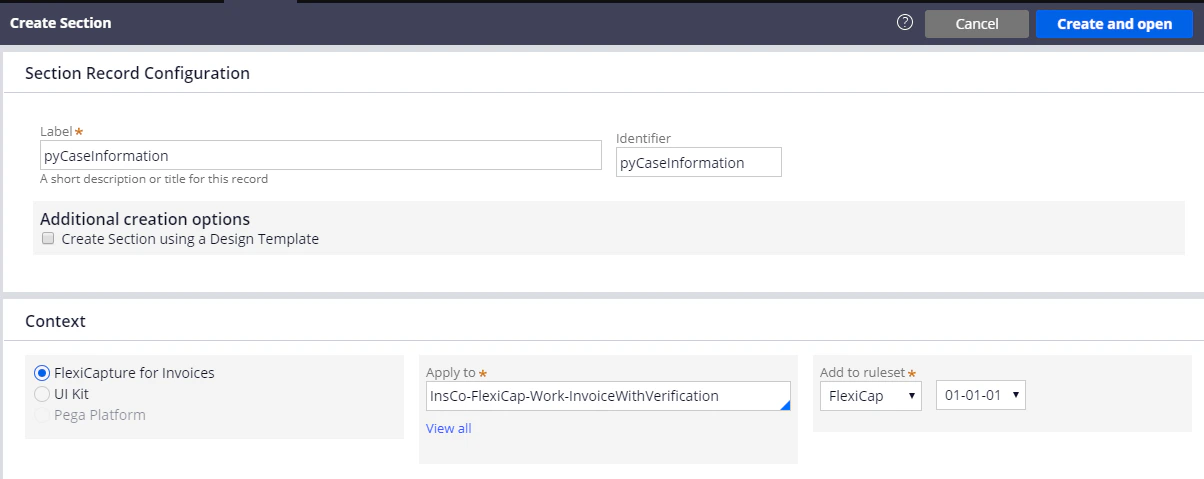
 2. In the **Label** and **Identifier** fields, enter the following value: *pyCaseInformation*. Make sure that the section is being created within the context of the application and that the full name of the case type is specified in the **Apply to** field. Next, click **Create and open**.
 3. Open the section that you have created, click the HTML tab, and clear the **Auto-generated HTML** option.
4. In the **HTML Source** field, paste the code from the **pyCaseInformation.html** file, which you can find in *%Installation Path%\Connector for FlexiCapture as a Service with verification\Samples\Code examples\Configure UI\Single document*.
3. Open the section that you have created, click the HTML tab, and clear the **Auto-generated HTML** option.
4. In the **HTML Source** field, paste the code from the **pyCaseInformation.html** file, which you can find in *%Installation Path%\Connector for FlexiCapture as a Service with verification\Samples\Code examples\Configure UI\Single document*.