> ## Documentation Index
> Fetch the complete documentation index at: https://docs.abbyy.com/llms.txt
> Use this file to discover all available pages before exploring further.
# Configuring your ABBYY FlexiCapture project
> Set up a FlexiCapture project for the Pega connector: enable FC as a service with verification and create an XML export profile per Document Definition.
Before you start configuring your project, please make sure that you have the following software installed:
* ABBYY FlexiCapture 12 Project Setup Station (required if you are using ABBYY FlexiCapture Distributed Edition or ABBYY FlexiCapture Cloud).
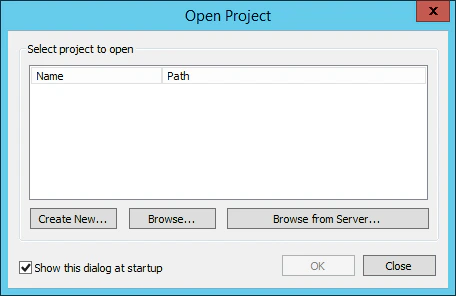
If you already have an FC project for which you need to set up data export to XML, open that project. Otherwise, you will need to create a project. Launch the Project Setup Station and in the **Open Project** dialog box click:
* **Create New\...** to create a new project.
* **Browse...** to open an existing project stored on your local drive.
* **Browse from Server...** to a open a project that you earlier uploaded to the FC Application Server.
 Next, you need to configure FC as a service with verification:
1. Open the Project Setup Station.
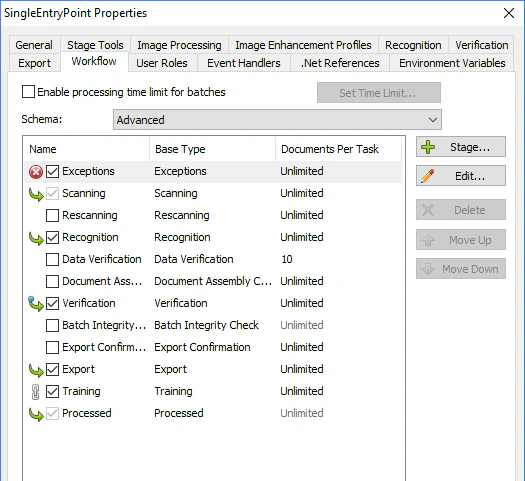
2. Click **Project → Project Properties...** and click the **Workflow** tab. From the **Schema** drop-down list, select **Advanced**.
3. Select the **Verification** option and click **Edit…**.
Next, you need to configure FC as a service with verification:
1. Open the Project Setup Station.
2. Click **Project → Project Properties...** and click the **Workflow** tab. From the **Schema** drop-down list, select **Advanced**.
3. Select the **Verification** option and click **Edit…**.
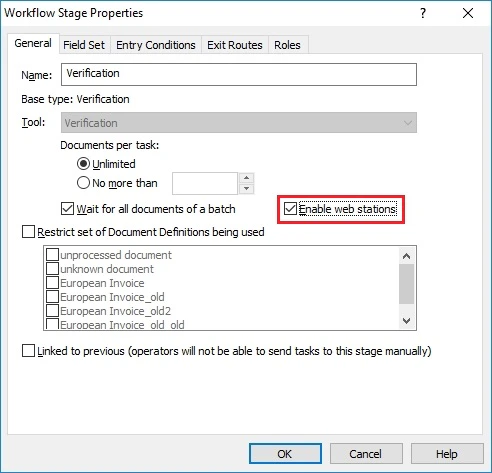
 4. In the dialog box that opens, on the **General** tab select the **Enable web stations** option.
 5. Click **OK**.
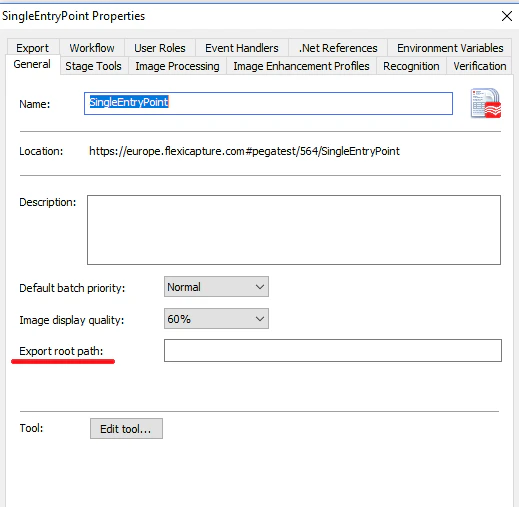
6. Make sure that the **Export root path** on the **General** tab is left empty.
5. Click **OK**.
6. Make sure that the **Export root path** on the **General** tab is left empty.
 7. Click **OK**.
Next, you need to create an export profile for each document definition.
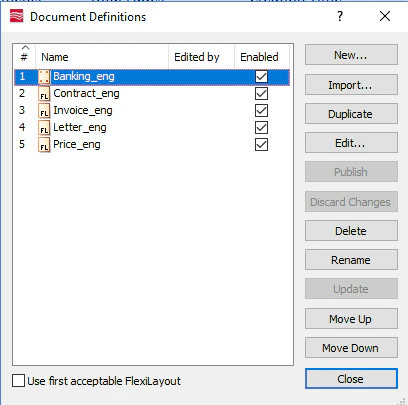
1. In the FC Project Setup Station click **Project → Document Definitions...** to open the list of Document Definitions available for the project. Select the Document Definition for which you want to specify new export settings, and click **Edit...**.
7. Click **OK**.
Next, you need to create an export profile for each document definition.
1. In the FC Project Setup Station click **Project → Document Definitions...** to open the list of Document Definitions available for the project. Select the Document Definition for which you want to specify new export settings, and click **Edit...**.
 2. Click **Document Definition → Export Settings...**.
3. Click the Add... button to start the export profile creation wizard.
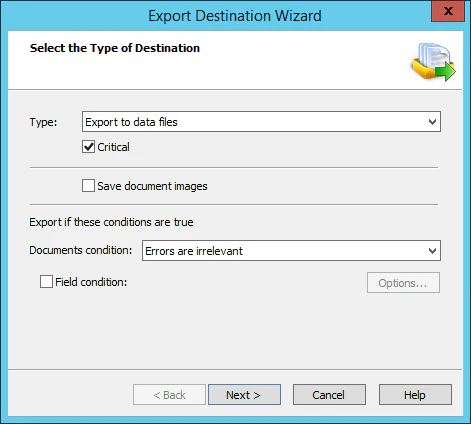
4. In the Select the Type of Destination step, select **Export to data files** from the **Type** drop-down list, select the **Critical** option below, select the **Errors are irrelevant** item from the **Document condition** drop-down list, and click **Next**.
2. Click **Document Definition → Export Settings...**.
3. Click the Add... button to start the export profile creation wizard.
4. In the Select the Type of Destination step, select **Export to data files** from the **Type** drop-down list, select the **Critical** option below, select the **Errors are irrelevant** item from the **Document condition** drop-down list, and click **Next**.
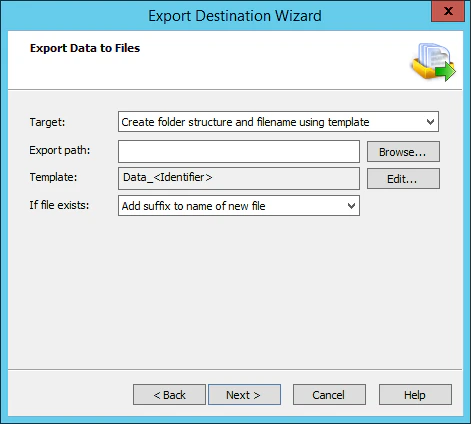
 5. In the **Export Data to Files** step, make sure the **Export path** field is empty and specify a file name template. Click **Next**.
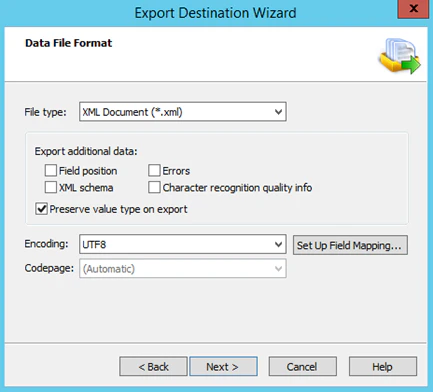
 6. In the **Data File Format** step, select **XML Document** in the **File type** field, and click **Next**.
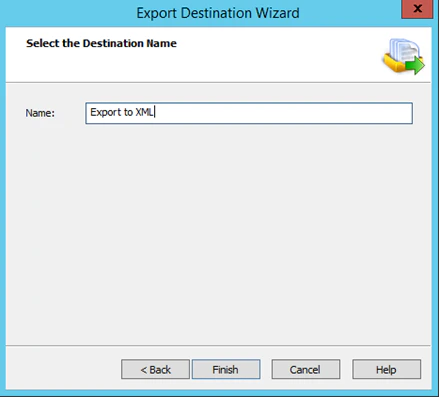
 7. Provide a name for your newly created export profile and click **Finish**.
 8. In the **Export Settings** dialog box, check the **Enabled** box for the newly created export profile.
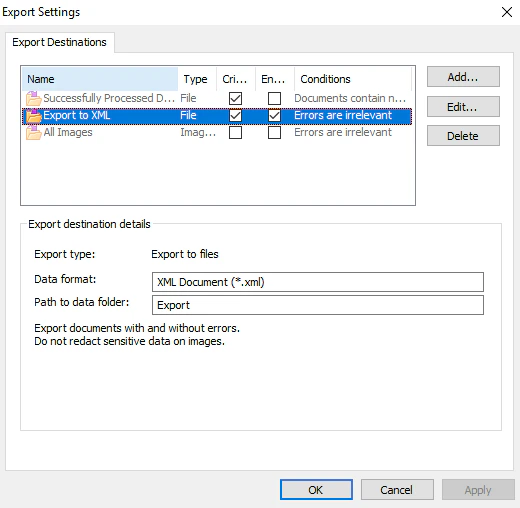 9. Click **Apply**, and then click **OK**.
10. Save and publish your Document Definition.
9. Click **Apply**, and then click **OK**.
10. Save and publish your Document Definition.