> ## Documentation Index
> Fetch the complete documentation index at: https://docs.abbyy.com/llms.txt
> Use this file to discover all available pages before exploring further.
# Creating a verification section
> Build a Pega verification section with an embedded VerificationSection iframe and custom Submit button that surface the FlexiCapture Web Verification Station.
To create a verification section, do the following:
1. In **Verification Flow Action**, create a section named *Verification* and open it on the **Design** tab.
2. Add two dynamic layouts. To the first dynamic layout, add an **Embedded section** named [VerificationSection](#verificationsection). To the second, add a button named [Submit](#submit).
## VerificationSection
When adding an **Embedded section** to a dynamic layout:
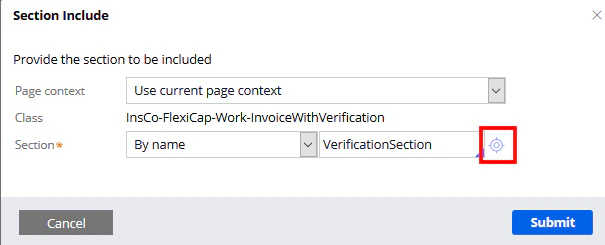
1. Select **Use current page context** in the **Page context** list. Select **By name** in the **Section** field and specify the following: *VerificationSection*.
2. Click the configuration button to create a new section.
 3. Click **Create and open** and then click the **HTML** tab.
4. Clear the **Auto-generated HTML** option and enter the code provided below.
This code can also be copied from the **VerificationSection.html** file, which you can find in *%Installation Path%\Connector for FlexiCapture as a Service with verification\Samples\Code examples\Flow actions*.
```
<% if ( tools.findPage("pyWorkPage").getProperty(".VerificationUrl").getStringValue().contains("https://")) {%>
" onload = changeWidth() >
<% } else { %>
3. Click **Create and open** and then click the **HTML** tab.
4. Clear the **Auto-generated HTML** option and enter the code provided below.
This code can also be copied from the **VerificationSection.html** file, which you can find in *%Installation Path%\Connector for FlexiCapture as a Service with verification\Samples\Code examples\Flow actions*.
```
<% if ( tools.findPage("pyWorkPage").getProperty(".VerificationUrl").getStringValue().contains("https://")) {%>
" onload = changeWidth() >
<% } else { %>
<% } %>
```
## Creating a custom Submit button
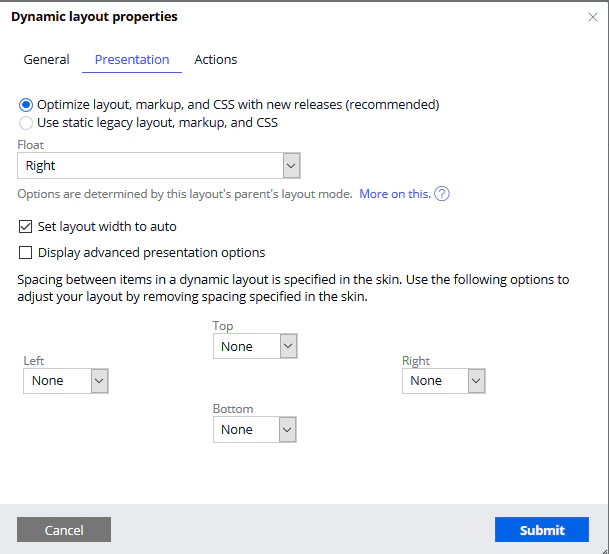
Before creating a button in the dynamic layout, you need to align it to the right of the screen. To do this, open the properties of the dynamic layout, click the **Presentation** tab, and select **Right** in the **Float** field. Click **Submit** to apply the changes.
 To add the button, do the following:
1. Add a basic *Button* element to the dynamic layout and open its properties.
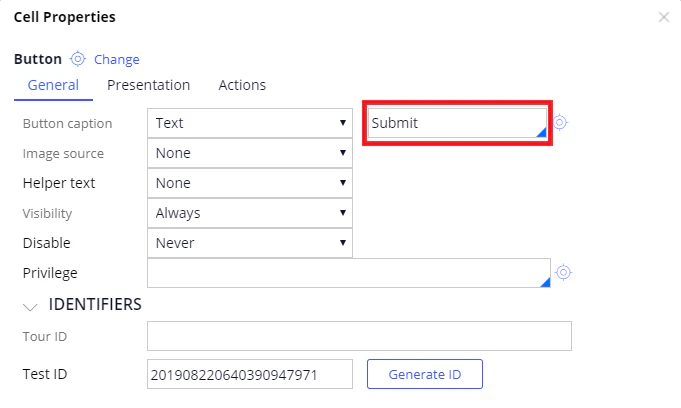
2. Click the **General** tab and specify *Submit* for the button caption text.
To add the button, do the following:
1. Add a basic *Button* element to the dynamic layout and open its properties.
2. Click the **General** tab and specify *Submit* for the button caption text.
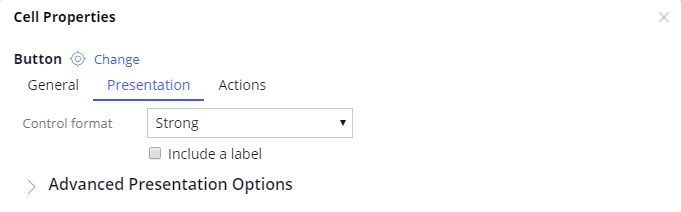
 3. On the **Presentation** tab, select **Strong** in the **Control format** list.
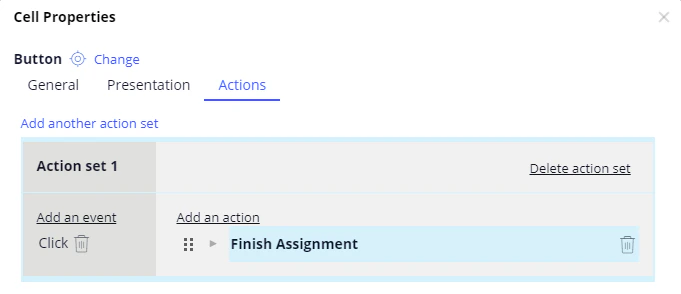
 4. On the **Action** tab, add a *Click* event and connect it to the *Finish Assignment* action.
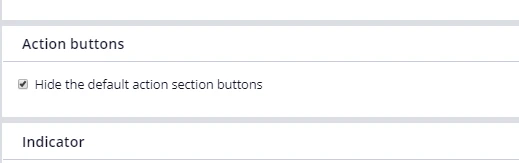
 5. Click **Submit**. To hide the standard set of buttons for the flow (i.e. **Cancel**, **Save**, and **Submit**), open **Verification** by clicking **Records → Process → Flow Action**, click the **Action** tab, and select **Hide the default action section buttons**.
 If the **Submit** button is not displayed for your case, select **Standard** in the **Control format** list in [step 3](#3).