> ## Documentation Index
> Fetch the complete documentation index at: https://docs.abbyy.com/llms.txt
> Use this file to discover all available pages before exploring further.
# Creating an export profile
> Use the export profile wizard in the FlexiCapture Project Setup Station to add an Export to data files profile to a Document Definition for UiPath.
To configure an export profile:
1. In the FC Project Setup Station click **Project → Document Definitions...** to open the list of Document Definitions available for the project. Select the Document Definition for which you want to specify new export settings, and click **Edit...**.
2. Click **Document Definition → Export Settings...**.
3. Click the Add... button to start the export profile creation wizard.
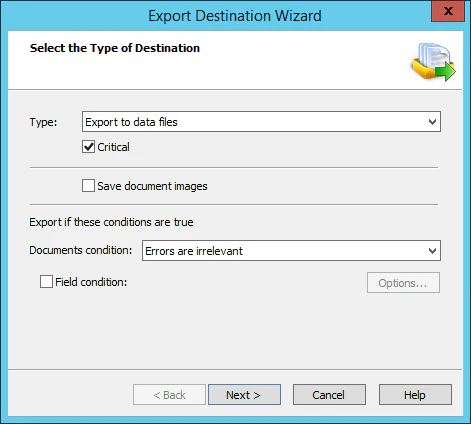
4. In the Select the Type of Destination step, select **Export to data files** from the **Type** drop-down list, select the **Critical** option below, select the **Errors are irrelevant** item from the **Document condition** drop-down list, and click **Next**.
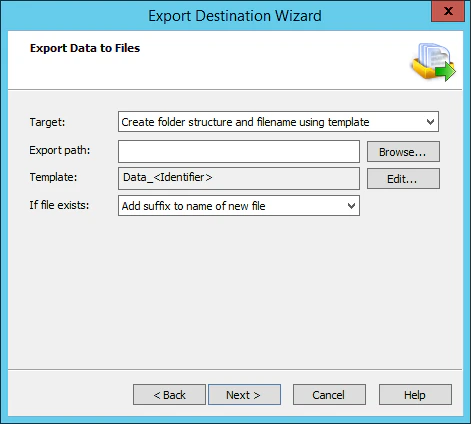
 5. In the **Export Data to Files** step, make sure the **Export path** field is empty and specify a file name template. Click **Next**.
 6. In the **Data File Format** step, select the required output format in the **File type** field, and click **Next**.
7. Provide a name for your newly created export profile and click **Finish**.
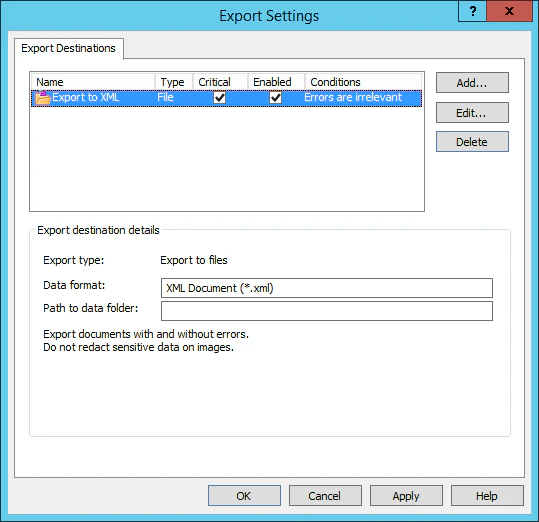
8. In the **Export Settings** dialog box, check the **Enabled** box for the newly created export profile. Click **Apply**, and then click **OK**.
6. In the **Data File Format** step, select the required output format in the **File type** field, and click **Next**.
7. Provide a name for your newly created export profile and click **Finish**.
8. In the **Export Settings** dialog box, check the **Enabled** box for the newly created export profile. Click **Apply**, and then click **OK**.
 9. Save and close the Document Definition editor. Next, click the **Publish** button to publish your Document Definition.