> ## Documentation Index
> Fetch the complete documentation index at: https://docs.abbyy.com/llms.txt
> Use this file to discover all available pages before exploring further.
# Connect to a Microsoft Azure file share
> Connect the ABBYY FlexiCapture Application Server to a Microsoft Azure Files share, store credentials in Credential Manager, and set the IIS application pool.
You can connect the ABBYY FlexiCapture Application Server to a file share in Microsoft Azure.
It is assumed that a storage account has already been created in Microsoft Azure Files and is available for use by ABBYY FlexiCapture.
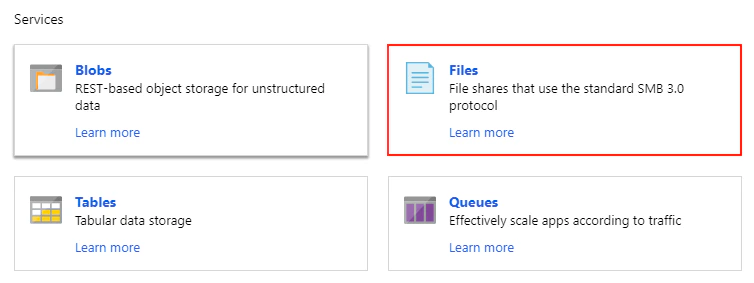
1. On the Azure portal, go to your storage account (`abbyystorage` in this example) and click **Files** in the storage account pane.
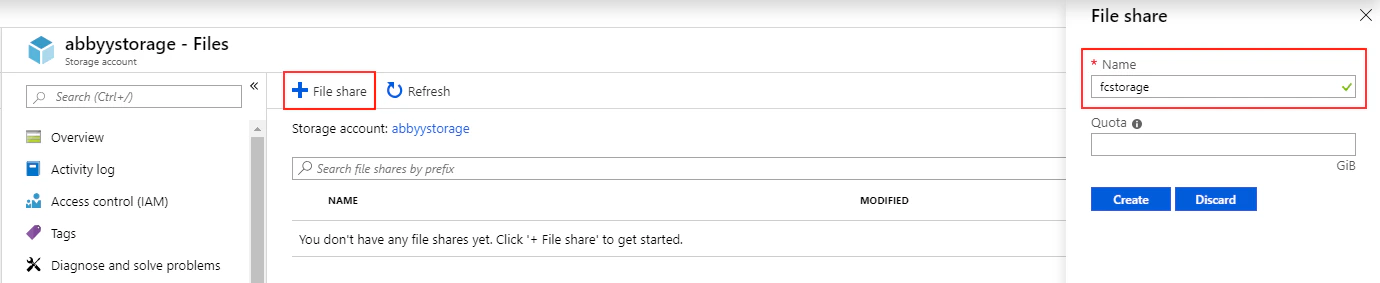
 2. Create a new file share in your storage account by specifying its name (`fcstorage` in this example) and a space quota as required.
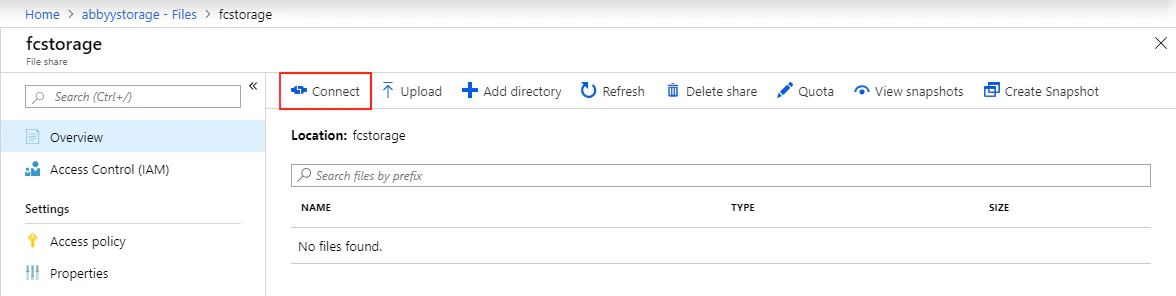
 3. Open the created file share and click **Connect**.
 4. Copy the `cmdkey` command to the Clipboard.
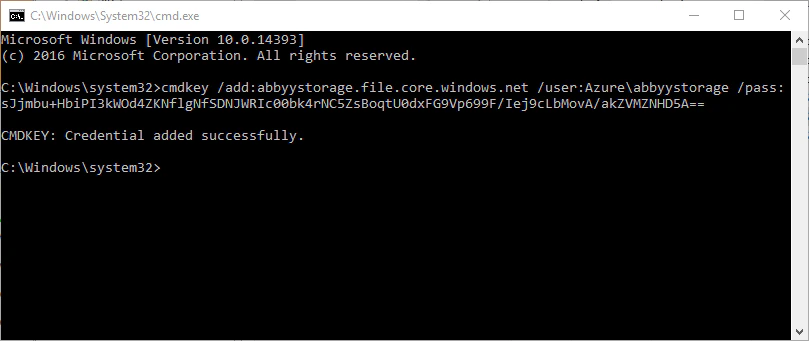
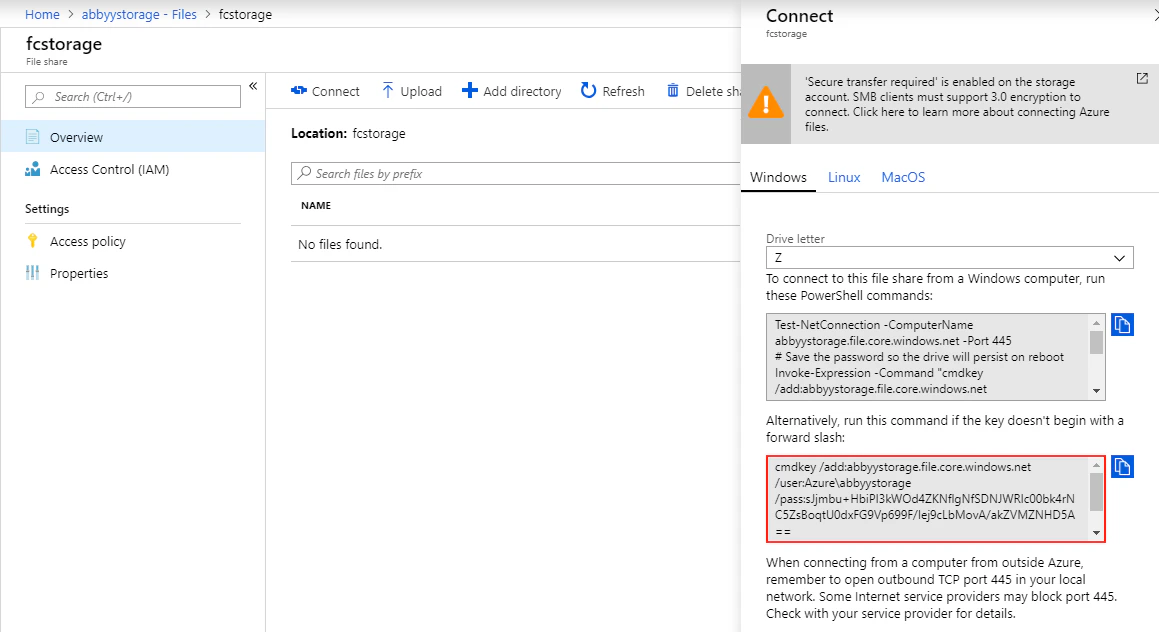 5. Log on to the virtual machine with the FlexiCapture Application Server as a system user with permissions to access the FlexiCapture services (`fcuser` in this example), open the command line prompt, and paste and execute the `cmdkey` command from the Clipboard. This will add the file share credentials to the Windows Credential Manager.
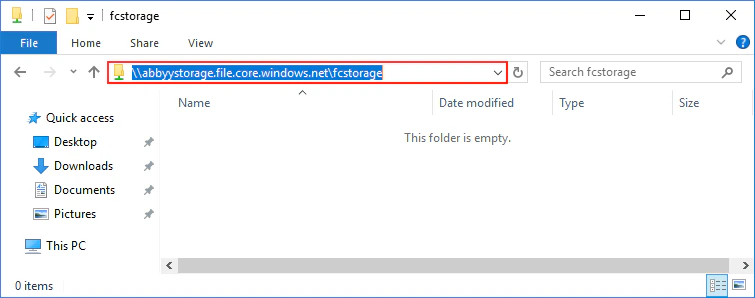
 6. Open Windows Explorer and make sure that the user can access the file share.
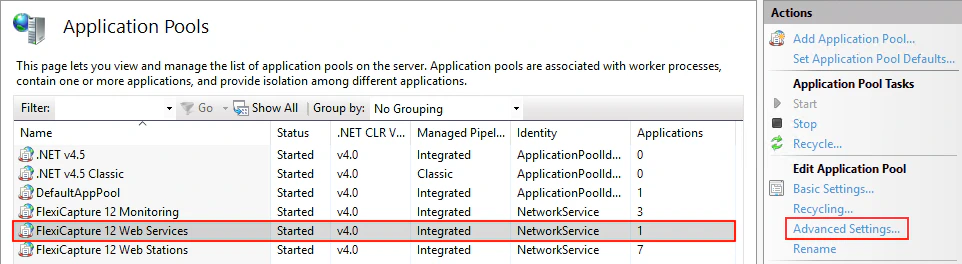
 7. Open the Internet Information Services (IIS) Manager, select the FlexiCapture application pool, and click **Advanced Settings**.
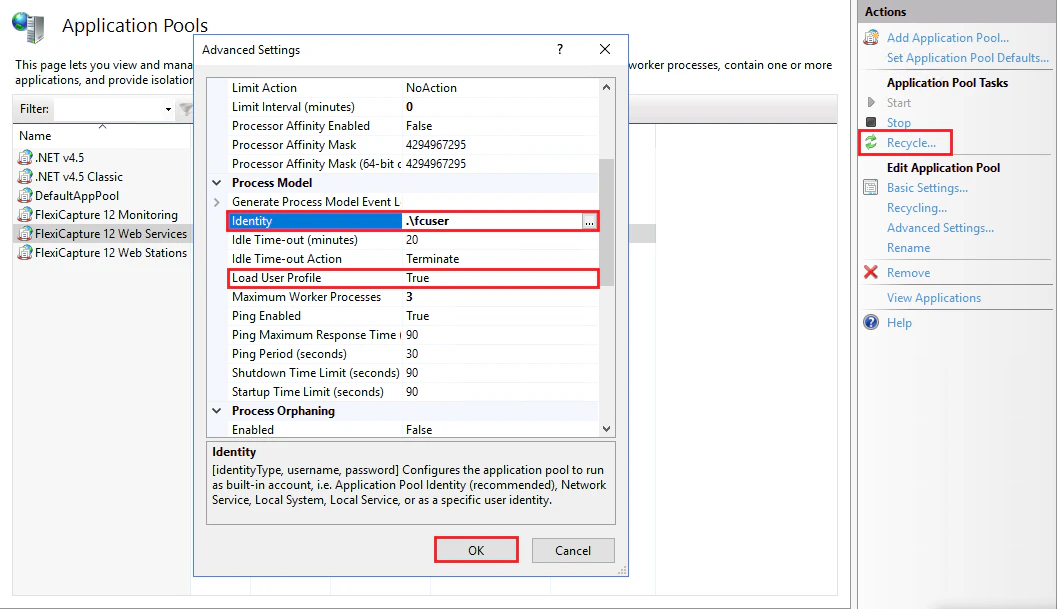
 8. Change the pool identity to the FlexiCapture user account with the required permissions, set **Load User Profile** to **True**, confirm the changes by clicking **OK**, and recycle the application pool.
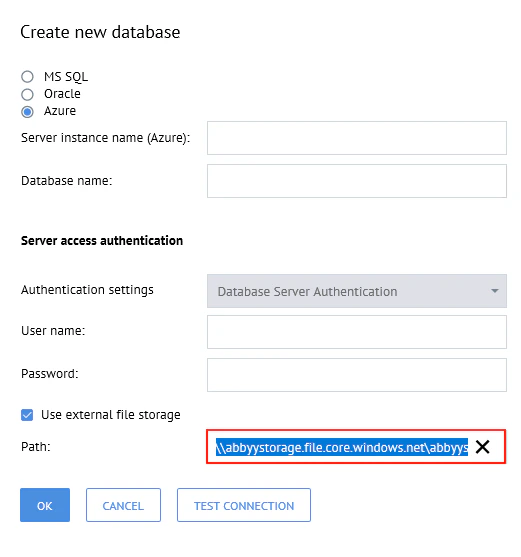
 9. In the Administration and Monitoring Console, select the **Use external file storage** option and specify the path to the file share in Microsoft Azure.
 ## Use Azure Key Vault to connect to Microsoft Azure Files
Azure Key Vault is a cloud service for securely storing secrets, such as API keys, passwords, and certificates. The service enables Azure subscribers to protect their sensitive data used by cloud applications and services. You can create and manage key vaults through the Azure portal (see the [Microsoft documentation](https://docs.microsoft.com/en-us/azure/key-vault/general/basic-concepts) for details).
To set up a connection to Azure Files:
### On the Azure portal
1. Set up virtual machines for your ABBYY FlexiCapture Application Servers.\
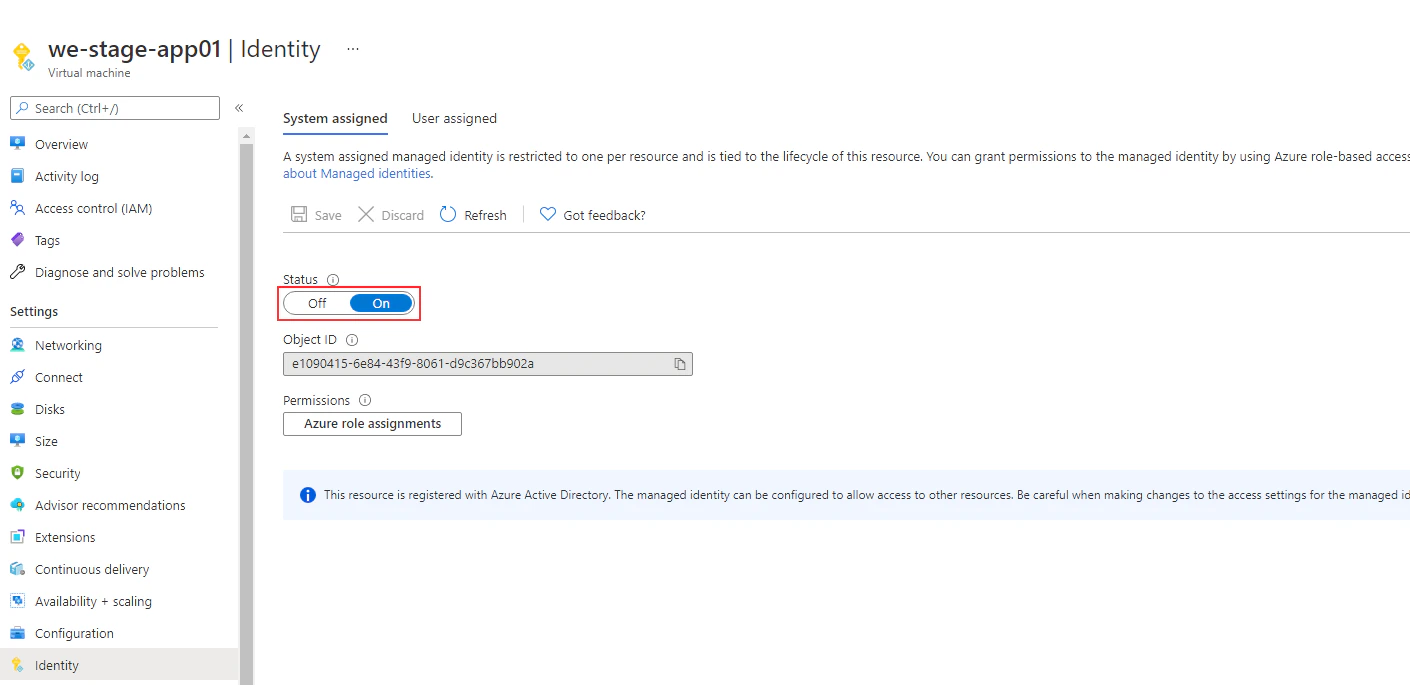
**Important!** Your virtual machines with the Application Server installed must be registered in Azure Active Directory. For detailed instructions on how to create and set up virtual machines, see the [Microsoft documentation](https://docs.microsoft.com/en-us/azure/active-directory/managed-identities-azure-resources/qs-configure-portal-windows-vm#system-assigned-managed-identity).
## Use Azure Key Vault to connect to Microsoft Azure Files
Azure Key Vault is a cloud service for securely storing secrets, such as API keys, passwords, and certificates. The service enables Azure subscribers to protect their sensitive data used by cloud applications and services. You can create and manage key vaults through the Azure portal (see the [Microsoft documentation](https://docs.microsoft.com/en-us/azure/key-vault/general/basic-concepts) for details).
To set up a connection to Azure Files:
### On the Azure portal
1. Set up virtual machines for your ABBYY FlexiCapture Application Servers.\
**Important!** Your virtual machines with the Application Server installed must be registered in Azure Active Directory. For detailed instructions on how to create and set up virtual machines, see the [Microsoft documentation](https://docs.microsoft.com/en-us/azure/active-directory/managed-identities-azure-resources/qs-configure-portal-windows-vm#system-assigned-managed-identity).
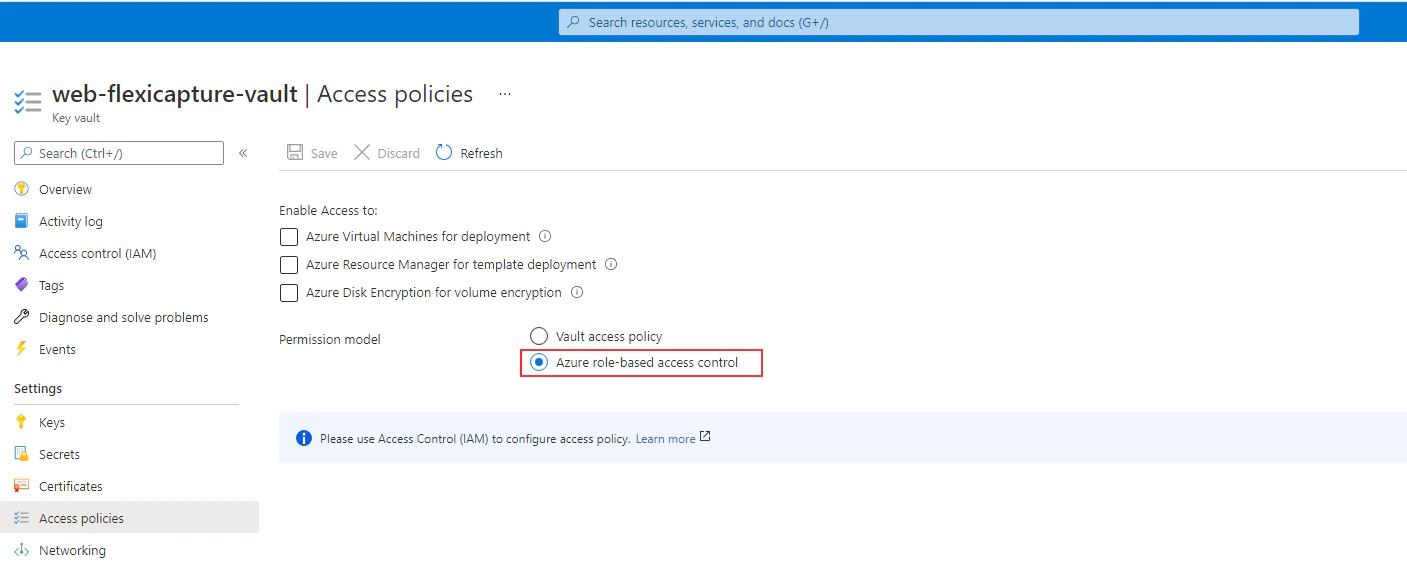
 2. Create a new key vault. Under **Permission model**, select **Azure role-based access control**.
 3. To be able to save and view secrets, add the **Key Vault Secrets Officer** role for your account and the **Key Vault Secrets User** role for the virtual machine objects. For detailed instructions on how to grant permissions to virtual machines, see the [Microsoft documentation](https://docs.microsoft.com/en-us/azure/active-directory/managed-identities-azure-resources/tutorial-windows-vm-access-arm).
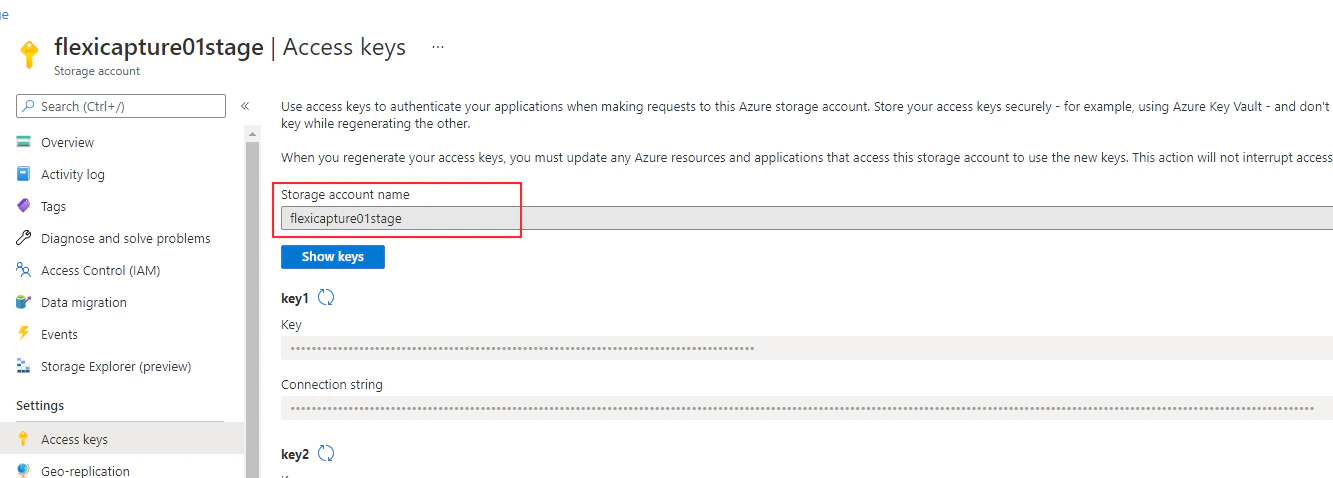
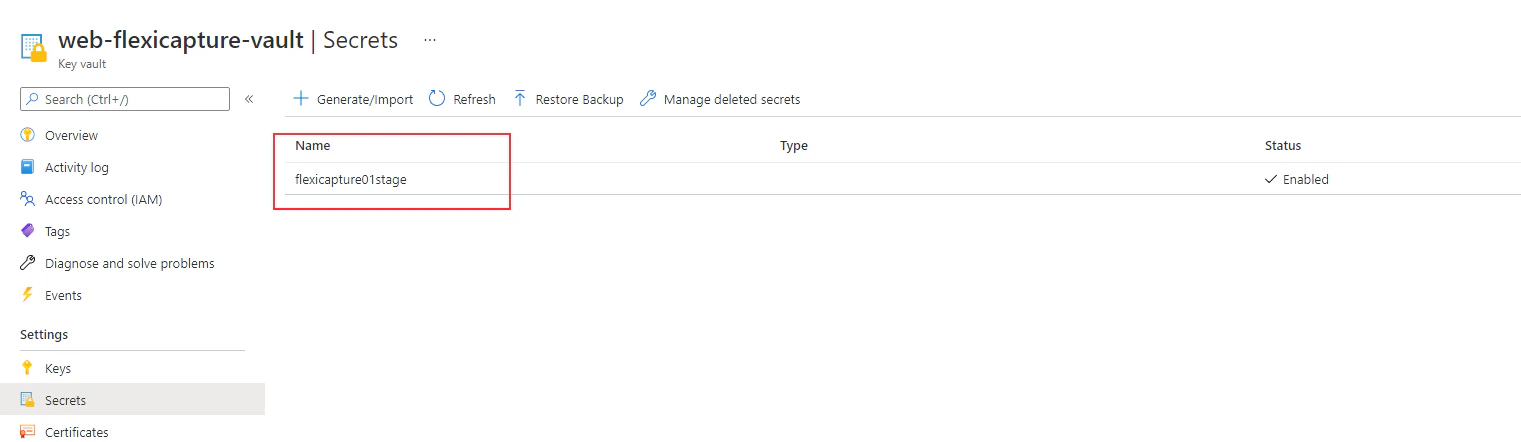
4. Add your secret (that is, your access key) for your Azure Storage account to the key vault. For detailed instructions on how to add a secret to a key vault, see the [Microsoft documentation](https://docs.microsoft.com/en-us/azure/key-vault/secrets/quick-create-portal#add-a-secret-to-key-vault).\
**Important!** To connect to Azure Files, the name of your secret must be the same as your storage account name.
3. To be able to save and view secrets, add the **Key Vault Secrets Officer** role for your account and the **Key Vault Secrets User** role for the virtual machine objects. For detailed instructions on how to grant permissions to virtual machines, see the [Microsoft documentation](https://docs.microsoft.com/en-us/azure/active-directory/managed-identities-azure-resources/tutorial-windows-vm-access-arm).
4. Add your secret (that is, your access key) for your Azure Storage account to the key vault. For detailed instructions on how to add a secret to a key vault, see the [Microsoft documentation](https://docs.microsoft.com/en-us/azure/key-vault/secrets/quick-create-portal#add-a-secret-to-key-vault).\
**Important!** To connect to Azure Files, the name of your secret must be the same as your storage account name.
 ### On each Application Server
Configure your system account to access Azure Files. To do this:
1. Save the following PowerShell script on each virtual machine where the Application Server is installed:
```powershell theme={null}
Param(
[Parameter(Mandatory=$true)][Alias("Share")][ValidateNotNullOrEmpty()][String]$ShareRoot,
[Parameter(Mandatory=$true)][Alias("Uri")][ValidateNotNullOrEmpty()][String]$VaultUri
)
$StorageAccount = $ShareRoot | Select-String -pattern "(?<=\\)(.*?)(?=(\\|[.]))" | Select-Object -ExpandProperty Matches | Select-Object -ExpandProperty Value
$ShareUser = "Azure\" + $StorageAccount
# Get parameters from Azure Key Vault
$Response = Invoke-RestMethod -UseBasicParsing -Uri 'https://169.254.169.254/metadata/identity/oauth2/token?api-version=2018-02-01&resource=https%3A%2F%2Fvault.azure.net' -Method GET -Headers @{Metadata="true"}
$BearerToken = $Response.access_token
# SharePass
$Uri = ($VaultUri).TrimEnd('/') + "/secrets/" + $StorageAccount + "?api-version=2016-10-01"
$Response = Invoke-RestMethod -UseBasicParsing -Uri $Uri -Method GET -Headers @{Authorization="Bearer $BearerToken"}
$SharePass = $Response.value
$ShareCredential = New-Object PSCredential($ShareUser, (ConvertTo-SecureString -AsPlainText -Force -String $SharePass))
New-PSDrive -Name "Flexicapture" -PSProvider FileSystem -Root $ShareRoot -Credential $ShareCredential -Scope Global
```
The script accepts the following two parameters as input:
* The path to the root of the network Azure folder, for example: `\\.file.core.windows.net\`.
* The URI of the key vault storing the access key for your Azure Storage account. You can copy the URI from the **Vault URI** field on the **Overview** tab on the Azure portal.
### On each Application Server
Configure your system account to access Azure Files. To do this:
1. Save the following PowerShell script on each virtual machine where the Application Server is installed:
```powershell theme={null}
Param(
[Parameter(Mandatory=$true)][Alias("Share")][ValidateNotNullOrEmpty()][String]$ShareRoot,
[Parameter(Mandatory=$true)][Alias("Uri")][ValidateNotNullOrEmpty()][String]$VaultUri
)
$StorageAccount = $ShareRoot | Select-String -pattern "(?<=\\)(.*?)(?=(\\|[.]))" | Select-Object -ExpandProperty Matches | Select-Object -ExpandProperty Value
$ShareUser = "Azure\" + $StorageAccount
# Get parameters from Azure Key Vault
$Response = Invoke-RestMethod -UseBasicParsing -Uri 'https://169.254.169.254/metadata/identity/oauth2/token?api-version=2018-02-01&resource=https%3A%2F%2Fvault.azure.net' -Method GET -Headers @{Metadata="true"}
$BearerToken = $Response.access_token
# SharePass
$Uri = ($VaultUri).TrimEnd('/') + "/secrets/" + $StorageAccount + "?api-version=2016-10-01"
$Response = Invoke-RestMethod -UseBasicParsing -Uri $Uri -Method GET -Headers @{Authorization="Bearer $BearerToken"}
$SharePass = $Response.value
$ShareCredential = New-Object PSCredential($ShareUser, (ConvertTo-SecureString -AsPlainText -Force -String $SharePass))
New-PSDrive -Name "Flexicapture" -PSProvider FileSystem -Root $ShareRoot -Credential $ShareCredential -Scope Global
```
The script accepts the following two parameters as input:
* The path to the root of the network Azure folder, for example: `\\.file.core.windows.net\`.
* The URI of the key vault storing the access key for your Azure Storage account. You can copy the URI from the **Vault URI** field on the **Overview** tab on the Azure portal.
 Sample command for running the script:
```powershell theme={null}
powershell.exe -share \\.file.core.windows.net\ -uri https://.vault.azure.net/
```
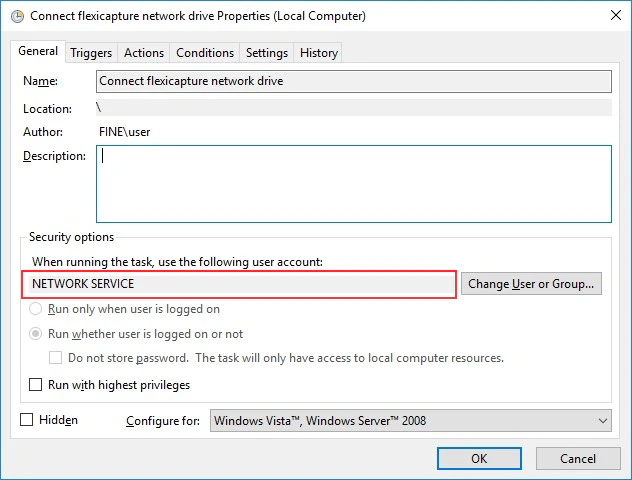
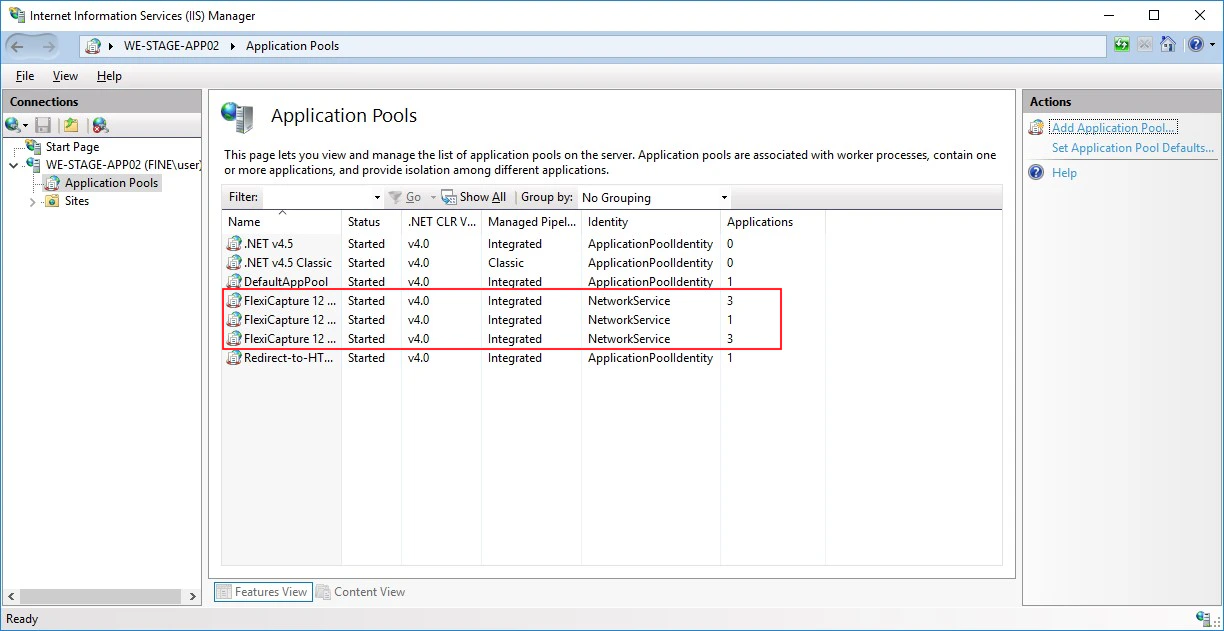
2. To run the script, create a task in Task Scheduler that will be triggered by a system startup event. The task must be run under the System, Network Service, or Local Service user account. The same account must be used to run the IIS application pool.
Sample command for running the script:
```powershell theme={null}
powershell.exe -share \\.file.core.windows.net\ -uri https://.vault.azure.net/
```
2. To run the script, create a task in Task Scheduler that will be triggered by a system startup event. The task must be run under the System, Network Service, or Local Service user account. The same account must be used to run the IIS application pool.
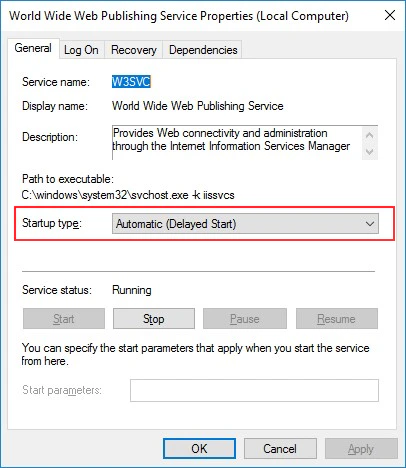
 3. Configure the IIS service to be started after the connection script is executed. To do this, open the **World Wide Web Publishing Service Properties** dialog box, and select **Automatic (Delayed Start)** from the **Startup type** drop-down list on the **General** tab.
 4. Restart the Application Server.