> ## Documentation Index
> Fetch the complete documentation index at: https://docs.abbyy.com/llms.txt
> Use this file to discover all available pages before exploring further.
# Sample 1. Step 20: Describing the YOUR PHOTO IN FANCY DRESS field
> Extract the YOUR PHOTO IN FANCY DRESS field in Sample 1 by grouping an Object Collection and four Separator elements in a compound Photo element.
As noted in [Step 6](/flexi-capture/fls/tutorial/step6), not all the parts of the photo on images 1 and 6 were recognized as image objects of type **Picture**.
To get a full photo, the program needs to find all the types of **Image Object** located in the photo area.
For convenience, group all the photo elements into one compound **Photo** element. This also limits the number of hypotheses formulated.
## Contents of the Photo Group element
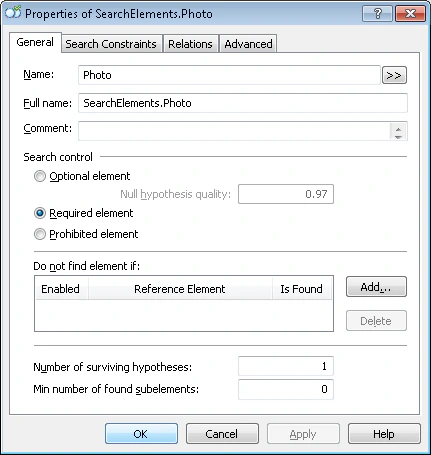 The **Photo** Group element includes:
* A **PhotoPicture** element of type **Object Collection** corresponding to the photo.
* A **PhotoHeader** element of type **Static Text** corresponding to the name YOUR PHOTO IN FANCY DRESS.
* Four separators around the photo that are required to find the **PhotoPicture** element.
## Create the field name element
Because the name YOUR PHOTO IN FANCY DRESS occurs nowhere else in the document, add the corresponding element to the **Group** element first and use it to locate the separators.
Name it **PhotoHeader**.
Use the same settings as the other field names.
Try matching the FlexiLayout with the images. You will see that the program reliably detects the name on all the images.
## Create the separator elements
Create **Separator** elements for the four separators around the photo and give them the following names:
| Element | Separator |
| -------------- | --------------- |
| **USeparator** | Upper separator |
| **BSeparator** | Lower separator |
| **LSeparator** | Left separator |
| **RSeparator** | Right separator |
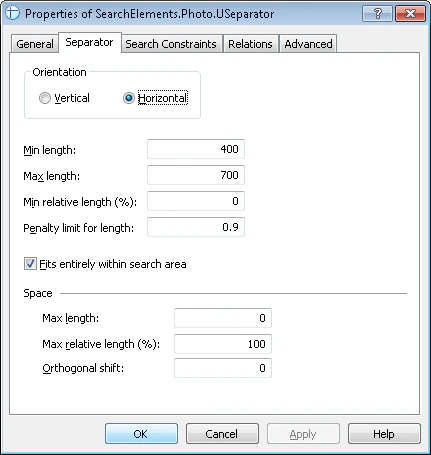
On the **Separator** tab in the **Properties** dialog box, specify the orientation of each of the four separators (**Vertical** or **Horizontal**). Do not change the other properties.
The **Photo** Group element includes:
* A **PhotoPicture** element of type **Object Collection** corresponding to the photo.
* A **PhotoHeader** element of type **Static Text** corresponding to the name YOUR PHOTO IN FANCY DRESS.
* Four separators around the photo that are required to find the **PhotoPicture** element.
## Create the field name element
Because the name YOUR PHOTO IN FANCY DRESS occurs nowhere else in the document, add the corresponding element to the **Group** element first and use it to locate the separators.
Name it **PhotoHeader**.
Use the same settings as the other field names.
Try matching the FlexiLayout with the images. You will see that the program reliably detects the name on all the images.
## Create the separator elements
Create **Separator** elements for the four separators around the photo and give them the following names:
| Element | Separator |
| -------------- | --------------- |
| **USeparator** | Upper separator |
| **BSeparator** | Lower separator |
| **LSeparator** | Left separator |
| **RSeparator** | Right separator |
On the **Separator** tab in the **Properties** dialog box, specify the orientation of each of the four separators (**Vertical** or **Horizontal**). Do not change the other properties.
 ## Specify the search areas for the separators
Now use the test images to specify the search area for each of the separators.
### Upper separator (USeparator element)
* Below the photo caption but not farther than 100 dots from its top boundary (Below the **PhotoHeader** element and Above the **PhotoHeader**, Offset = -100).
* Within the area that is not longer than the caption by more than 80 dots on each side (Left of the right boundary of the **PhotoHeader** element, Offset = -80, Reference boundary = right, and Right of the left boundary of the **PhotoHeader** element, Offset = -80, Reference boundary = left).
### Lower separator (BSeparator element)
* Below the name of the NAME field (Below the **NameHeader** element).
* Above the bottom of **IdentityNumber** (**Above** the **IdentityNumber** element, **ElementBoundary** = bottom).
* Within the area that is not longer than the name by more than 80 dots on each side (Left of the right boundary of the **PhotoHeader** element, Offset = -80, Reference boundary = right, and Right of the left boundary of the **PhotoHeader** element, Offset = -80, Reference boundary = left).
### Left separator (LSeparator element)
* Within the area that is not wider than the distance between the upper and lower separators by more than 50 dots on each side (Below the **USeparator** element, Offset = -50, and Above the **BSeparator** element, Offset = -50).
* No farther than 40 dots from the left boundary of the upper separator (Right of the left boundary of the **USeparator** element, Offset = -20, Reference boundary = left, and Left of the left boundary of the **USeparator** element, Offset = -20, Reference boundary = left).
### Right separator (RSeparator element)
* Within the area that is not wider than the distance between the upper and lower separators by more than 50 dots on each side (Below the **USeparator** element, Offset = -50, and Above the **BSeparator** element, Offset = -50).
* No farther than 40 dots from the right boundary of the upper separator (Right of the right boundary of the **USeparator** element, Offset = -20, Reference boundary = right, and Left of the right boundary of the **USeparator** element, Offset = -20, Reference boundary = right).
Now, if you try matching the FlexiLayout with the images, you will see that the program can detect these areas. In the **Tree of Hypotheses**, right-click a hypothesis and select **Show Search Area** on the shortcut menu. If the search criteria are wrong and the program fails to locate the search area properly, you notice this immediately. You might also see that even the search area of a correct hypothesis needs some adjustment. For example, it might be too small.
The maximum size of all the separators was detected by trial and error while studying the properties of **Separator** objects during pre-recognition.
## Describe the YOUR PHOTO IN FANCY DRESS field
Name it **PhotoPicture**.
On the **Relations** tab, specify the search area for the **PhotoPicture** element:
* Below the upper separator (Below the **USeparator** element).
* Above the lower separator (Above the **BSeparator** element).
* To the right of the left separator (Right of the **LSeparator** element).
* To the left of the right separator (Left of the **RSeparator** element).
Finally, create the **PhotoPicture** block and specify the **PhotoPicture** element as the source element.
## Specify the search areas for the separators
Now use the test images to specify the search area for each of the separators.
### Upper separator (USeparator element)
* Below the photo caption but not farther than 100 dots from its top boundary (Below the **PhotoHeader** element and Above the **PhotoHeader**, Offset = -100).
* Within the area that is not longer than the caption by more than 80 dots on each side (Left of the right boundary of the **PhotoHeader** element, Offset = -80, Reference boundary = right, and Right of the left boundary of the **PhotoHeader** element, Offset = -80, Reference boundary = left).
### Lower separator (BSeparator element)
* Below the name of the NAME field (Below the **NameHeader** element).
* Above the bottom of **IdentityNumber** (**Above** the **IdentityNumber** element, **ElementBoundary** = bottom).
* Within the area that is not longer than the name by more than 80 dots on each side (Left of the right boundary of the **PhotoHeader** element, Offset = -80, Reference boundary = right, and Right of the left boundary of the **PhotoHeader** element, Offset = -80, Reference boundary = left).
### Left separator (LSeparator element)
* Within the area that is not wider than the distance between the upper and lower separators by more than 50 dots on each side (Below the **USeparator** element, Offset = -50, and Above the **BSeparator** element, Offset = -50).
* No farther than 40 dots from the left boundary of the upper separator (Right of the left boundary of the **USeparator** element, Offset = -20, Reference boundary = left, and Left of the left boundary of the **USeparator** element, Offset = -20, Reference boundary = left).
### Right separator (RSeparator element)
* Within the area that is not wider than the distance between the upper and lower separators by more than 50 dots on each side (Below the **USeparator** element, Offset = -50, and Above the **BSeparator** element, Offset = -50).
* No farther than 40 dots from the right boundary of the upper separator (Right of the right boundary of the **USeparator** element, Offset = -20, Reference boundary = right, and Left of the right boundary of the **USeparator** element, Offset = -20, Reference boundary = right).
Now, if you try matching the FlexiLayout with the images, you will see that the program can detect these areas. In the **Tree of Hypotheses**, right-click a hypothesis and select **Show Search Area** on the shortcut menu. If the search criteria are wrong and the program fails to locate the search area properly, you notice this immediately. You might also see that even the search area of a correct hypothesis needs some adjustment. For example, it might be too small.
The maximum size of all the separators was detected by trial and error while studying the properties of **Separator** objects during pre-recognition.
## Describe the YOUR PHOTO IN FANCY DRESS field
Name it **PhotoPicture**.
On the **Relations** tab, specify the search area for the **PhotoPicture** element:
* Below the upper separator (Below the **USeparator** element).
* Above the lower separator (Above the **BSeparator** element).
* To the right of the left separator (Right of the **LSeparator** element).
* To the left of the right separator (Left of the **RSeparator** element).
Finally, create the **PhotoPicture** block and specify the **PhotoPicture** element as the source element.