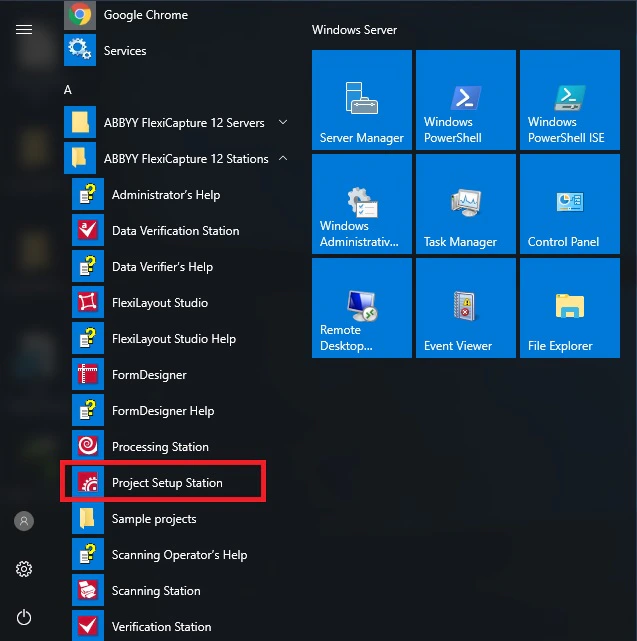
 2. **File → Open Project…,** をクリックし、ABBYY FlexiCapture Connector for Automation Anywhere\Samples\FlexiCapture Projects\InvoiceDemoProject を参照して、**InvoiceDemoProject.fcproj** という名前の Project を選択します。
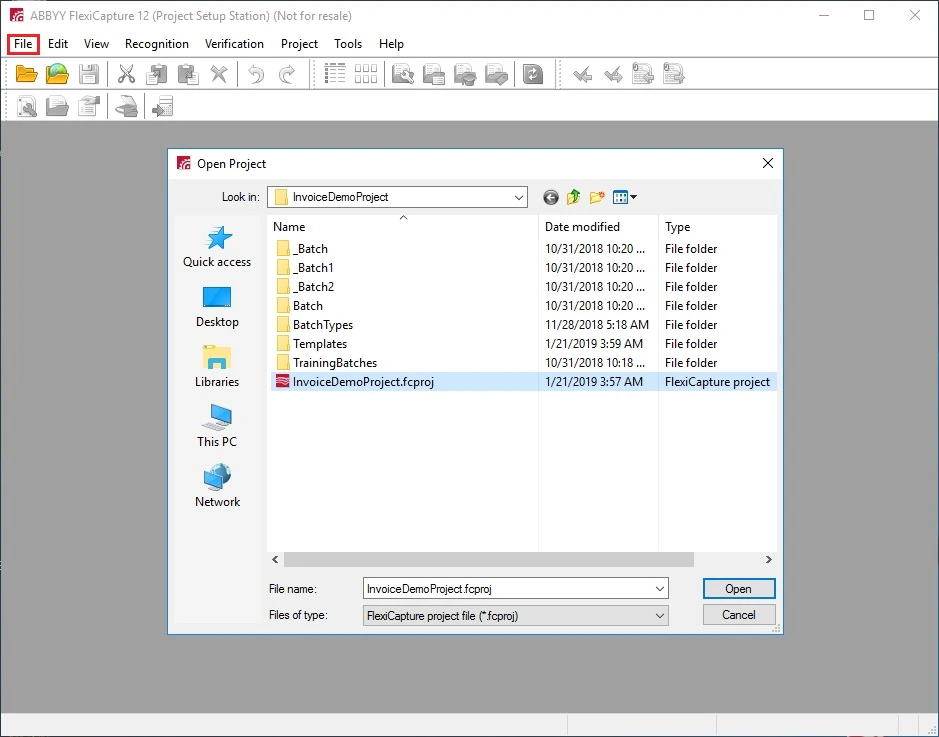 3. **File → Upload Project to Server…** をクリックして、Project を FC サーバーにアップロードします。
4. 開いたダイアログで、ABBYY FlexiCapture サーバーのアドレスと ABBYY FlexiCapture 管理者の認証情報を指定します。
3. **File → Upload Project to Server…** をクリックして、Project を FC サーバーにアップロードします。
4. 開いたダイアログで、ABBYY FlexiCapture サーバーのアドレスと ABBYY FlexiCapture 管理者の認証情報を指定します。
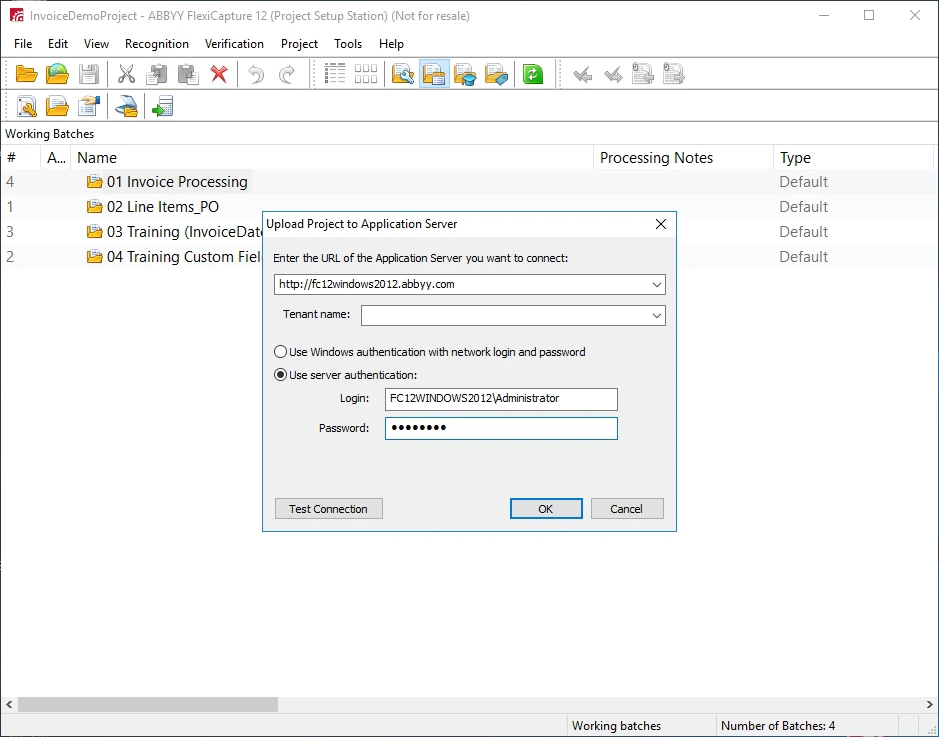 4. 開いたダイアログで、Projectを選択します。
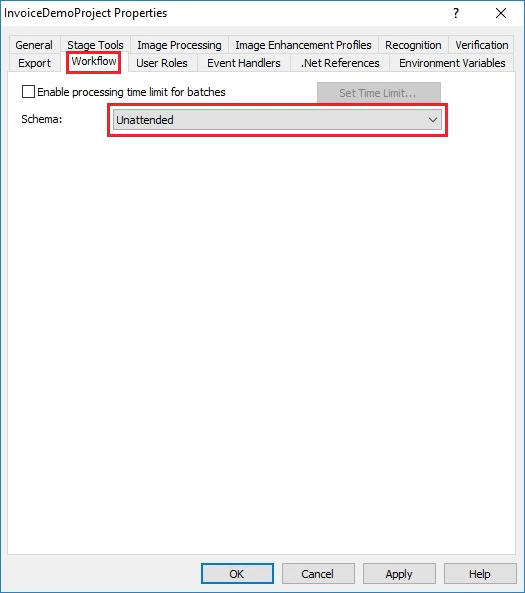
5. **Project → Project Properties...** をクリックし、**Workflow** タブをクリックします。**Schema** ドロップダウンリストから **Unattended** を選択します。
4. 開いたダイアログで、Projectを選択します。
5. **Project → Project Properties...** をクリックし、**Workflow** タブをクリックします。**Schema** ドロップダウンリストから **Unattended** を選択します。
 6. **OK** をクリックします。
次に、[Automation Anywhere を設定](/ja/flexi-capture/connectors/aa-setup-aa)する必要があります。
## 有人サービス シナリオ
ABBYY FlexiCapture を有人サービスとして設定するには、次の手順を実行します。
1. Project Setup Station を開きます。
2. **File → Open Project from Server...** をクリックします。
3. **Open Existing Project from Application Server** ダイアログで、ABBYY FlexiCapture サーバーのアドレスと FlexiCapture 管理者の認証情報を指定します。
6. **OK** をクリックします。
次に、[Automation Anywhere を設定](/ja/flexi-capture/connectors/aa-setup-aa)する必要があります。
## 有人サービス シナリオ
ABBYY FlexiCapture を有人サービスとして設定するには、次の手順を実行します。
1. Project Setup Station を開きます。
2. **File → Open Project from Server...** をクリックします。
3. **Open Existing Project from Application Server** ダイアログで、ABBYY FlexiCapture サーバーのアドレスと FlexiCapture 管理者の認証情報を指定します。
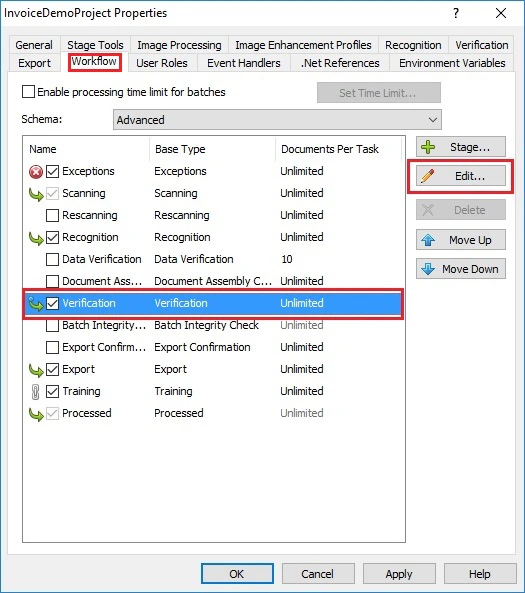 7. **Edit…** をクリックします。
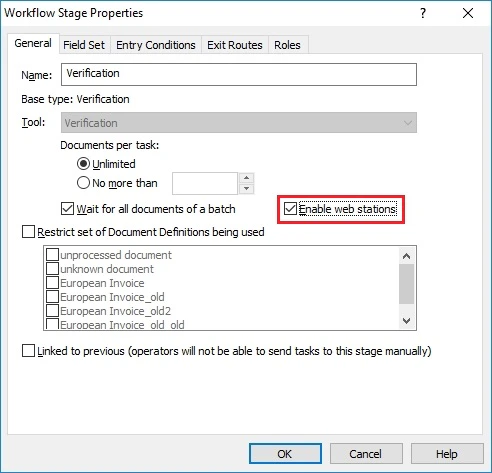
8. 開いたダイアログで、**General** タブをクリックし、**Enable web stations** オプションを選択します。
7. **Edit…** をクリックします。
8. 開いたダイアログで、**General** タブをクリックし、**Enable web stations** オプションを選択します。
 9. **OK** をクリックします。
10. もう一度 **OK** をクリックして、**Project Properties…** ダイアログを閉じます。
次に、[Automation Anywhere を設定](/ja/flexi-capture/connectors/aa-setup-aa)する必要があります。
9. **OK** をクリックします。
10. もう一度 **OK** をクリックして、**Project Properties…** ダイアログを閉じます。
次に、[Automation Anywhere を設定](/ja/flexi-capture/connectors/aa-setup-aa)する必要があります。