> ## Documentation Index
> Fetch the complete documentation index at: https://docs.abbyy.com/llms.txt
> Use this file to discover all available pages before exploring further.
# Laserfiche workflow activityの更新
> Laserfiche Workflow Administration Console と Designer で ABBYY FlexiCapture アクティビティを更新し、プロジェクト設定を再割り当てしてから、ワークフローを再公開します。
まず、Workflow Administration Console でアクティビティを更新します。
1. Workflow Administration Console を開きます。
2. 左側のナビゲーション ペインで、**Server Configuration → Custom Activities** を選択します。
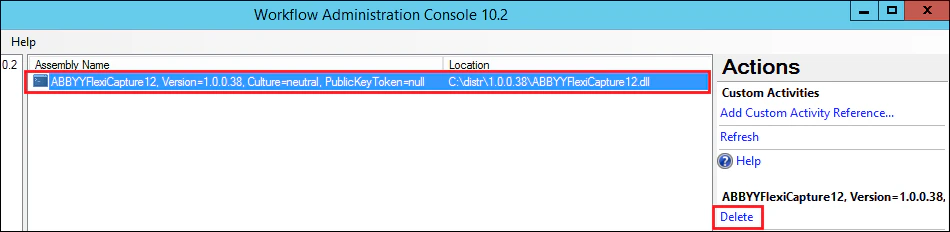
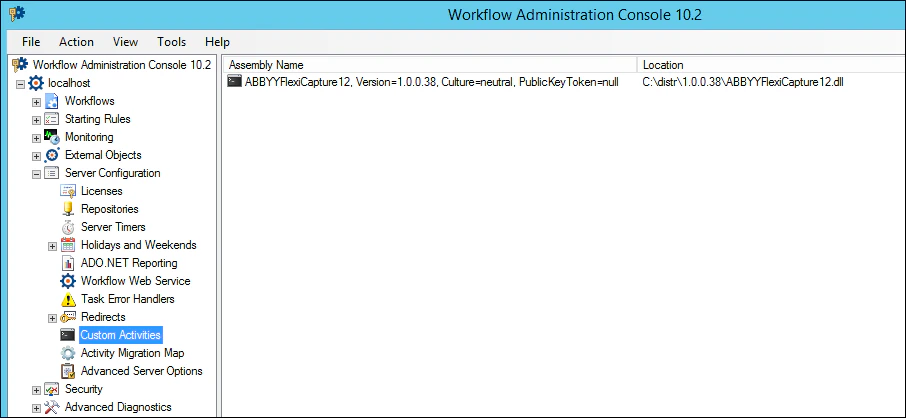 3. 右側の **操作** リストで、古いバージョンの ABBYY FlexiCapture アクティビティを選択して削除します。
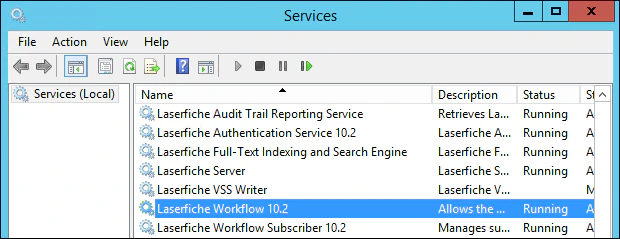
 4. WIN+R を押して “services.msc” コマンドを入力し、Windows Services を開きます。次に、Laserfiche Workflow 10.2 サービスを再起動します。
 5. **Add Custom Activity Reference…** を選択し、新しいバージョンのアクティビティ ファイルへのパスを指定します。
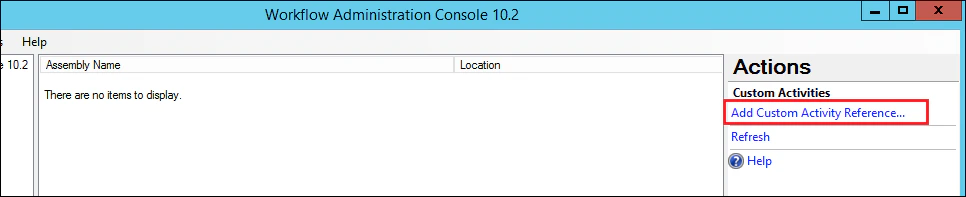 6. 新しいアクティビティのバージョンが **Assembly Name** 列に表示されていることを確認します。
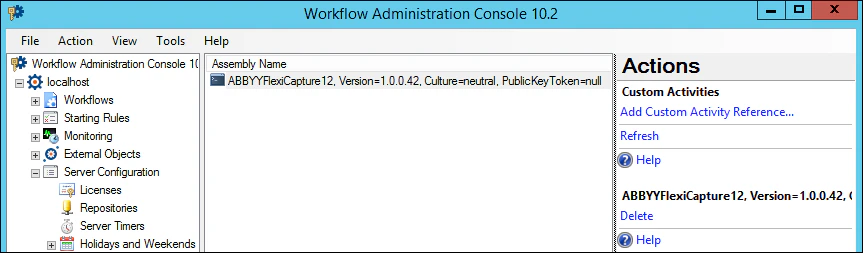 7. Workflow Administration Console を閉じます。
次に、Workflow Designer でアクティビティを更新します。以下の手順を実行してください。
1. Workflow Designer を開きます。
2. 左側のペインでいずれかのアクティビティ グループをクリックしてコンテキスト メニューを開き、**Toolbox → Add/Remove Activities…** を選択します。
7. Workflow Administration Console を閉じます。
次に、Workflow Designer でアクティビティを更新します。以下の手順を実行してください。
1. Workflow Designer を開きます。
2. 左側のペインでいずれかのアクティビティ グループをクリックしてコンテキスト メニューを開き、**Toolbox → Add/Remove Activities…** を選択します。
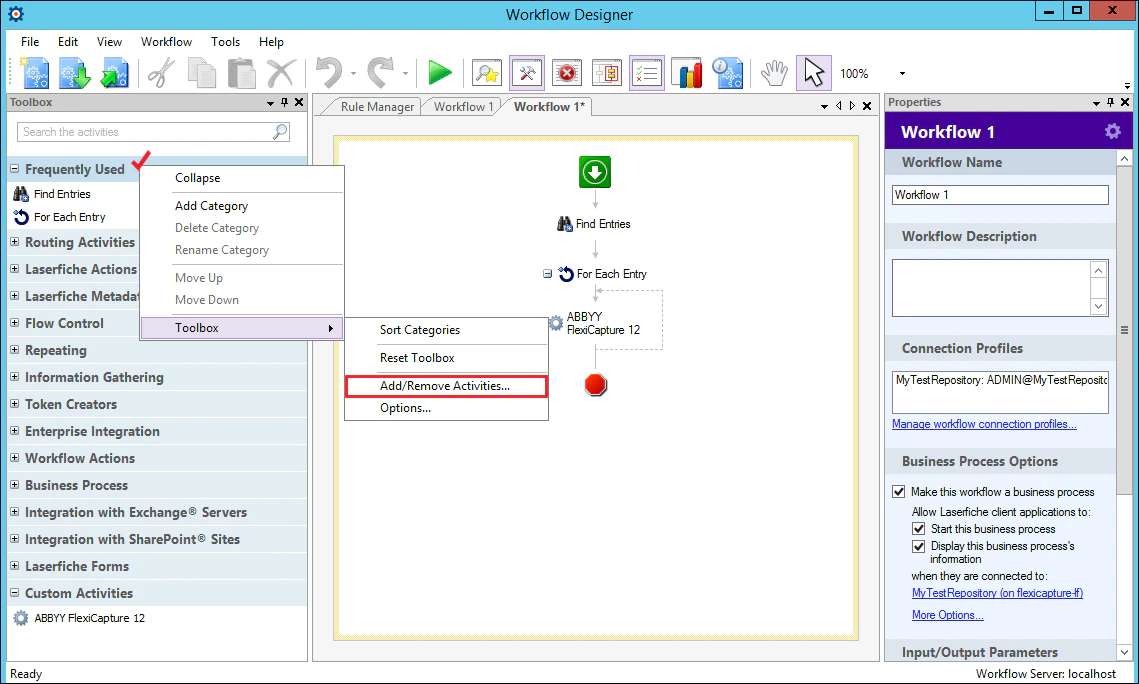 3. **Add/Remove Toolbox Activities** ダイアログで、古い *ABBYYFlexiCapture12* アセンブリを選択し、**Remove** をクリックします。
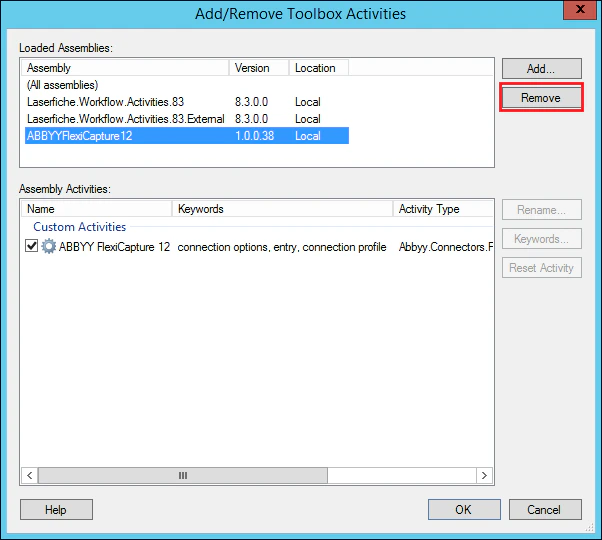 4. **Remove Assembly** ダイアログで **Yes** をクリックします。次に、**Confirm Changes** ダイアログで **OK** をクリックして、変更を確定します。
5. Workflow Designer を閉じてから再度開き、任意のアクティビティ グループのコンテキスト メニューで **Toolbox → Add/Remove Activities…** を選択します。
6. **Add…** をクリックし、新しいバージョンのアクティビティ ファイルへのパスを指定します。
7. **Version** 列で、*ABBYYFlexiCapture12* アクティビティに新しいアセンブリのバージョンが指定されていることを確認します。
4. **Remove Assembly** ダイアログで **Yes** をクリックします。次に、**Confirm Changes** ダイアログで **OK** をクリックして、変更を確定します。
5. Workflow Designer を閉じてから再度開き、任意のアクティビティ グループのコンテキスト メニューで **Toolbox → Add/Remove Activities…** を選択します。
6. **Add…** をクリックし、新しいバージョンのアクティビティ ファイルへのパスを指定します。
7. **Version** 列で、*ABBYYFlexiCapture12* アクティビティに新しいアセンブリのバージョンが指定されていることを確認します。
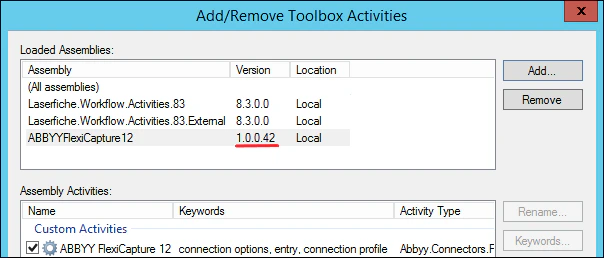 8. **OK** をクリックして、変更を確定します。
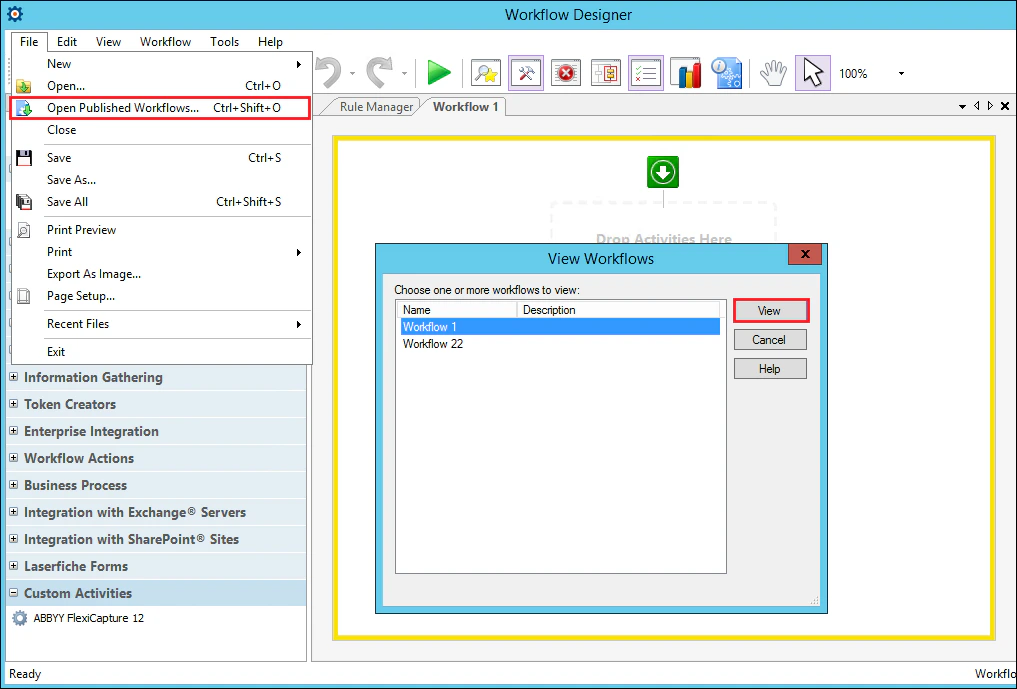
9. 次に、**File → Open Published Workflows…** をクリックし、*ABBYYFlexiCapture12* アクティビティを使用するワークフローを選択して、**View** をクリックします。
8. **OK** をクリックして、変更を確定します。
9. 次に、**File → Open Published Workflows…** をクリックし、*ABBYYFlexiCapture12* アクティビティを使用するワークフローを選択して、**View** をクリックします。
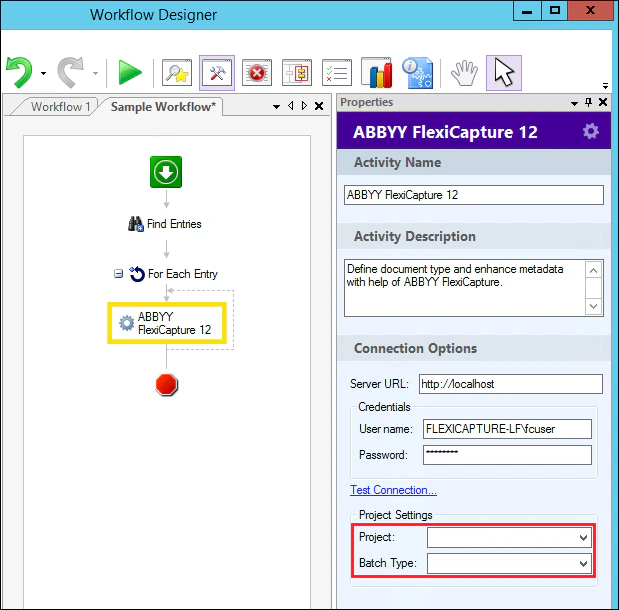
 10. ワークフロー ペインで *ABBYYFlexiCapture12* アクティビティを選択し、**Properties** パネルで FC のプロジェクト名と Batch Type を指定します。
 11. ワークフローを保存して公開します。