> ## Documentation Index
> Fetch the complete documentation index at: https://docs.abbyy.com/llms.txt
> Use this file to discover all available pages before exploring further.
# ABBYY FlexiCapture プロジェクトの設定
> Pega コネクタ用に FlexiCapture プロジェクトを設定します。Verification を使用するサービスとして FC を有効にし、Document Definition ごとに XML エクスポート プロファイルを作成します。
プロジェクトの設定を始める前に、次のソフトウェアがインストールされていることを確認してください。
* ABBYY FlexiCapture 12 Project Setup Station (ABBYY FlexiCapture Distributed Edition または ABBYY FlexiCapture Cloud を使用する場合は必須) 。
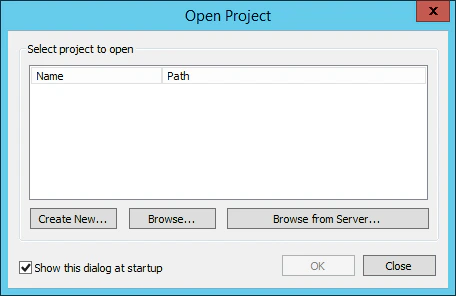
XML へのデータ エクスポートを設定する必要がある FC プロジェクトがすでにある場合は、そのプロジェクトを開きます。ない場合は、プロジェクトを作成する必要があります。Project Setup Station を起動し、**Open Project** ダイアログで次のいずれかをクリックします。
* 新しいプロジェクトを作成するには、**Create New\...**
* ローカル ドライブに保存されている既存のプロジェクトを開くには、**Browse...**
* 以前に FC Application Server にアップロードしたプロジェクトを開くには、**Browse from Server...**
 次に、Verification を使用するサービスとして FC を設定する必要があります。
1. Project Setup Station を開きます。
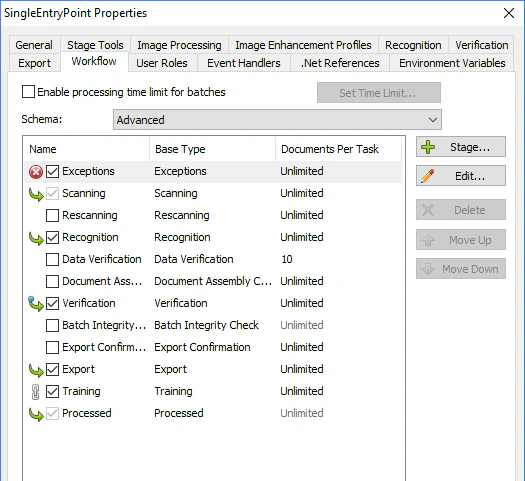
2. **Project → Project Properties...** をクリックし、**Workflow** タブを開きます。**Schema** ドロップダウンリストから **Advanced** を選択します。
3. **Verification** オプションを選択し、**Edit…** をクリックします。
次に、Verification を使用するサービスとして FC を設定する必要があります。
1. Project Setup Station を開きます。
2. **Project → Project Properties...** をクリックし、**Workflow** タブを開きます。**Schema** ドロップダウンリストから **Advanced** を選択します。
3. **Verification** オプションを選択し、**Edit…** をクリックします。
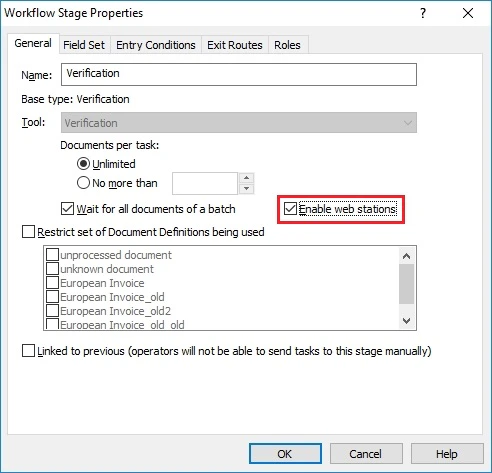
 4. 開いたダイアログの **General** タブで、**Enable web stations** オプションを選択します。
 5. **OK** をクリックします。
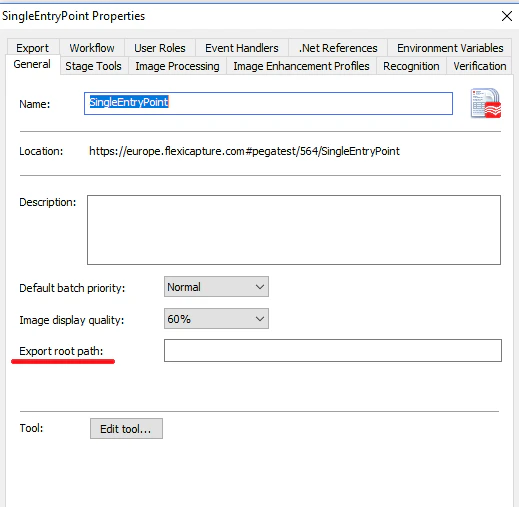
6. **General** タブの **Export root path** を空のままにしておきます。
5. **OK** をクリックします。
6. **General** タブの **Export root path** を空のままにしておきます。
 7. **OK** をクリックします。
次に、各 Document Definition のエクスポート プロファイルを作成する必要があります。
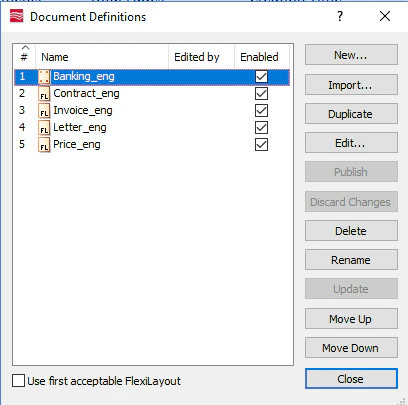
1. FC Project Setup Station で **Project → Document Definitions...** をクリックし、Project で使用できる Document Definitions の一覧を開きます。新しいエクスポート設定を指定する Document Definition を選択し、**Edit...** をクリックします。
7. **OK** をクリックします。
次に、各 Document Definition のエクスポート プロファイルを作成する必要があります。
1. FC Project Setup Station で **Project → Document Definitions...** をクリックし、Project で使用できる Document Definitions の一覧を開きます。新しいエクスポート設定を指定する Document Definition を選択し、**Edit...** をクリックします。
 2. **Document Definition → Export Settings...** をクリックします。
3. Add... ボタンをクリックして、エクスポート プロファイル作成ウィザードを開始します。
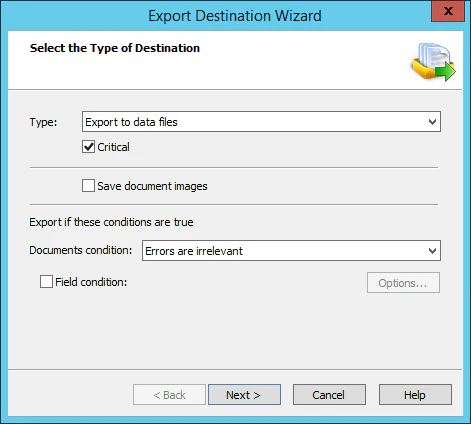
4. **Select the Type of Destination** ステップで、**Type** ドロップダウンリストから **Export to data files** を選択し、その下の **Critical** オプションを選択します。次に、**Document condition** ドロップダウンリストから **Errors are irrelevant** アイテムを選択し、**Next** をクリックします。
2. **Document Definition → Export Settings...** をクリックします。
3. Add... ボタンをクリックして、エクスポート プロファイル作成ウィザードを開始します。
4. **Select the Type of Destination** ステップで、**Type** ドロップダウンリストから **Export to data files** を選択し、その下の **Critical** オプションを選択します。次に、**Document condition** ドロップダウンリストから **Errors are irrelevant** アイテムを選択し、**Next** をクリックします。
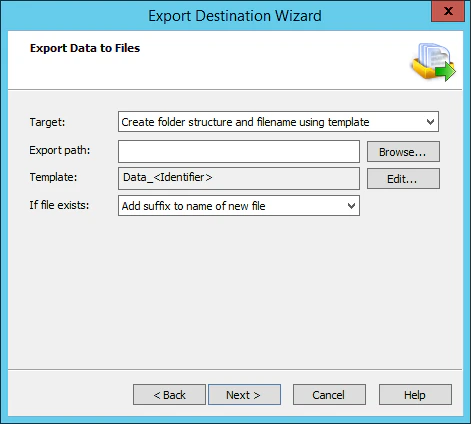
 5. **Export Data to Files** ステップで、**Export path** field が空であることを確認し、ファイル名テンプレートを指定します。**Next** をクリックします。
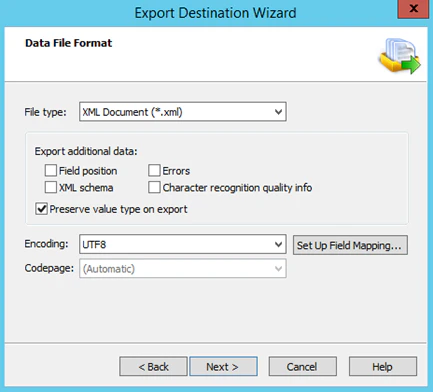
 6. **Data File Format** ステップで、**File type** field で **XML Document** を選択し、**Next** をクリックします。
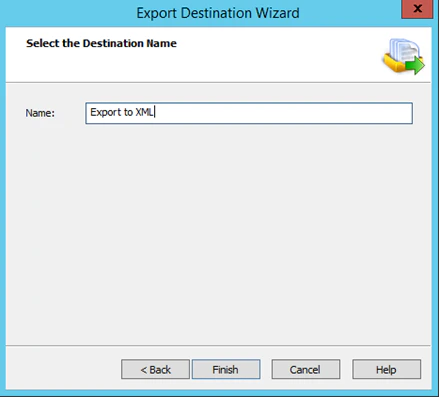
 7. 新しく作成したエクスポート プロファイルの名前を入力し、**Finish** をクリックします。
 8. **Export Settings** ダイアログで、新しく作成したエクスポート プロファイルの **Enabled** ボックスをオンにします。
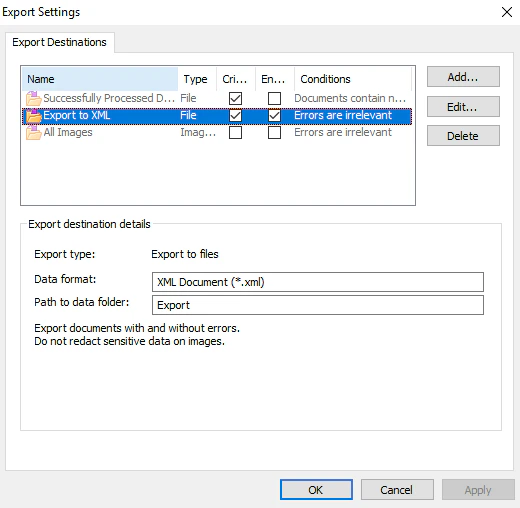 9. **Apply** をクリックし、次に **OK** をクリックします。
10. Document Definition を保存して公開します。
9. **Apply** をクリックし、次に **OK** をクリックします。
10. Document Definition を保存して公開します。