> ## Documentation Index
> Fetch the complete documentation index at: https://docs.abbyy.com/llms.txt
> Use this file to discover all available pages before exploring further.
# フローアクションの作成
> ユーザーがケースデータを入力し、FlexiCapture の検証ページを表示し、ケースにファイルを追加できる Pega フローアクションを Dev Studio で作成します。
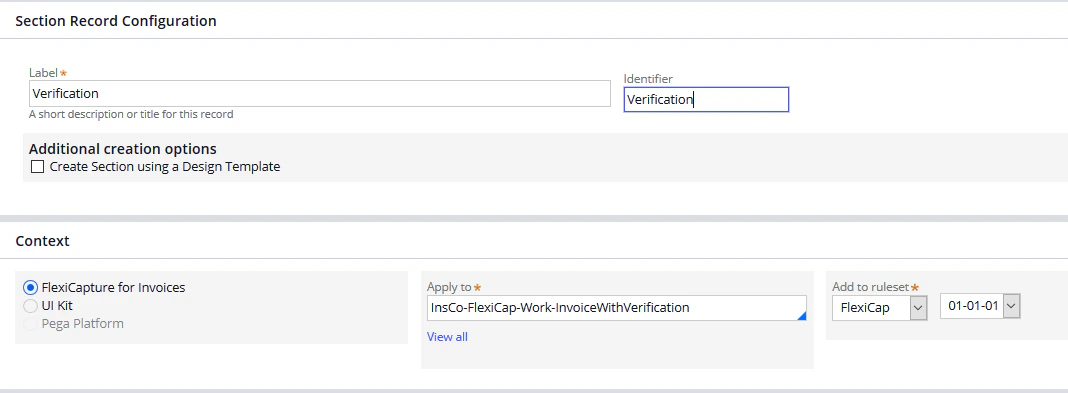
[flow action](https://community.pega.com/sites/default/files/help_v63sp1/Content/definitions/f/flowaction.htm) を使用すると、ユーザーはケースデータを入力・変更できます。以下の例では、フローアクションを使用して[検証ページを表示](/ja/flexi-capture/connectors/pega/pega-verification-section)し、[ケースにファイルを追加する](/ja/flexi-capture/connectors/pega/pega-collect)ためのコントロールを表示します。
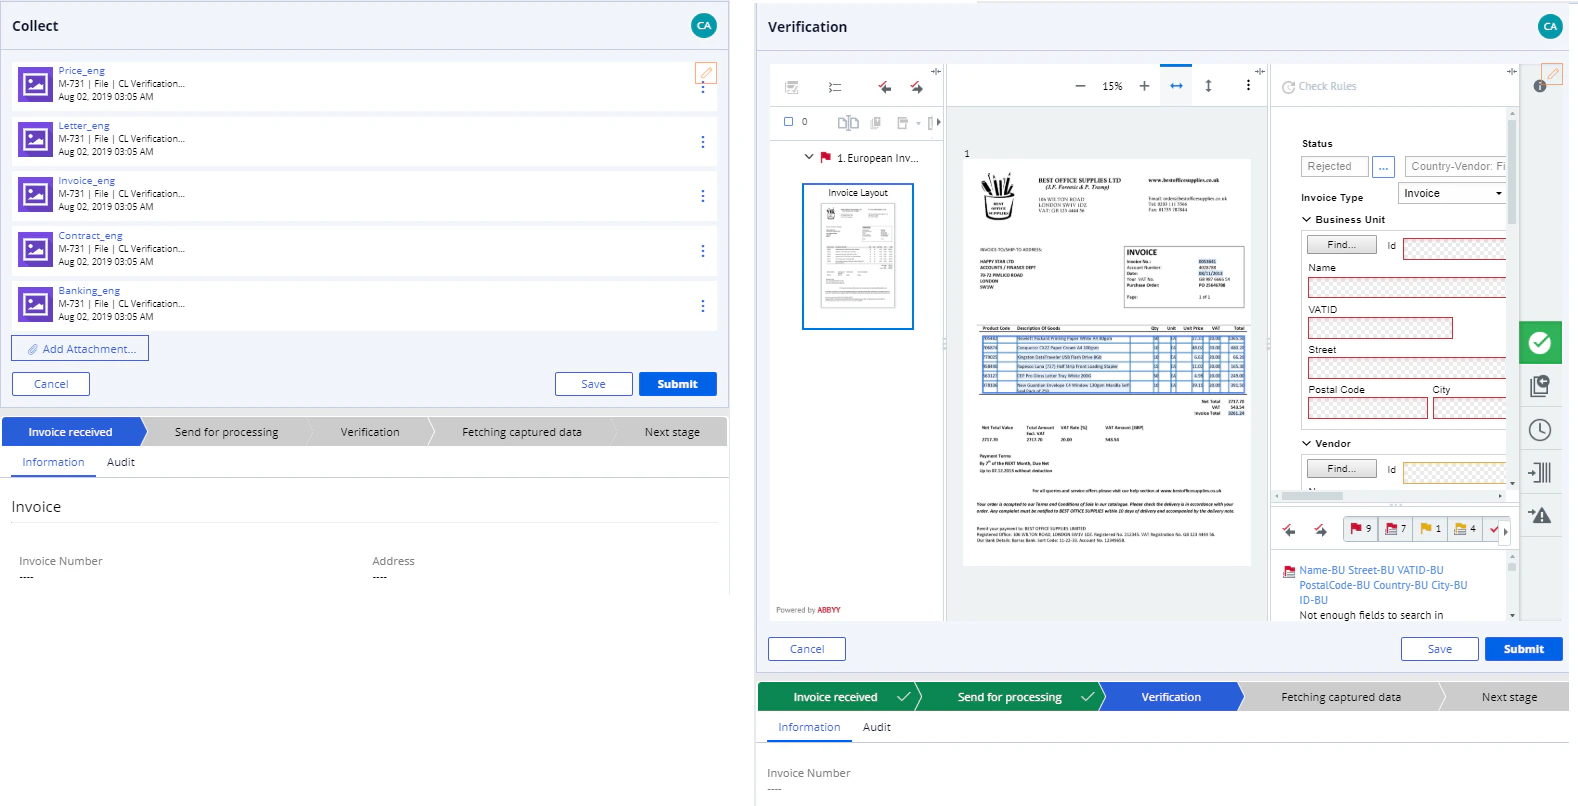 フローアクションを作成するには、次の手順を実行します。
1. **Dev Studio** で **Records → Process → Flow Action →** **Create** をクリックします。
2. **Label** field と **Identifier** field に入力します。次に、ケースを含むアプリケーションを選択し、**Apply to** field の "Rule-Obj-Activity" をケースの完全名に置き換えます。
フローアクションを作成するには、次の手順を実行します。
1. **Dev Studio** で **Records → Process → Flow Action →** **Create** をクリックします。
2. **Label** field と **Identifier** field に入力します。次に、ケースを含むアプリケーションを選択し、**Apply to** field の "Rule-Obj-Activity" をケースの完全名に置き換えます。
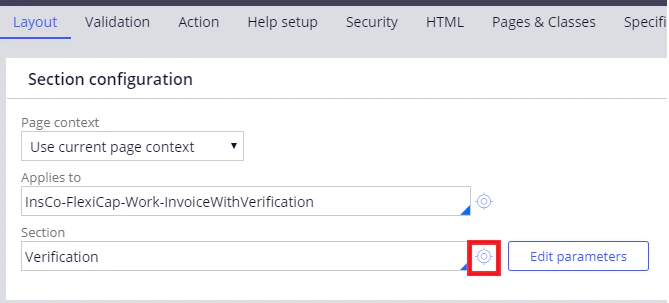
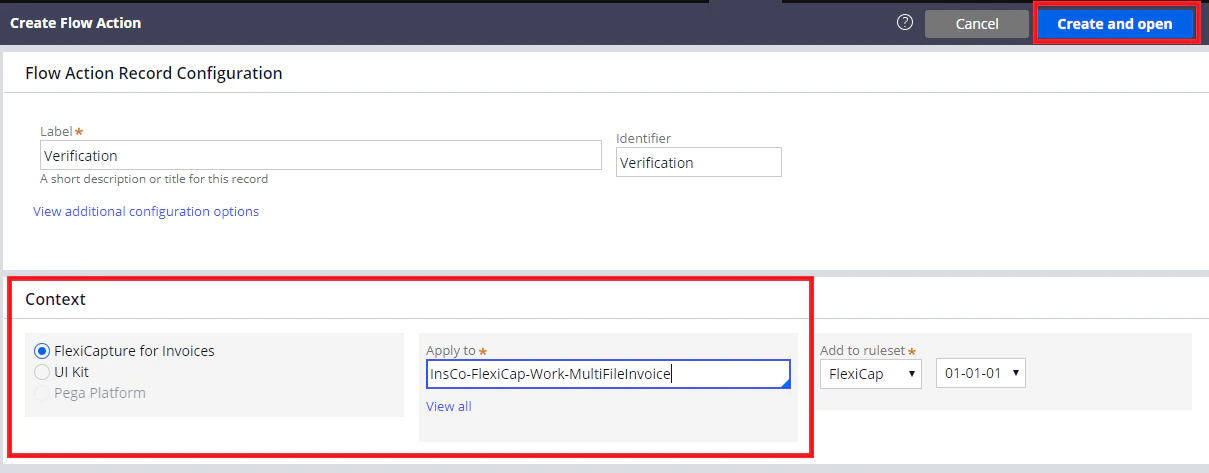 3. **Create and open** をクリックします。**Layout** tab で、**Section** field にセクション名を指定します。次に、その field の右側にある設定ボタンをクリックします。
 4. 開いたダイアログで、**Label** field と **Identifier** field に入力します。次に、ケースを含むアプリケーションを選択し、**Apply to** field にケース型の完全名が指定されていることを確認します。
5. **Create and open** をクリックします。すべてのセクションの一覧を表示するには、**Dev Studio** を開いて **Records → User Interface → Section** をクリックします。
4. 開いたダイアログで、**Label** field と **Identifier** field に入力します。次に、ケースを含むアプリケーションを選択し、**Apply to** field にケース型の完全名が指定されていることを確認します。
5. **Create and open** をクリックします。すべてのセクションの一覧を表示するには、**Dev Studio** を開いて **Records → User Interface → Section** をクリックします。