> ## Documentation Index
> Fetch the complete documentation index at: https://docs.abbyy.com/llms.txt
> Use this file to discover all available pages before exploring further.
# 検証セクションの作成
> FlexiCapture Web Verification Station を表示するための、埋め込み VerificationSection iframe とカスタム Submit ボタンを備えた Pega の検証セクションを作成します。
検証セクションを作成するには、次のようにします。
1. **Verification Flow Action** で、*Verification* という名前のセクションを作成し、**Design** タブを開きます。
2. 動的レイアウトを 2 つ追加します。1 つ目の動的レイアウトには、[VerificationSection](#verificationsection) という名前の**埋め込みセクション**を追加します。2 つ目には、[Submit](#submit) という名前のボタンを追加します。
## VerificationSection
動的レイアウトに**埋め込みセクション**を追加する場合:
1. **Page context** リストで **Use current page context** を選択します。**Section** フィールドで **By name** を選択し、次の値を指定します: *VerificationSection*。
2. 設定ボタンをクリックして、新しいセクションを作成します。
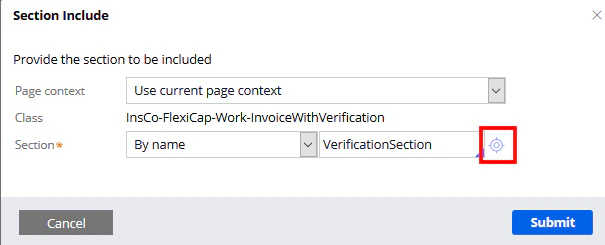 3. **Create and open** をクリックし、次に **HTML** タブをクリックします。
4. **Auto-generated HTML** オプションをオフにして、以下のコードを入力します。
このコードは **VerificationSection.html** ファイルからコピーすることもできます。このファイルは *%Installation Path%\Connector for FlexiCapture as a Service with verification\Samples\Code examples\Flow actions* にあります。
```
<% if ( tools.findPage("pyWorkPage").getProperty(".VerificationUrl").getStringValue().contains("https://")) {%>
" onload = changeWidth() >
<% } else { %>
3. **Create and open** をクリックし、次に **HTML** タブをクリックします。
4. **Auto-generated HTML** オプションをオフにして、以下のコードを入力します。
このコードは **VerificationSection.html** ファイルからコピーすることもできます。このファイルは *%Installation Path%\Connector for FlexiCapture as a Service with verification\Samples\Code examples\Flow actions* にあります。
```
<% if ( tools.findPage("pyWorkPage").getProperty(".VerificationUrl").getStringValue().contains("https://")) {%>
" onload = changeWidth() >
<% } else { %>
<% } %>
```
## カスタムの Submit ボタンを作成する
動的レイアウトにボタンを作成する前に、ボタンを画面の右側に寄せる必要があります。そのためには、動的レイアウトのプロパティを開き、**Presentation** タブをクリックして、**Float** field で **Right** を選択します。変更を適用するには、**Submit** をクリックします。
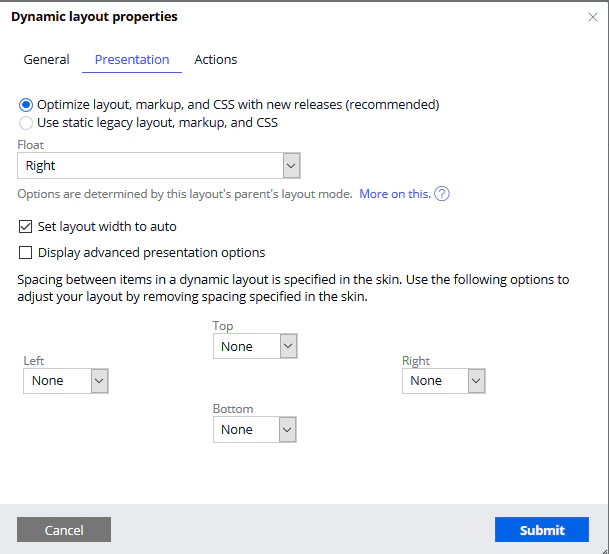 ボタンを追加するには、次の操作を行います。
1. 基本の *Button* 要素を動的レイアウトに追加し、そのプロパティを開きます。
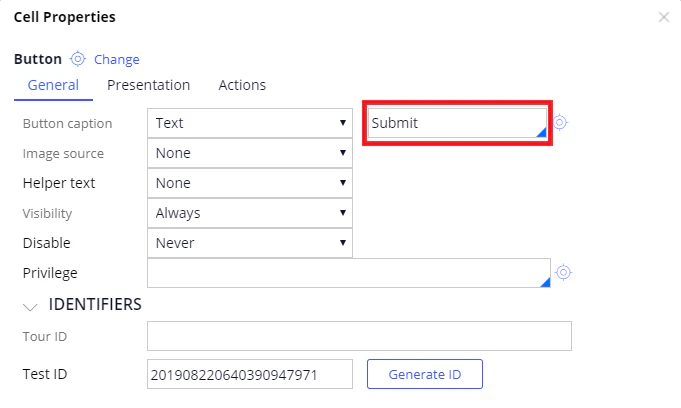
2. **General** タブをクリックし、ボタンのキャプションテキストに *Submit* を指定します。
ボタンを追加するには、次の操作を行います。
1. 基本の *Button* 要素を動的レイアウトに追加し、そのプロパティを開きます。
2. **General** タブをクリックし、ボタンのキャプションテキストに *Submit* を指定します。
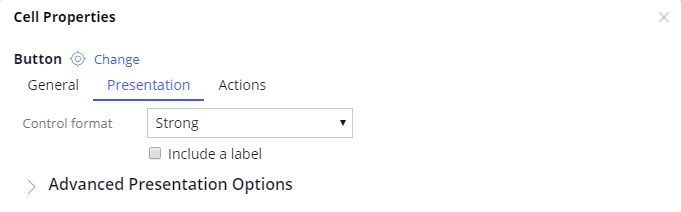
 3. **Presentation** タブで、**Control format** リストから **Strong** を選択します。
 4. **Action** タブで、*Click* イベントを追加し、*Finish Assignment* アクションに接続します。
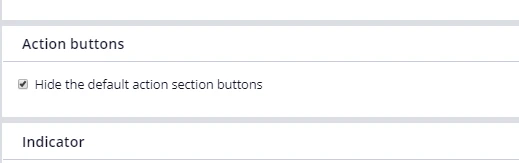
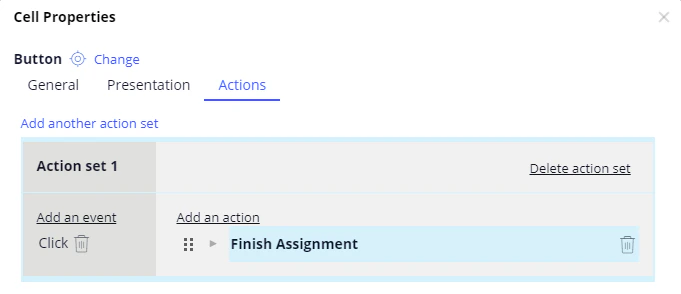 5. **Submit** をクリックします。flow の標準ボタンセット (**Cancel**、**Save**、**Submit**) を非表示にするには、**Records → Process → Flow Action** をクリックして **Verification** を開き、**Action** タブをクリックして、**Hide the default action section buttons** を選択します。
 Case に **Submit** ボタンが表示されない場合は、[step 3](#3) の **Control format** リストで **Standard** を選択してください。