> ## Documentation Index
> Fetch the complete documentation index at: https://docs.abbyy.com/llms.txt
> Use this file to discover all available pages before exploring further.
# ABBYY FlexiCapture プロジェクトの設定
> UiPath エクスポート用に ABBYY FlexiCapture プロジェクトを設定します。Project Setup Station でプロジェクトを開くか作成し、Application Server にアップロードします。
FC では、文書はプロジェクト内で処理されます。FC は各文書の種類を識別し、その種類用に用意された適切な Document Definition を適用します。各 Document Definition には、文書画像とデータのエクスポートに使用する 1 つ以上のエクスポートプロファイルが含まれています。
プロジェクトの設定を開始する前に、次のソフトウェアがインストールされていることを確認してください。
* ABBYY FlexiCapture 12 Project Setup Station (ABBYY FlexiCapture Distributed Edition または ABBYY FlexiCapture Cloud を使用している場合は必須) 。
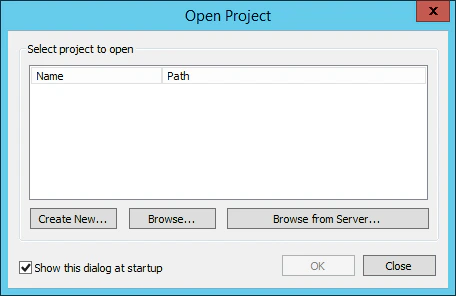
UiPath へのデータエクスポートを設定する必要がある FC プロジェクトがすでにある場合は、そのプロジェクトを開きます。ない場合は、新しいプロジェクトを作成する必要があります。Project Setup Station を起動し、**Open Project** ダイアログで次のいずれかをクリックします。
* **Create New\...** をクリックして新しいプロジェクトを作成します。
* **Browse...** をクリックすると、ローカルドライブに保存されている既存のプロジェクトを開けます。
* **Browse from Server...** をクリックすると、以前 FC Application Server にアップロードしたプロジェクトを開けます。
 次に、プロジェクトをローカルで開いた場合は、ABBYY FlexiCapture Application Server にアップロードする必要があります。
1. **File → Upload Project to Server...** をクリックします。
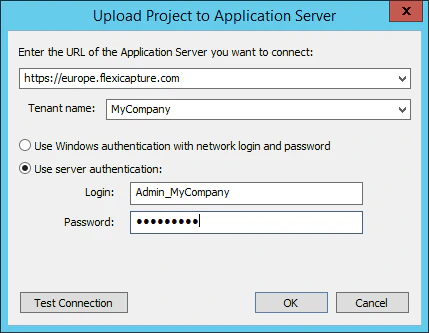
2. **Upload Project to Application Server** ダイアログで、サーバーのアドレス、使用するプロトコル、および認証情報を指定します。
3. ABBYY FlexiCapture Cloud を使用している場合は、**URL** フィールドに次の 3 つの FlexiCapture Cloud インスタンスのいずれかを指定します (会社が登録されているインスタンスを指定してください) 。
* [https://europe.flexicapture.com](https://europe.flexicapture.com)
* [https://australia.flexicapture.com](https://australia.flexicapture.com)
* [https://usa.flexicapture.com](https://usa.flexicapture.com)
**Tenant name** フィールドに会社名を指定し、**Use server authentication** オプションを選択して、認証情報を入力します。
4. 入力した情報が正しいことを確認するため、**Test Connection** をクリックします。
5. **OK** をクリックして、プロジェクトを Application Server にアップロードします。
次に、プロジェクトをローカルで開いた場合は、ABBYY FlexiCapture Application Server にアップロードする必要があります。
1. **File → Upload Project to Server...** をクリックします。
2. **Upload Project to Application Server** ダイアログで、サーバーのアドレス、使用するプロトコル、および認証情報を指定します。
3. ABBYY FlexiCapture Cloud を使用している場合は、**URL** フィールドに次の 3 つの FlexiCapture Cloud インスタンスのいずれかを指定します (会社が登録されているインスタンスを指定してください) 。
* [https://europe.flexicapture.com](https://europe.flexicapture.com)
* [https://australia.flexicapture.com](https://australia.flexicapture.com)
* [https://usa.flexicapture.com](https://usa.flexicapture.com)
**Tenant name** フィールドに会社名を指定し、**Use server authentication** オプションを選択して、認証情報を入力します。
4. 入力した情報が正しいことを確認するため、**Test Connection** をクリックします。
5. **OK** をクリックして、プロジェクトを Application Server にアップロードします。
 プロジェクトをクラウドにアップロードするとき、またはクラウドからプロジェクトを開くときに、"Application server version is not compatible." というエラーが発生することがあります。このエラーが表示された場合は、Project Setup Station のバージョンがクラウドベースの Application Server のバージョンと一致していません。互換性のあるバージョンの FC を入手するには、お住まいの地域の ABBYY 営業窓口にお問い合わせください ([https://www.abbyy.com/contacts](https://www.abbyy.com/contacts) を参照) 。
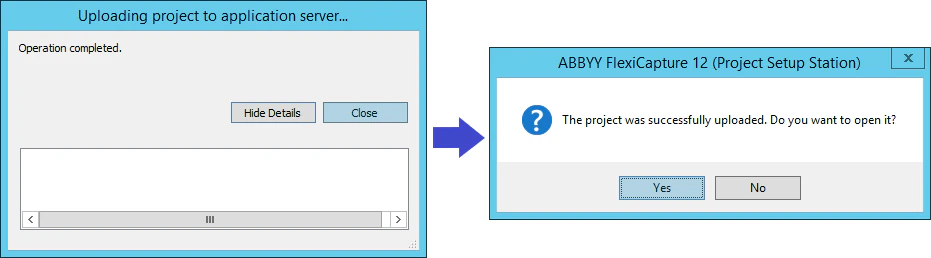
6. "Operation completed" メッセージが表示されたら、**Close** をクリックします。次のダイアログで **Yes** をクリックして、アップロードしたプロジェクトをサーバーから開きます。
プロジェクトをクラウドにアップロードするとき、またはクラウドからプロジェクトを開くときに、"Application server version is not compatible." というエラーが発生することがあります。このエラーが表示された場合は、Project Setup Station のバージョンがクラウドベースの Application Server のバージョンと一致していません。互換性のあるバージョンの FC を入手するには、お住まいの地域の ABBYY 営業窓口にお問い合わせください ([https://www.abbyy.com/contacts](https://www.abbyy.com/contacts) を参照) 。
6. "Operation completed" メッセージが表示されたら、**Close** をクリックします。次のダイアログで **Yes** をクリックして、アップロードしたプロジェクトをサーバーから開きます。
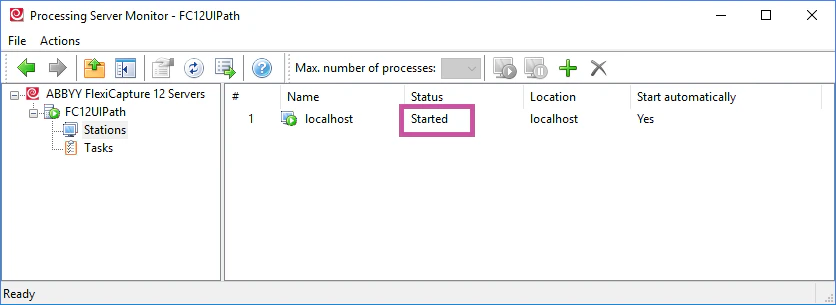
 FC Processing Server が実行中であり、Processing Stations が追加、設定、起動されていることを確認します。これを行うには、**Start → All Programs → ABBYY FlexiCapture 12 Servers → Processing Server** を選択して Processing Server Monitor を起動します。サーバーとステーションの両方が "Started" ステータスになっている必要があります。
 FC Processing Server の設定の詳細については、[Processing Server のセットアップ](/ja/flexi-capture/admin-guide/processing-server-setup) を参照してください。
ここから、プロジェクトを設定します。つまり、[Document Definition にエクスポートプロファイルを作成](/ja/flexi-capture/connectors/ui-path/up-export-profile)し、[適切なワークフローの種類を選択](/ja/flexi-capture/connectors/ui-path/up-configuring-fc-workflow)します。
請求書の処理には、事前定義プロジェクトを使用できます。プロジェクトファイルとサンプル画像を含む **InvoiceDemoProject\_Multitask.zip** アーカイブは、**\Multi-task package\Samples\FlexiCapture Projects** にあるコネクターのインストールフォルダーにあります。アーカイブを展開し、FC Project Setup Station でプロジェクトを開いて、上記の手順に従ってサーバーにアップロードしてください。
FC Processing Server の設定の詳細については、[Processing Server のセットアップ](/ja/flexi-capture/admin-guide/processing-server-setup) を参照してください。
ここから、プロジェクトを設定します。つまり、[Document Definition にエクスポートプロファイルを作成](/ja/flexi-capture/connectors/ui-path/up-export-profile)し、[適切なワークフローの種類を選択](/ja/flexi-capture/connectors/ui-path/up-configuring-fc-workflow)します。
請求書の処理には、事前定義プロジェクトを使用できます。プロジェクトファイルとサンプル画像を含む **InvoiceDemoProject\_Multitask.zip** アーカイブは、**\Multi-task package\Samples\FlexiCapture Projects** にあるコネクターのインストールフォルダーにあります。アーカイブを展開し、FC Project Setup Station でプロジェクトを開いて、上記の手順に従ってサーバーにアップロードしてください。