> ## Documentation Index
> Fetch the complete documentation index at: https://docs.abbyy.com/llms.txt
> Use this file to discover all available pages before exploring further.

# UiPath ワークフロー を実行する

> 設定済みの UiPath ワークフロー を ABBYY FlexiCapture で実行します。ファイルを Input フォルダーに配置し、Input フォルダーと Output フォルダーを選択して、アクティビティログ を確認します。

ワークフロー を作成し、ABBYY FlexiCapture project を設定してから実行します。

<div id="run-the-workflow">
  ## ワークフローの実行
</div>

<Steps>
  <Step title="処理するファイルを追加">
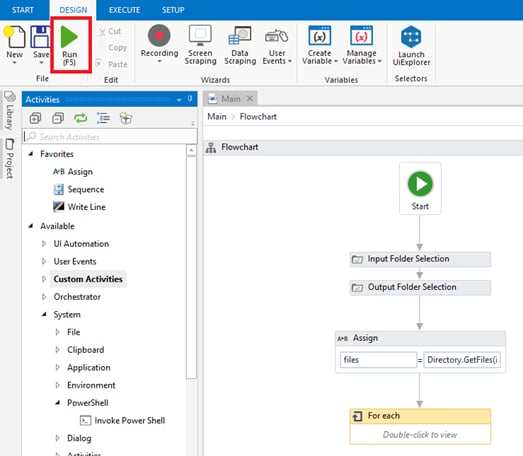
    開始前に、処理対象のファイルを **Input** フォルダーに入れておいてください。
  </Step>

  <Step title="Input フォルダーとOutput フォルダーを選択">
    ユーザーには、まずInput フォルダー、次にOutput フォルダーを選択するよう求められます。両方のフォルダーを選択すると、ワークフローが開始されます。
  </Step>

  <Step title="結果を収集">
    ワークフローが完了すると、結果ファイルがOutput フォルダーに表示されます。
  </Step>
</Steps>

<Frame>
  <img src="https://mintcdn.com/abbyy/jk6a9TGm7KRcVxRI/images/flexi-capture/connectors/UiCon_19.png?fit=max&auto=format&n=jk6a9TGm7KRcVxRI&q=85&s=af59bf4e0766de7cffb7ad4b17f8f0e2" alt="UiPath Studio で開かれているワークフローのスクリーンショット。Input Folder Selection、Output Folder Selection、ディレクトリからファイルをロードする Assign、および For each ループを含むフローチャートが表示され、Design リボンの Run ボタンが強調表示されています。" width="523" height="456" data-path="images/flexi-capture/connectors/UiCon_19.png" />
</Frame>

<div id="view-the-activity-logs">
  ## アクティビティログの表示
</div>

アクティビティによって作成されたログは、画面下部の **Output** タブに表示されます。
