> ## Documentation Index
> Fetch the complete documentation index at: https://docs.abbyy.com/llms.txt
> Use this file to discover all available pages before exploring further.
# ABBYY FlexiCapture プロジェクトワークフローの構成
> Workflow タブで、WinActor に適した ABBYY FlexiCapture のワークフローを選択します。手動介入なしで処理するには Unattended スキーマ、検証を行う場合は Advanced を使用します。
ABBYY FlexiCapture でプロジェクトワークフローを構成するには、次の手順に従います。
1. Project Setup Station でプロジェクトを開き、**Project → Project Properties...** をクリックして、**General** タブの **Export root path** が空であることを確認します。
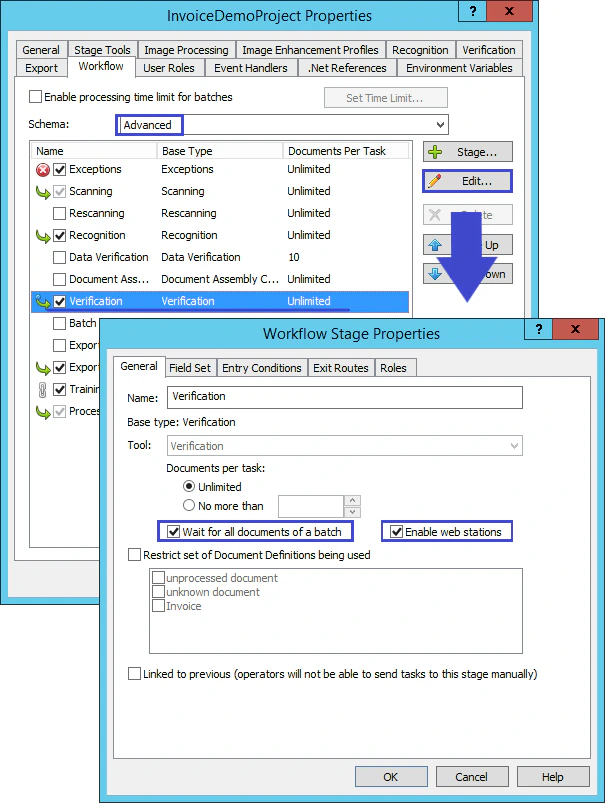
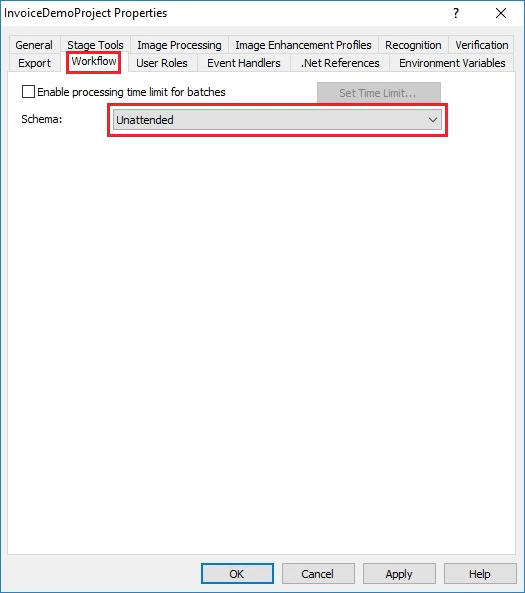
2. **Workflow** タブを開きます。利用シナリオに応じて、適切なワークフロータイプを選択します。
* ドキュメントを無人モードで処理する場合は、Schema ドロップダウンリストから **Unattended** を選択し、**OK** をクリックします。
 * エクスポートの前に認識結果を確認する必要がある場合は、**Schema** ドロップダウンリストから **Advanced** を選択します。次に、**Verification** を選択して **Edit…** ボタンをクリックします。**Workflow Stage Properties** ダイアログで、**Wait for all documents of a batch** と **Enable web stations** を選択し、**OK** をクリックします。