> ## Documentation Index
> Fetch the complete documentation index at: https://docs.abbyy.com/llms.txt
> Use this file to discover all available pages before exploring further.

# Configure a connection to ABBYY Vantage

> Configure the ABBYY Vantage server address and the OAuth 2.0 authentication profile in Pega so the connector can connect to ABBYY Vantage.

After you import the application and configure a case type, configure a connection to ABBYY Vantage. Set the ABBYY Vantage server address, and then set up the authentication profile.

## Configure the Vantage server address

<Steps>
  <Step title="Open the base URL setting">
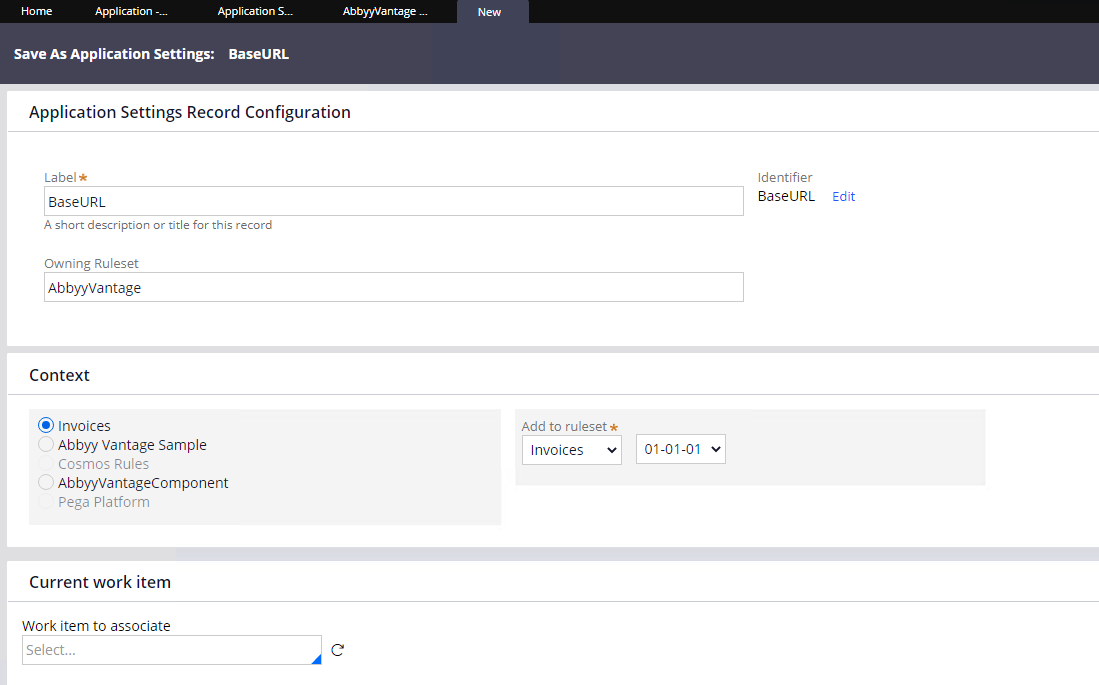
    Open **Records > SysAdmin > Application Settings** and select **AbbyyVantage – BaseURL**. Click **Save As**, save the rule in your application context, and then click **Create and open**.

    <Frame>
      <img src="https://mintcdn.com/abbyy/sAK9EyrYIxrZ9f2p/images/vantage/developer/connectors/pega/base-url-setting.png?fit=max&auto=format&n=sAK9EyrYIxrZ9f2p&q=85&s=820aa6ab26cb131428a548c9e3501b76" alt="AbbyyVantage – BaseURL application setting in Pega" width="1099" height="685" data-path="images/vantage/developer/connectors/pega/base-url-setting.png" />
    </Frame>
  </Step>

  <Step title="Specify the server address">
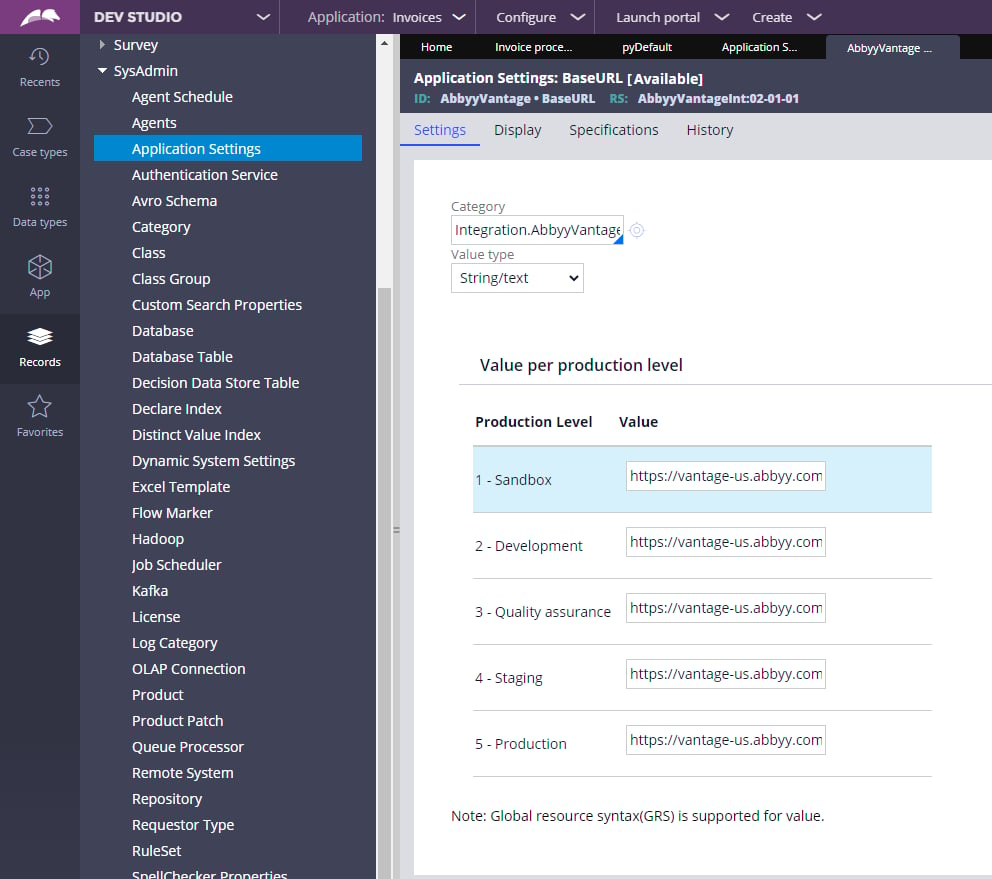
    Specify the address of the ABBYY Vantage server for each production level you intend to use. Do not add a slash (`/`) at the end of the server address.

    <Frame>
      <img src="https://mintcdn.com/abbyy/sAK9EyrYIxrZ9f2p/images/vantage/developer/connectors/pega/base-url-production-levels.png?fit=max&auto=format&n=sAK9EyrYIxrZ9f2p&q=85&s=63740e4d8702c9e5112df5b6d2b380ac" alt="ABBYY Vantage server address specified for each production level" width="992" height="879" data-path="images/vantage/developer/connectors/pega/base-url-production-levels.png" />
    </Frame>
  </Step>
</Steps>

Use the ABBYY Vantage server address for your region:

<CodeGroup>
  ```text US theme={null}
  https://vantage-us.abbyy.com
  ```

  ```text EU theme={null}
  https://vantage-eu.abbyy.com
  ```

  ```text AU theme={null}
  https://vantage-au.abbyy.com
  ```
</CodeGroup>

### Check the production level

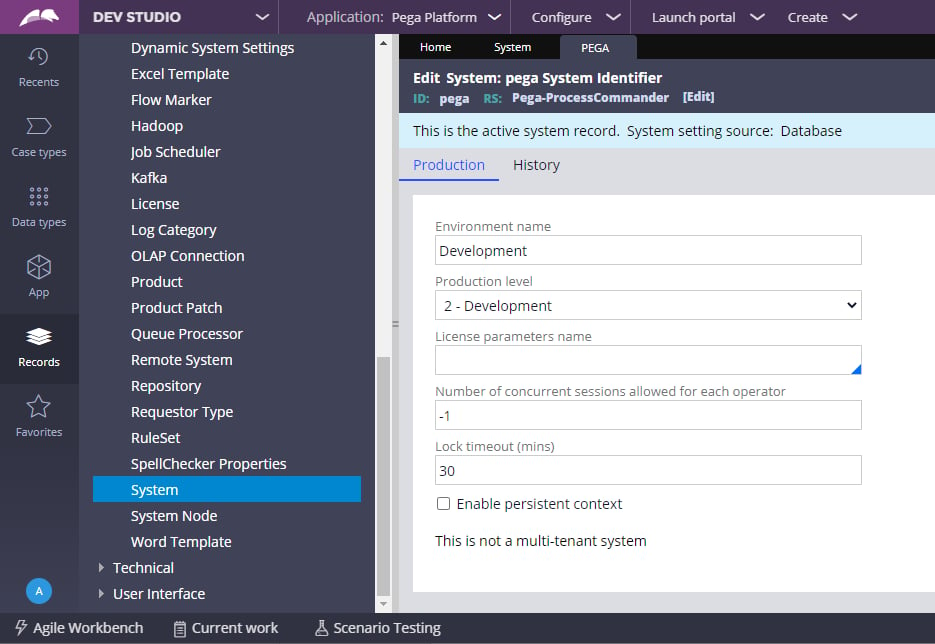
If you need to confirm the current production level of your system, complete these steps.

<Steps>
  <Step title="Switch to PRPC Admin">
    Switch to the **PRPC Admin** access group.
  </Step>

  <Step title="Open your system">
    Open **Dev Studio > SysAdmin > System** and select your system.

    <Frame>
      <img src="https://mintcdn.com/abbyy/sAK9EyrYIxrZ9f2p/images/vantage/developer/connectors/pega/check-production-level.png?fit=max&auto=format&n=sAK9EyrYIxrZ9f2p&q=85&s=b76f410c52ffd1a96d7ecb19321c487f" alt="Pega System settings showing the production level" width="935" height="644" data-path="images/vantage/developer/connectors/pega/check-production-level.png" />
    </Frame>
  </Step>
</Steps>

## Configure the Authentication Profile

The connector authenticates to ABBYY Vantage with an OAuth 2.0 client. Create a Public API Client in ABBYY Vantage, and then enter its credentials in the Pega authentication profile.

<Steps>
  <Step title="Create a Public API Client in ABBYY Vantage">
    In ABBYY Vantage, create a Public API Client and save its client ID and client secret. In the **OAuth 2.0 Flows Settings**, enable **Allow client credentials flow**, and assign the roles the connector needs with **Manage Roles**, such as **Skill User**. For more information, see [Configure a Public API client](/vantage/documentation/tenant-admin/tenant-management/configure-client).
  </Step>

  <Step title="Enter the client credentials in Pega">
    Open **Records > Security > Authentication Profile** and select the **AbbyyVantage** profile. Enter the client ID and client secret in the **Client identifier** and **Client secret** fields.
  </Step>

  <Step title="Save the authentication profile">
    Save the changes to the authentication profile.
  </Step>
</Steps>

### Set the access token endpoint

Specify the access token endpoint for your region:

<CodeGroup>
  ```text US theme={null}
  https://vantage-us.abbyy.com/auth2/connect/token
  ```

  ```text EU theme={null}
  https://vantage-eu.abbyy.com/auth2/connect/token
  ```

  ```text AU theme={null}
  https://vantage-au.abbyy.com/auth2/connect/token
  ```
</CodeGroup>

If the ABBYY Vantage user is registered in several tenants, include the tenant identifier in the endpoint:

<CodeGroup>
  ```text US theme={null}
  https://vantage-us.abbyy.com/auth2/<tenant-identifier>/connect/token
  ```

  ```text EU theme={null}
  https://vantage-eu.abbyy.com/auth2/<tenant-identifier>/connect/token
  ```

  ```text AU theme={null}
  https://vantage-au.abbyy.com/auth2/<tenant-identifier>/connect/token
  ```
</CodeGroup>

To find the tenant identifier, log in to the ABBYY Vantage tenant as a tenant administrator, open **Configuration > General**, and copy the tenant identifier.

## Next steps

Continue to [Process documents in a Pega case](/vantage/connectors/pega/process-documents).