> ## Documentation Index
> Fetch the complete documentation index at: https://docs.abbyy.com/llms.txt
> Use this file to discover all available pages before exploring further.
# Set up the sample Pega application
> Import the ABBYY Vantage sample Pega application, add it as a built-on application, and configure case types to process documents with ABBYY Vantage.
Set up the ABBYY Vantage Connector for Pega by importing the sample application, adding it to your own application as a built-on application, and configuring a case type to process documents.
Download the ABBYY Vantage Connector for Pega from the [ABBYY Marketplace](https://www.abbyy.com/marketplace/assets/host/abbyy/connector/pega/). The download is a ZIP archive containing a Pega application configured to work with ABBYY Vantage, along with sample images and a connector guide.
The sample application contains `AbbyyVantageComponent`, which includes:
* A set of Connect REST rules
* An authentication profile
* Dynamic System Settings used by the connector
* A **Process documents** case type that demonstrates how the connector works
* Data pages, data transforms, activities, flows, flow actions, and other rules
You can inspect these rules after importing the application.
## Import the application
Open Pega Dev Studio. In the upper area of the window, select **Configure > Application > Distribution > Import** to launch the Import wizard.
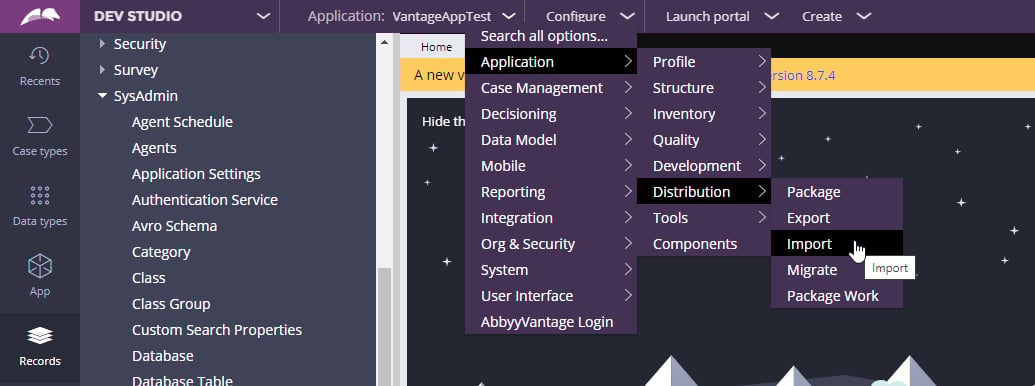 Import the `Abbyy_Vantage_Sample_App_v1.4.jar` file to the server.
### Grant access to the application
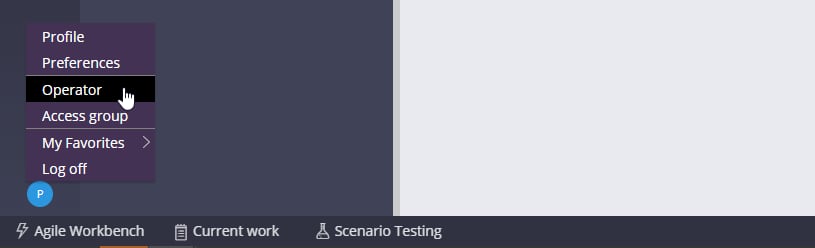
Open the menu for the appropriate operator. To choose the current operator, click the icon in the lower-left area of the window and select **Operator**. The **Edit Operator ID** window opens.
Import the `Abbyy_Vantage_Sample_App_v1.4.jar` file to the server.
### Grant access to the application
Open the menu for the appropriate operator. To choose the current operator, click the icon in the lower-left area of the window and select **Operator**. The **Edit Operator ID** window opens.
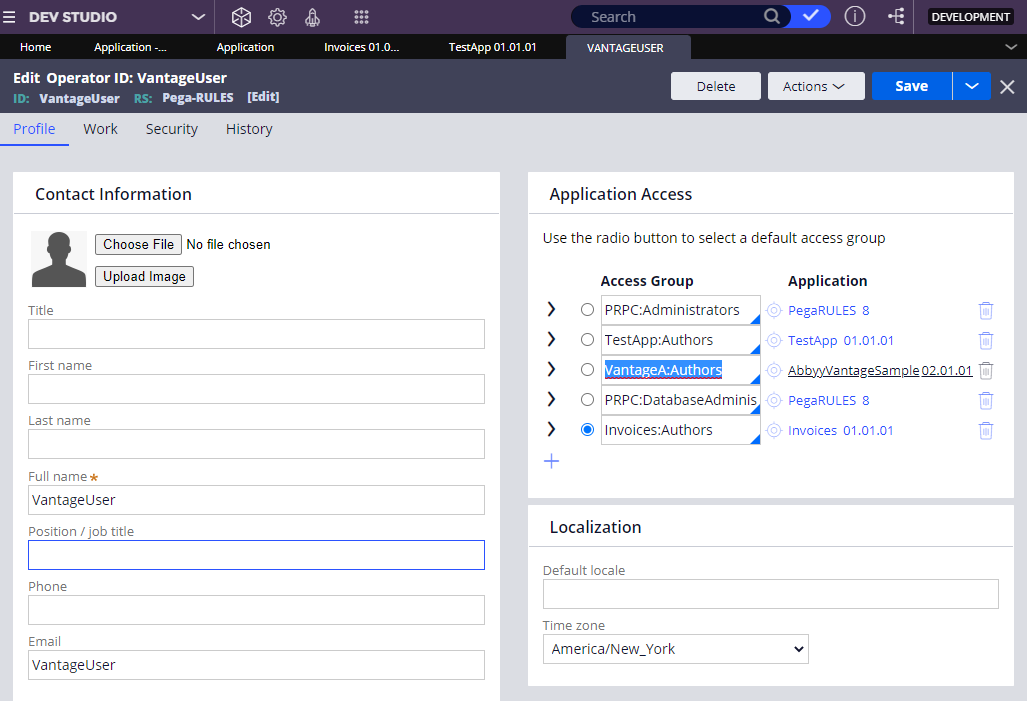
 In the **Application Access** section of the **Edit Operator ID** window, add the `VantageA:Authors` access group.
 Log out and log in again. The application then appears in the **Application > Switch Application** menu.
## Add AbbyyVantageSample to built-on applications
If you have a Pega application already, proceed with this section. Otherwise, jump to [Configure a connection to ABBYY Vantage](/vantage/connectors/pega/configure-connection) to continue setup with the `AbbyyVantageSample` application directly.
After `AbbyyVantageSample` is imported, add it as a built-on application to your own application. This lets you reuse the sample application's elements in your application.
The sample application is built on the Theme Cosmos UI. If your application uses a different UI, create a new application with the Theme Cosmos UI and follow this section to configure it. If your Pega project has a different UI configuration or a headless implementation, you can invoke the process flow and data model of the ABBYY Vantage component and configure the sections according to your business scenario.
Navigate to **Records > Application Definition > Application** and open your application.
In the **Built on applications** section of the **Definition** tab, click **+Add application**. Enter `AbbyyVantageSample` in the **Name** field and select `02.01.01` in the **Version** field.
Log out and log in again. The application then appears in the **Application > Switch Application** menu.
## Add AbbyyVantageSample to built-on applications
If you have a Pega application already, proceed with this section. Otherwise, jump to [Configure a connection to ABBYY Vantage](/vantage/connectors/pega/configure-connection) to continue setup with the `AbbyyVantageSample` application directly.
After `AbbyyVantageSample` is imported, add it as a built-on application to your own application. This lets you reuse the sample application's elements in your application.
The sample application is built on the Theme Cosmos UI. If your application uses a different UI, create a new application with the Theme Cosmos UI and follow this section to configure it. If your Pega project has a different UI configuration or a headless implementation, you can invoke the process flow and data model of the ABBYY Vantage component and configure the sections according to your business scenario.
Navigate to **Records > Application Definition > Application** and open your application.
In the **Built on applications** section of the **Definition** tab, click **+Add application**. Enter `AbbyyVantageSample` in the **Name** field and select `02.01.01` in the **Version** field.
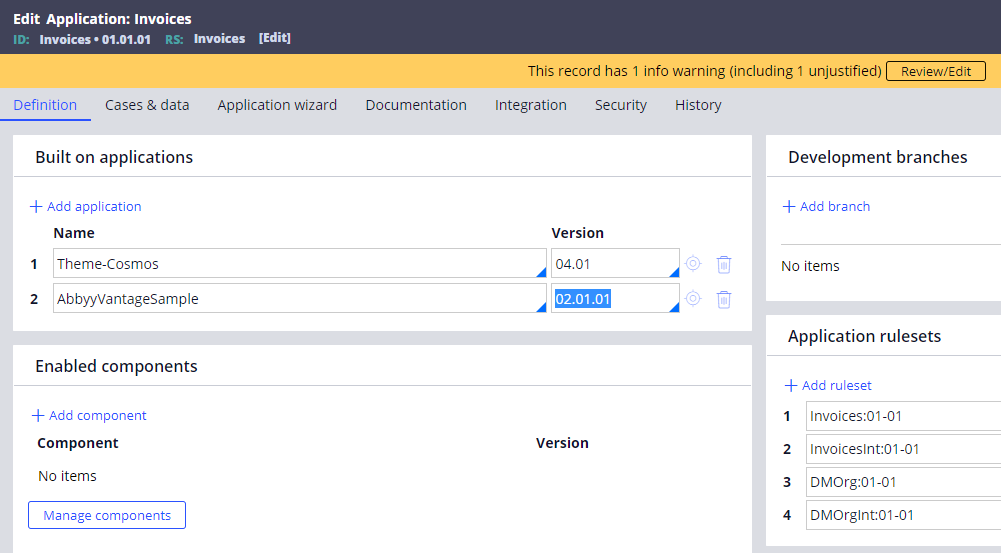 Save the application. You can now reuse the elements of `AbbyyVantageSample`.
### Inspect the component rules
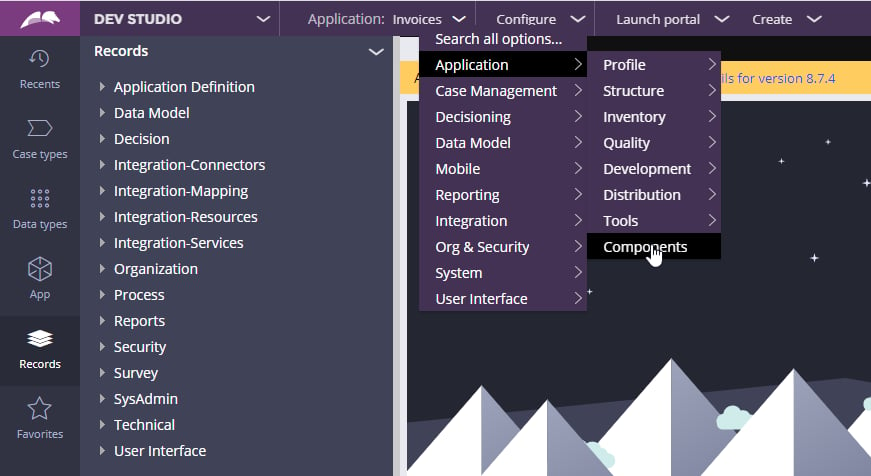
Open **Configure > Application > Components**.
Save the application. You can now reuse the elements of `AbbyyVantageSample`.
### Inspect the component rules
Open **Configure > Application > Components**.
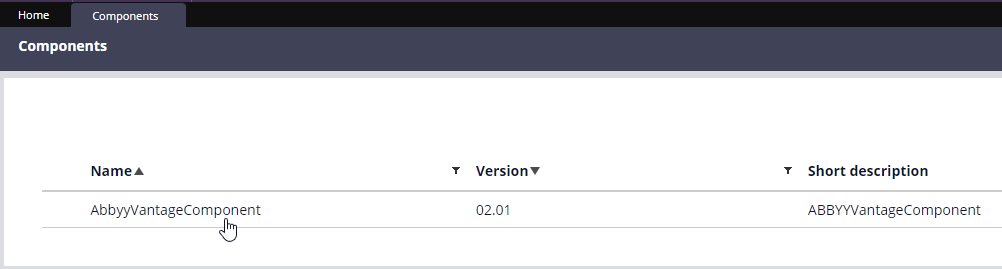
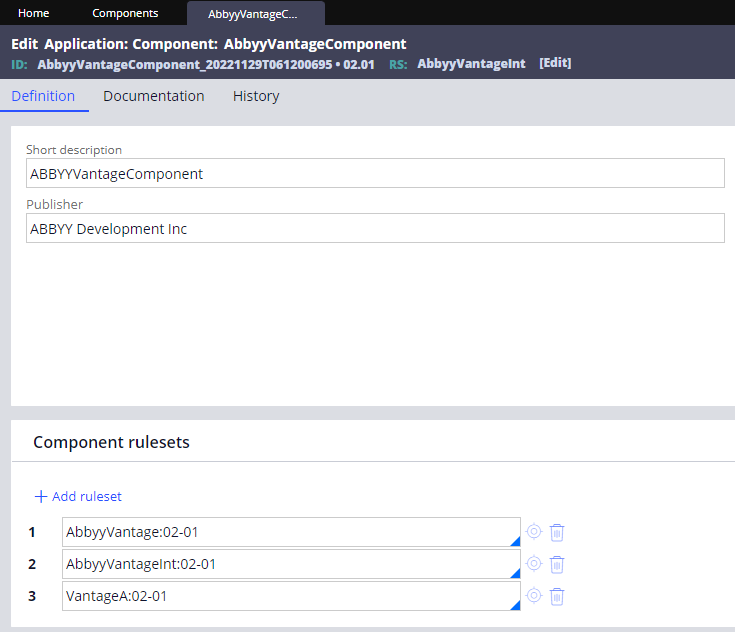
 Open `AbbyyVantageComponent`, and then open the rulesets in the **Component rulesets** section to inspect the rules.
 ## Create and configure case types
When `AbbyyVantageSample` is added to your application's built-on applications, create a case type to process documents with ABBYY Vantage.
### Create a case type and set inheritance
Switch to your application, which already has `AbbyyVantageSample` added as a built-on application. Go to the **Case types** menu and create a case type (for example, Invoice processing).
## Create and configure case types
When `AbbyyVantageSample` is added to your application's built-on applications, create a case type to process documents with ABBYY Vantage.
### Create a case type and set inheritance
Switch to your application, which already has `AbbyyVantageSample` added as a built-on application. Go to the **Case types** menu and create a case type (for example, Invoice processing).
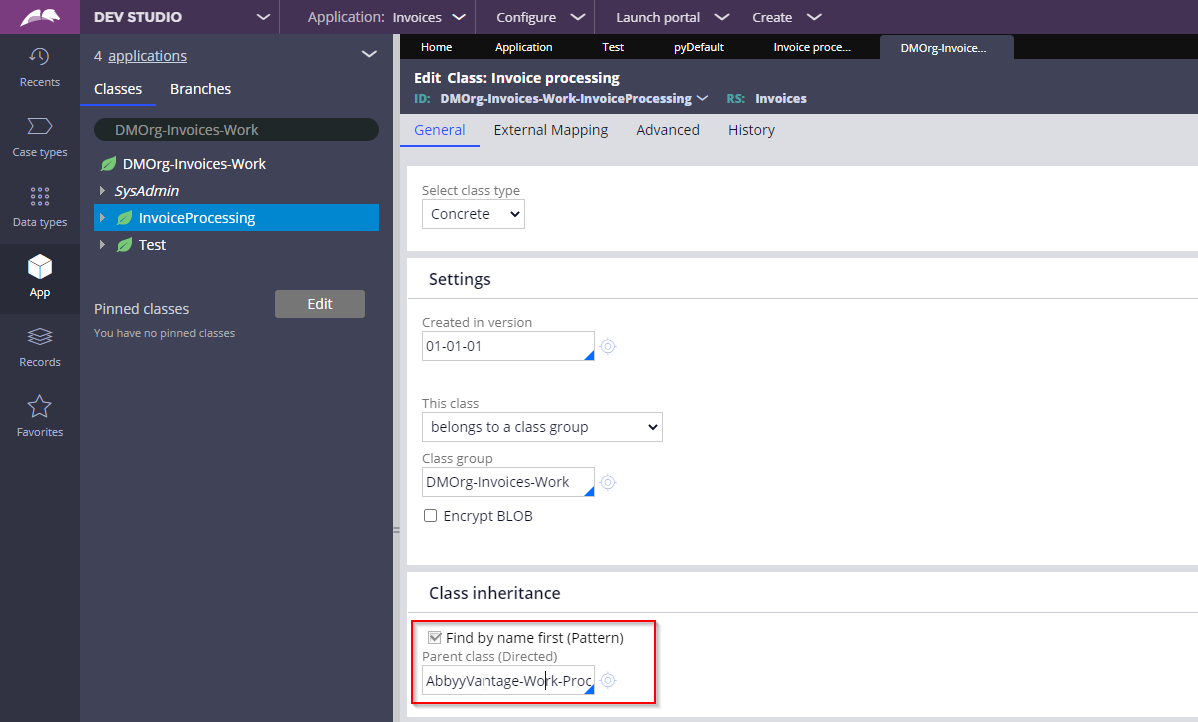
 Go to the **App** menu. On the **Classes** tab, right-click the class of the created case type, and then select **Definition**.
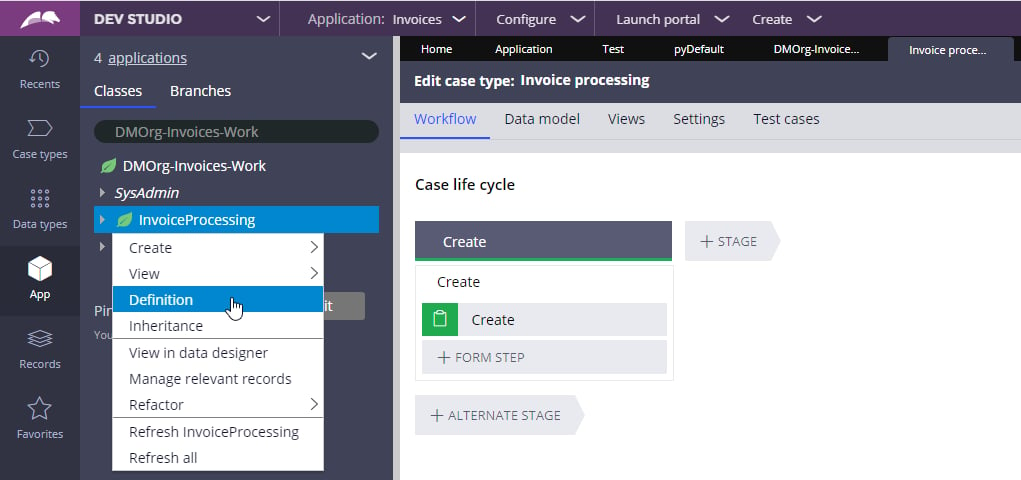 In the **Class inheritance** section, change inheritance to `AbbyyVantage-Work-ProcessDocuments`, and then save the definition.
 ### Add steps to the case workflow
Open the **Case types** menu, right-click the created case type, and select **Open**. Open the **Stages** tab.
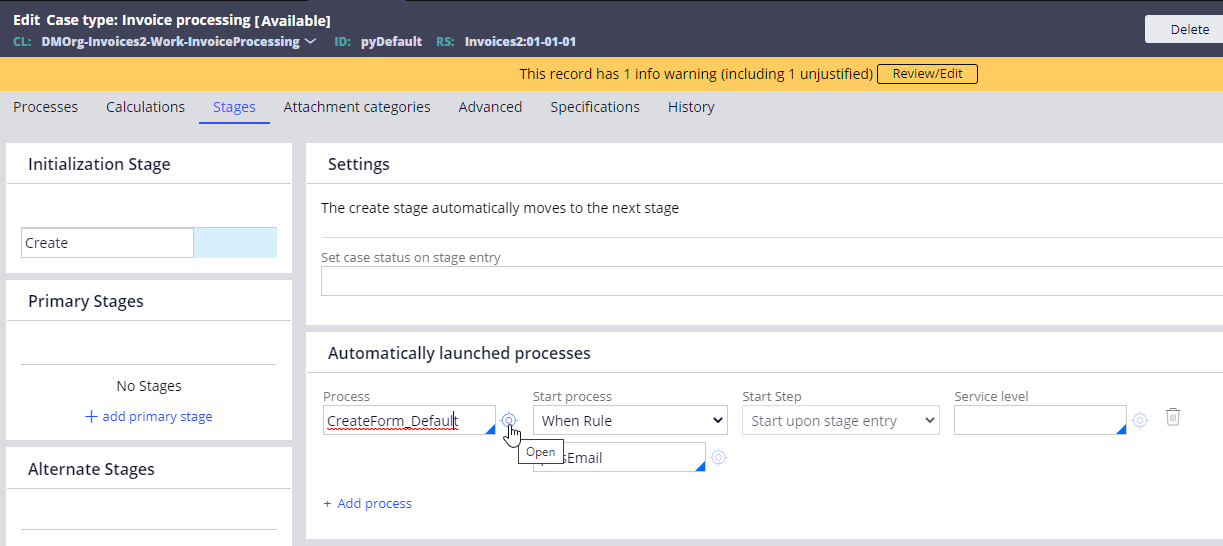
In the **Initialization Stage** section, select **Create**. In the **Automatically launched processes** section, open the default `CreateForm_Default` process and delete it. Then select `CreateForm_Default (AbbyyVantage-Work-ProcessDocuments)` for the **Create** initialization stage.
### Add steps to the case workflow
Open the **Case types** menu, right-click the created case type, and select **Open**. Open the **Stages** tab.
In the **Initialization Stage** section, select **Create**. In the **Automatically launched processes** section, open the default `CreateForm_Default` process and delete it. Then select `CreateForm_Default (AbbyyVantage-Work-ProcessDocuments)` for the **Create** initialization stage.
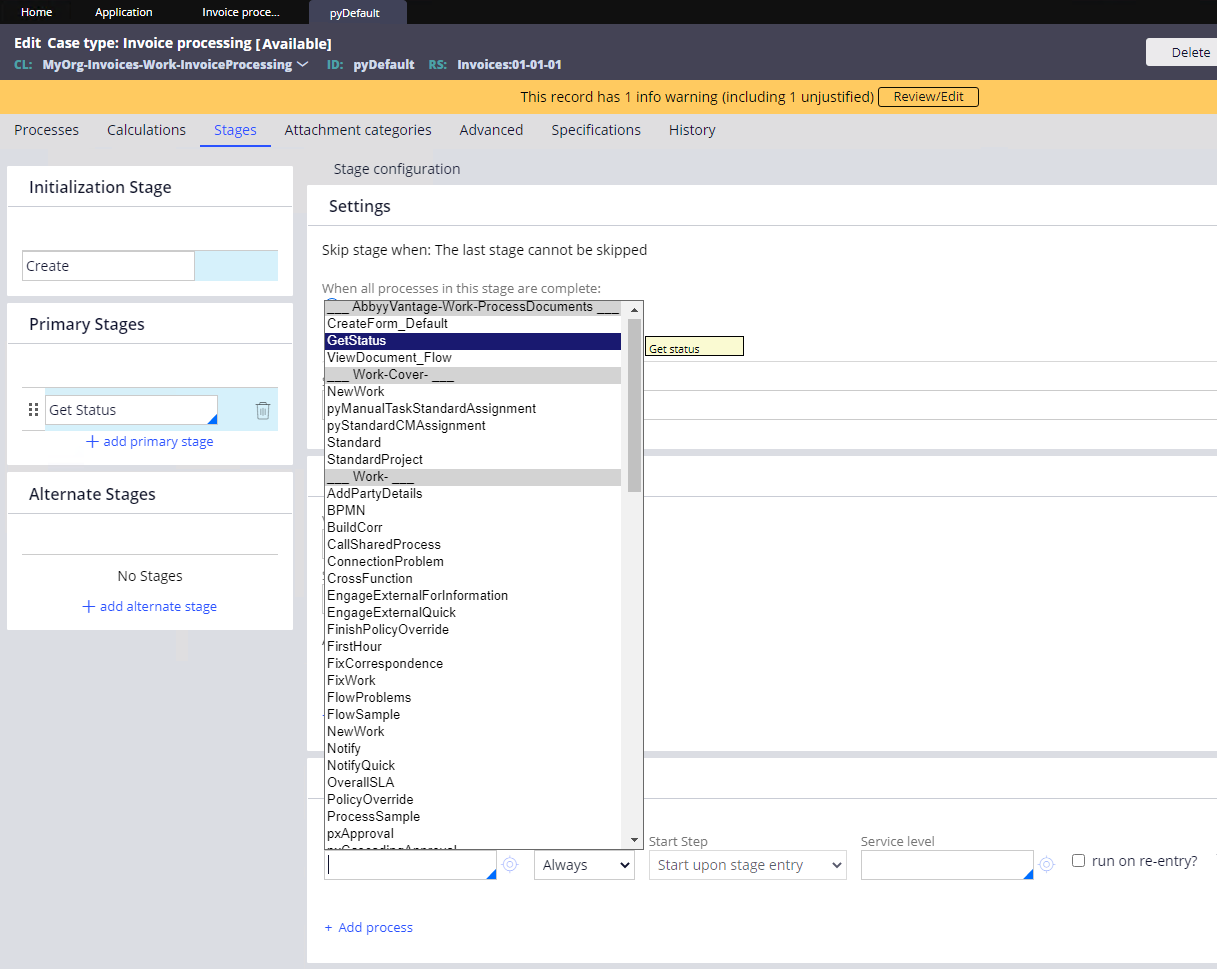
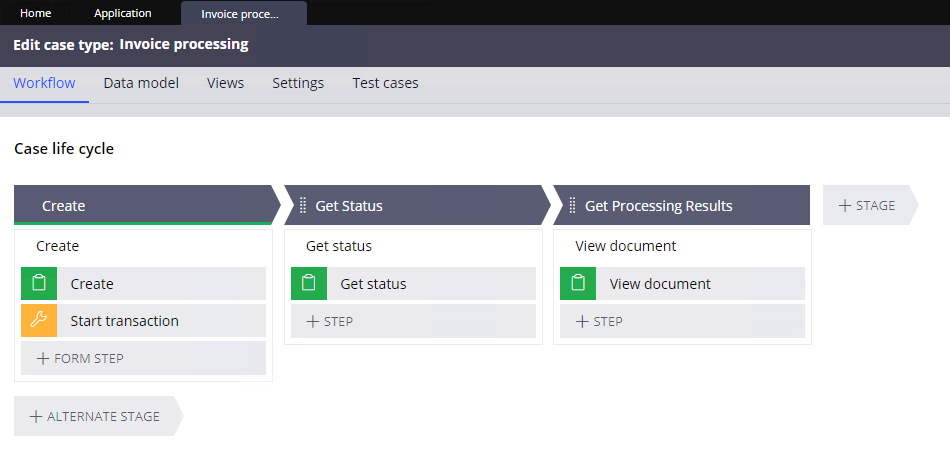
 Add a primary stage and name it (for example, Get Status). With this stage in focus, select `GetStatus (AbbyyVantage-Work-ProcessDocuments)` in the **Automatically launched processes** section.
 Add another primary stage and name it (for example, Get Processing Results). With this stage in focus, select `ViewDocument_Flow (AbbyyVantage-Work-ProcessDocuments)` in the **Automatically launched processes** section, and then save the case type.
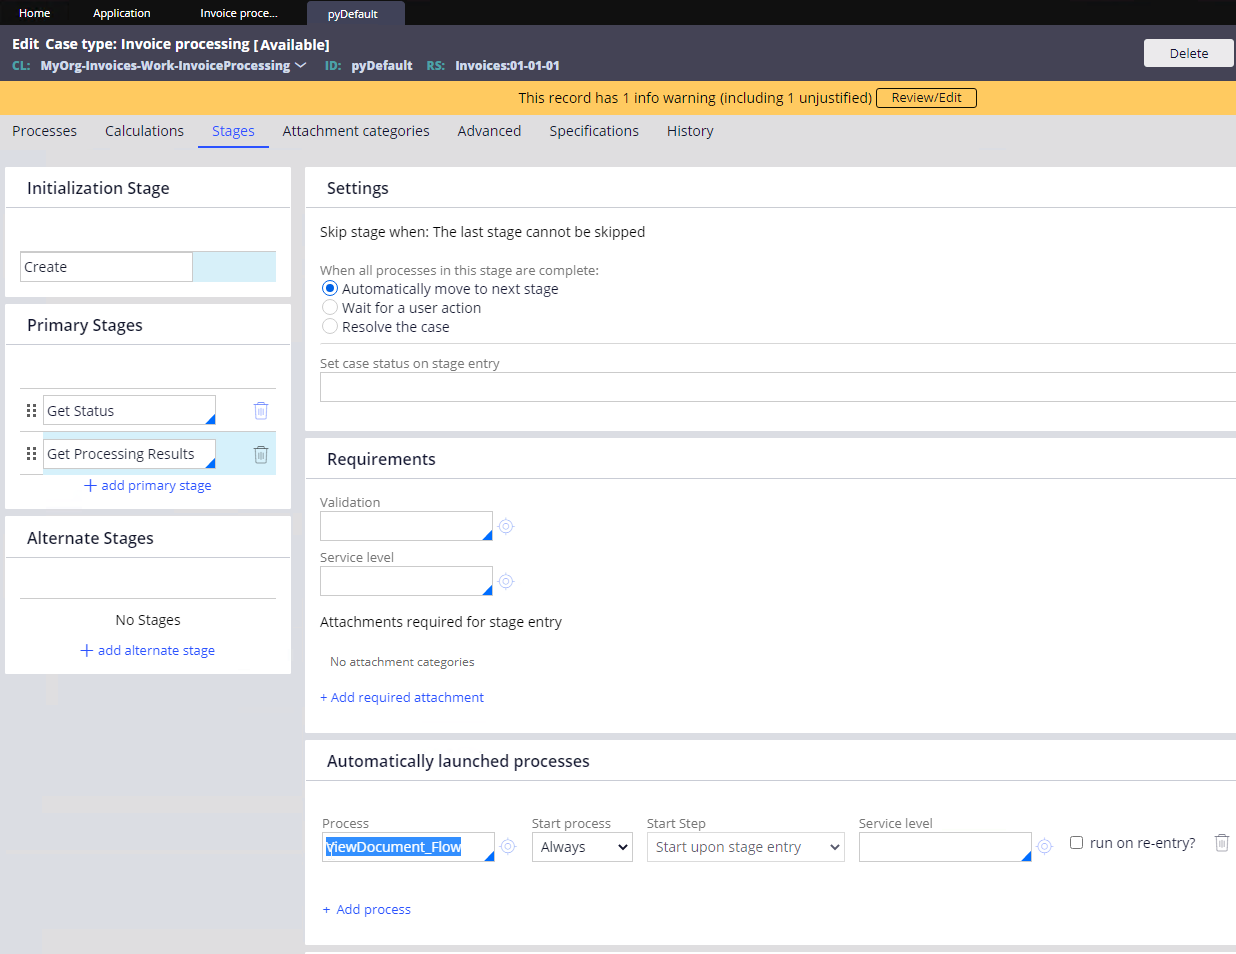 Once all stages are added, the case type workflow appears as follows:
 ### Add a section to the application context
Navigate to **Records > User Interface > Section**. Find and open the **Create** section for the `AbbyyVantage:02-01-01` ruleset version.
### Add a section to the application context
Navigate to **Records > User Interface > Section**. Find and open the **Create** section for the `AbbyyVantage:02-01-01` ruleset version.
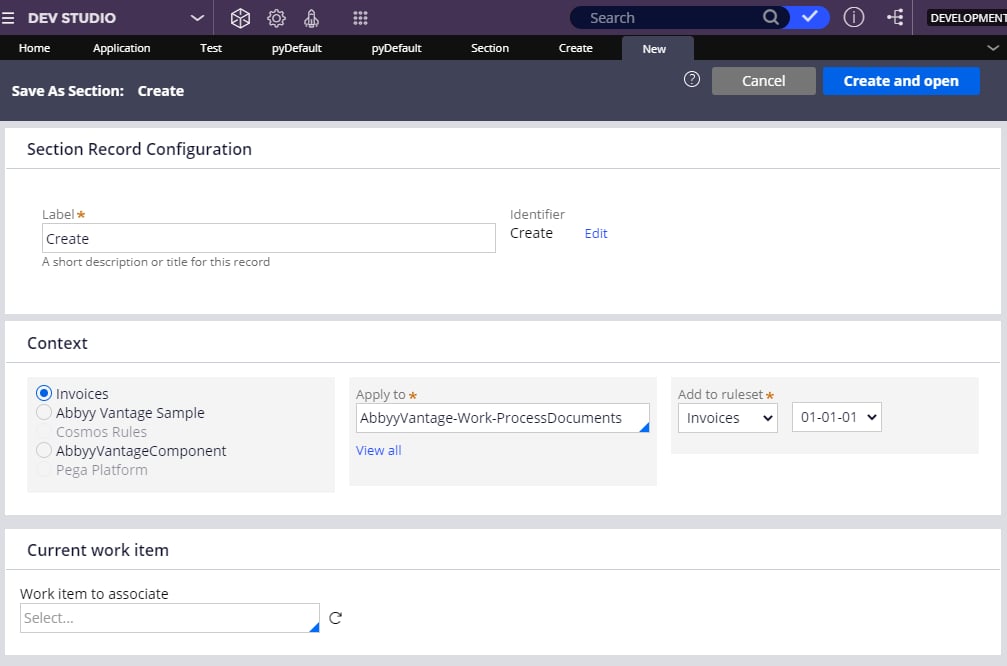
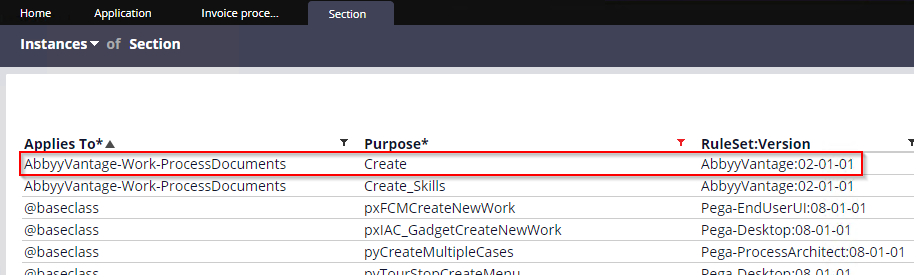 Click **Save As**. In the window that opens, ensure your application and its ruleset are selected in the **Context** section. Click **Create and open**, and then save the **Create** section.
 ## Next steps
Continue to [Configure a connection to ABBYY Vantage](/vantage/connectors/pega/configure-connection).
## Next steps
Continue to [Configure a connection to ABBYY Vantage](/vantage/connectors/pega/configure-connection).