> ## Documentation Index
> Fetch the complete documentation index at: https://docs.abbyy.com/llms.txt
> Use this file to discover all available pages before exploring further.
# Creating, configuring, and deleting a Public API client
> Create, configure, and delete Public API Clients in the ABBYY Vantage UI — manage client secrets, redirect URIs, OAuth 2.0 flows, and token lifetimes.
Use the Vantage UI to create, configure, and delete Public API Clients that integrating applications use to authenticate to the Vantage API.
Only a **Tenant Administrator** can create or manage Public API Clients.
## Creating a Public API Client
In Vantage, click **Configuration** in the left pane.
In the **Tenant Administration** dialog box, do one of the following:
* **First client in this tenant:** click **Create API Client**.
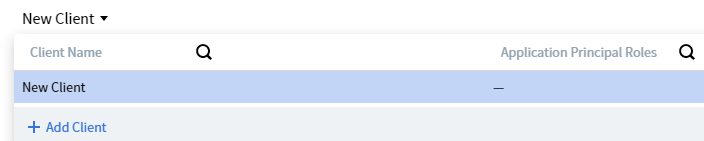
* **Any subsequent client:** click **Public API Client**, then on the **Public API Client** page open the **New Client** drop-down list and click **Add Client**.
 In the **Client Created** dialog, copy each value by clicking its **copy** icon. Alternatively, click **Save to File** to download a TXT file containing both values.
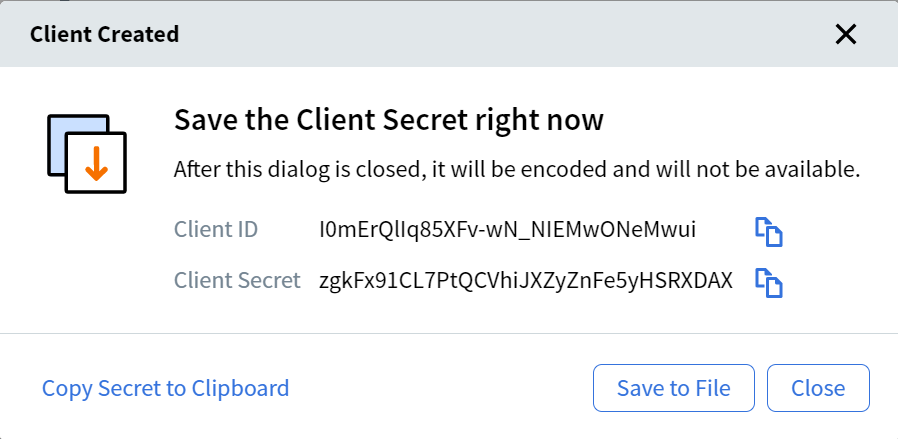 The Client Secret is shown only once, at creation. Save it immediately — you won't be able to view the full value again.
Click **Close**. The **Public API Client** page opens, where you can configure the new client.
## Configuring a Public API Client
After creating a Public API Client, configure its settings.
To open a client's settings, click the client's name on the **Public API Client** page, or search by client name or application principal roles.
The Client Secret is shown only once, at creation. Save it immediately — you won't be able to view the full value again.
Click **Close**. The **Public API Client** page opens, where you can configure the new client.
## Configuring a Public API Client
After creating a Public API Client, configure its settings.
To open a client's settings, click the client's name on the **Public API Client** page, or search by client name or application principal roles.
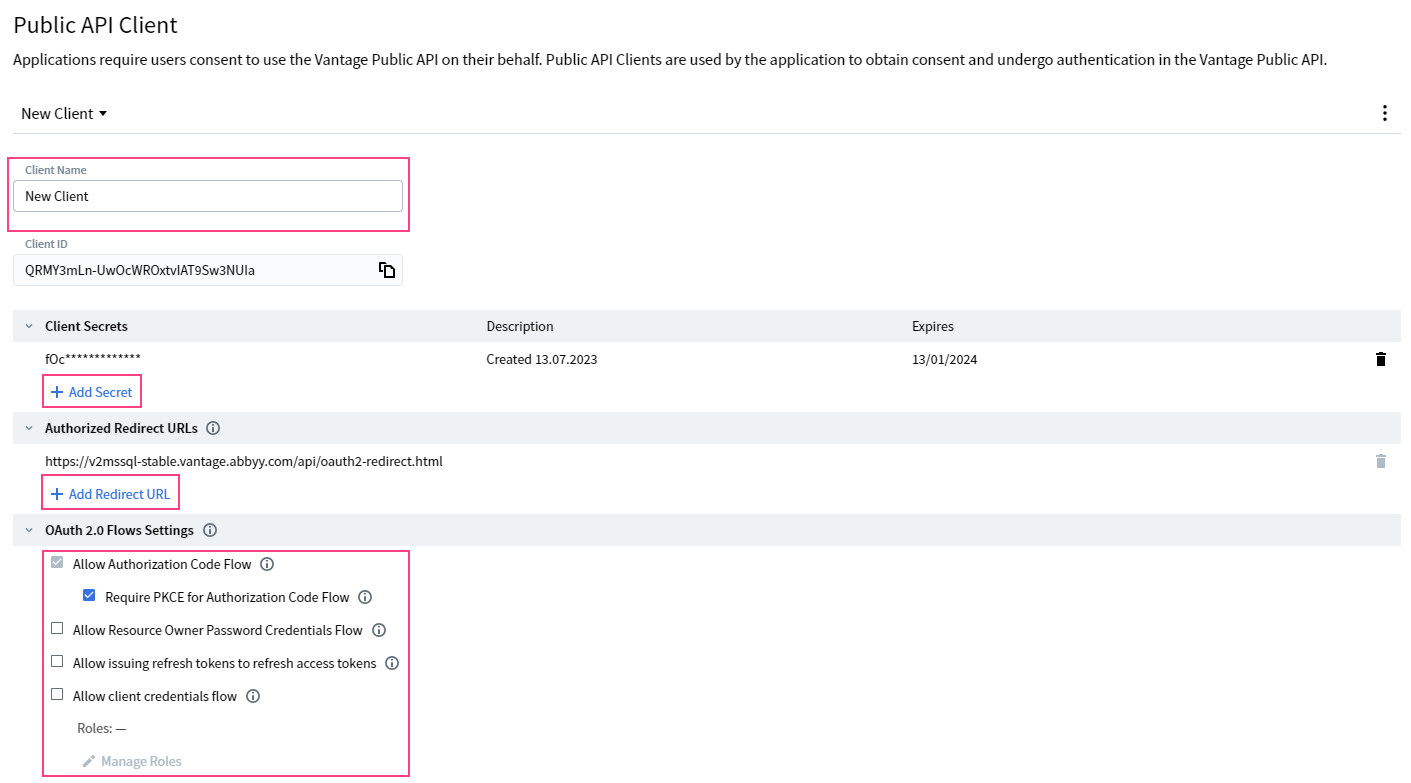 In the **Client Name** field, enter a name that identifies this client.
Click **Add Secret** to create a new client secret. By default, the new secret expires in 6 months — you can set the expiration from 1 day up to 36 months.
Click **Add Redirect URL** and enter each URL you want to allow authorization redirects to.
In the **OAuth 2.0 Flows Settings** section, select one or more flows the client can use:
* **Allow Authorization Code Flow** — a secure authentication scheme where the application sends the authentication request directly to the Vantage authorization server. The server verifies credentials and returns an authorization code. This flow is enabled for all Vantage API clients.
* **Require PKCE for Authorization Code Flow** — strengthens security for public clients by letting Vantage verify that the application requesting the access token is the same one that initiated authentication.
* **Allow Resource Owner Password Credentials Flow** — lets users authenticate with their username and password. The application has direct access to the user's password, so use this only with applications the user fully trusts.
* **Allow issuing refresh tokens to refresh access tokens** — lets the client issue refresh tokens to renew access tokens without prompting the user. Applications must store refresh tokens securely.
* **Allow client credentials flow** — grants applications access to the Vantage API via the OAuth 2.0 Client Credentials flow. Roles are determined by the **Manage Roles** setting below this option.
The Resource Owner Password Credentials flow does not work when an External Identity Provider is configured. See [Authentication](/vantage/documentation/tenant-admin/tenant-management/authentication).
In the **Token Lifetime Settings** section, configure:
* **Access Token** — the period during which an issued access token grants access to Vantage. Default: 24 hours.
* **Refresh Token** — the absolute period starting from the issuance of the first access token, during which the refresh token can renew the access token. Default: 30 days.
For more information about authentication flows, see [Authentication](/vantage/documentation/tenant-admin/tenant-management/authentication).
## Deleting a Public API Client
To delete a client, click its icon on the **Public API Client** page, then click **Delete Client**.
In the **Client Name** field, enter a name that identifies this client.
Click **Add Secret** to create a new client secret. By default, the new secret expires in 6 months — you can set the expiration from 1 day up to 36 months.
Click **Add Redirect URL** and enter each URL you want to allow authorization redirects to.
In the **OAuth 2.0 Flows Settings** section, select one or more flows the client can use:
* **Allow Authorization Code Flow** — a secure authentication scheme where the application sends the authentication request directly to the Vantage authorization server. The server verifies credentials and returns an authorization code. This flow is enabled for all Vantage API clients.
* **Require PKCE for Authorization Code Flow** — strengthens security for public clients by letting Vantage verify that the application requesting the access token is the same one that initiated authentication.
* **Allow Resource Owner Password Credentials Flow** — lets users authenticate with their username and password. The application has direct access to the user's password, so use this only with applications the user fully trusts.
* **Allow issuing refresh tokens to refresh access tokens** — lets the client issue refresh tokens to renew access tokens without prompting the user. Applications must store refresh tokens securely.
* **Allow client credentials flow** — grants applications access to the Vantage API via the OAuth 2.0 Client Credentials flow. Roles are determined by the **Manage Roles** setting below this option.
The Resource Owner Password Credentials flow does not work when an External Identity Provider is configured. See [Authentication](/vantage/documentation/tenant-admin/tenant-management/authentication).
In the **Token Lifetime Settings** section, configure:
* **Access Token** — the period during which an issued access token grants access to Vantage. Default: 24 hours.
* **Refresh Token** — the absolute period starting from the issuance of the first access token, during which the refresh token can renew the access token. Default: 30 days.
For more information about authentication flows, see [Authentication](/vantage/documentation/tenant-admin/tenant-management/authentication).
## Deleting a Public API Client
To delete a client, click its icon on the **Public API Client** page, then click **Delete Client**.
 ## Related topics
Overview of API client management in your tenant
Sign-in flows and OAuth 2.0 / SAML 2.0 options
## Related topics
Overview of API client management in your tenant
Sign-in flows and OAuth 2.0 / SAML 2.0 options