사전 준비 사항
- ID를 구성하기 전에 Vantage 테넌트 식별자가 있는지 확인합니다. 테넌트 식별자를 얻으려면 ABBYY Vantage에서 Configuration을 클릭합니다. 식별자는 General 탭에 있습니다.
- 인증 응답을 수신할 리디렉션 URI를 생성합니다. URI는 다음과 같습니다:
https://<your-vantage-url>/auth2/Saml2/Acs
설정
Claim 설명 추가
- 관리 콘솔을 엽니다.
- Service > Claim Descriptions를 선택합니다. Add Claim Description을 클릭합니다.
- 필수 field에 값을 입력합니다:
- 표시 이름을 지정합니다(예: Persistent Identifier).
- claim 유형을 지정합니다:
urn:oasis:names:tc:SAML:2.0:nameid-format:persistent. - Publish this claim description in federation metadata as a claim type that this federation service can accept를 선택합니다.
- Publish this claim description in federation metadata as a claim type that this federation service can send를 선택합니다.
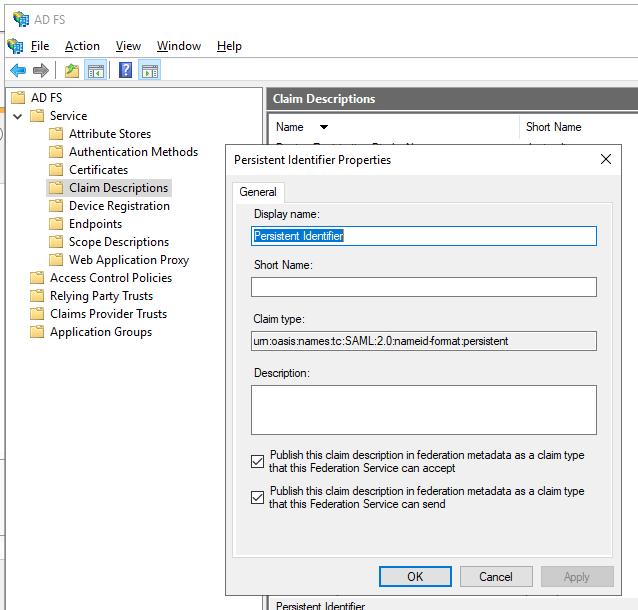
- OK를 클릭합니다.
Relying Party Trust 구성
- 콘솔 트리의 AD FS 아래에서 Trust Relationships > Relying Party Trusts > Add Relying Party Trust를 선택합니다.
- Welcome 페이지에서 Claims aware를 선택한 후 Start를 선택합니다.
- Select Data Source 페이지에서 Enter data about the relying party manually를 선택한 다음 Next를 선택합니다.
- Specify Display Name 페이지에서 Display Name에 임의의 이름을 입력한 후 Next를 선택합니다.
- Choose Profile 페이지에서 ADFS 2.0 프로필을 선택한 다음 Next를 클릭합니다.
- Configure Certificate 페이지에서 Next를 클릭합니다.
- Configure URL 페이지에서 Enable support for the SAML 2.0 WebSSO protocol을 선택합니다. Relying party SAML 2.0 SSO service URL 아래에
https://<your-vantage-url>/auth2/Saml2/Acs를 입력한 다음 Next를 클릭합니다. - ID를 구성하려면 다음 단계를 따르십시오:
- Relying party trust identifier 아래에
api://platform.abbyy.cloud/tenantId를 입력합니다. 여기서 tenantId는 GUID 형식의 테넌트 식별자이며 하이픈 없이 입력해야 합니다(예: 117489fc1aea41658369d4d18d6557ga). 이 값은 인증을 위한 Application ID URI로 사용됩니다. 이 값은 Vantage에서 External Identity Provider를 구성할 때 필요하므로 복사해 두십시오. 그런 다음 Add를 클릭합니다. - Expose an API 탭에서 Application ID URI를 위에서 입력한 값과 동일하게 설정합니다(예:
api://a37892f6-c2e9-4092-b804-d054741da4da). Add를 클릭한 다음 Next를 클릭합니다.
- Relying party trust identifier 아래에
- 모든 사용자에게 Vantage에 대한 액세스 권한을 부여하려면 Choose Issuance Authorization Rules 창에서 Permit all users to access this relying party를 선택합니다. 특정 그룹에만 액세스 권한을 부여하려면 Permit specific group을 선택하고 원하는 그룹을 지정합니다. 그런 다음 Next를 클릭합니다.
- Ready to Add Trust 페이지에서 설정을 검토합니다. Next를 클릭한 다음 Close를 클릭합니다.
들어오는 클레임을 변환하는 규칙 추가
- Relying Party Trusts를 클릭합니다.
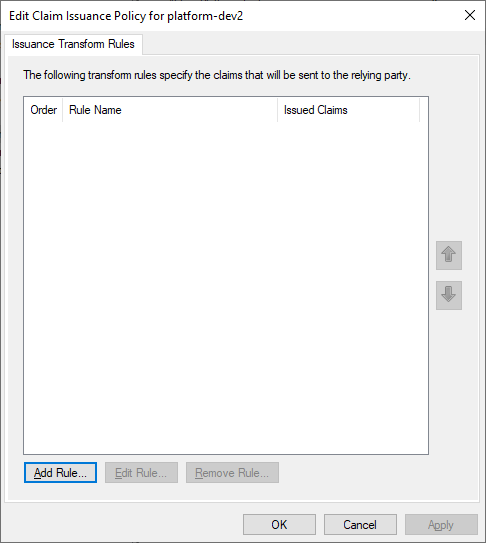
- 선택한 트러스트를 마우스 오른쪽 버튼으로 클릭한 다음 Edit Claim Issuance Policy를 클릭합니다.
- 열리는
Edit Claim Issuance Policy for <name>창에서 Add Rule을 클릭합니다.
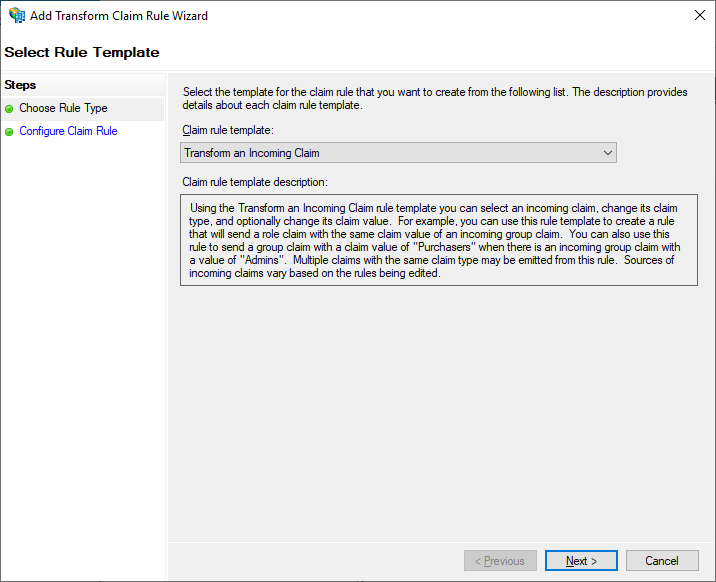
- Transform an Incoming Claim 클레임 규칙 템플릿을 선택한 다음 Next를 클릭합니다.
- Configure Claim Rule 단계에서 다음을 설정합니다.
- Claim rule name에서 TransformWindows account name을 지정합니다.
- Incoming claim type에서 Windows account name을 선택합니다.
- Outgoing claim type에서 Name ID를 선택합니다.
- Outgoing name ID format에서 Persistent Identifier를 선택합니다.
- Pass through all claim values를 선택합니다.
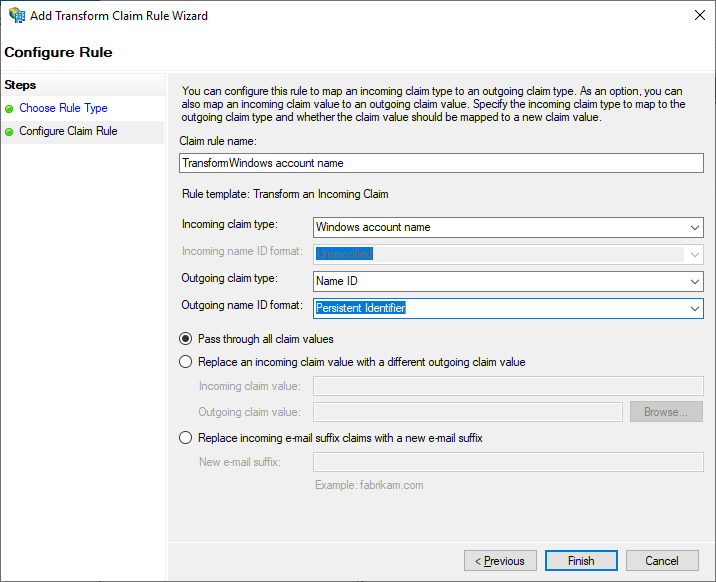
- Finish를 클릭합니다.
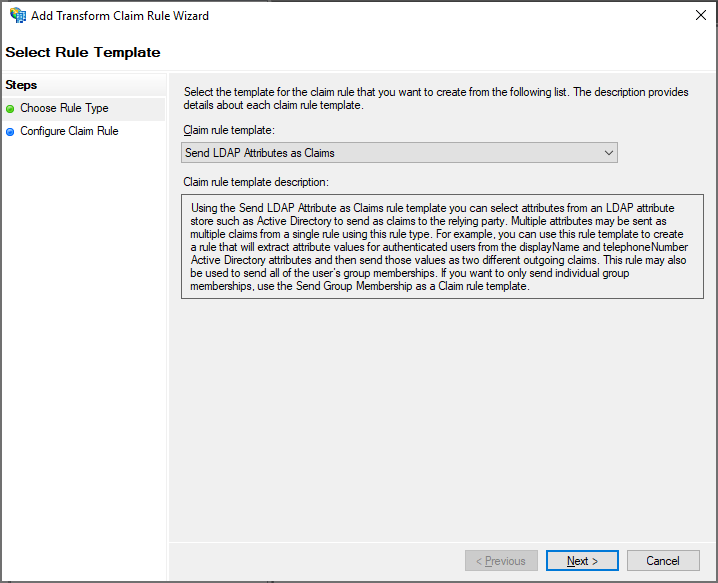
- 발급된 토큰에 e-mail 및 name 클레임이 포함되도록 다른 규칙을 추가합니다. Select Rule Template 페이지에서 Claim rule template 아래의 Send LDAP Attributes as Claims를 선택한 다음 Next를 클릭합니다.
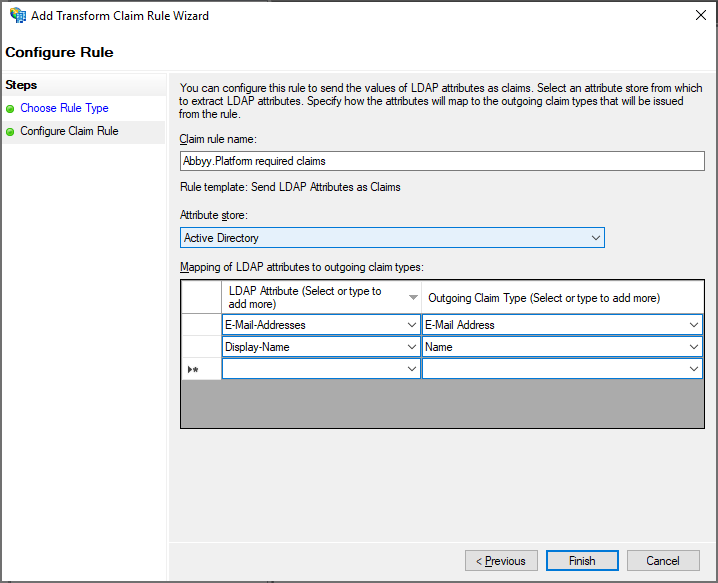
- Configure Claim Rule 페이지에서 Claim rule name 아래의 Active Directory attribute store를 선택한 다음 Finish를 클릭합니다.
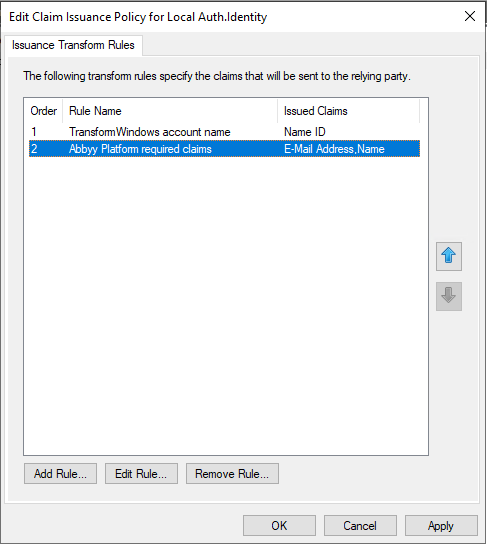
- 추가된 규칙은 Edit Claim Rules 대화 상자에 표시됩니다.
다음 단계
https://<adfs_server_address>/federationmetadata/2007-06/federationmetadata.xml. 예를 들어, https://adfs.platform.local/federationmetadata/2007-06/federationmetadata.xml과 같습니다.
자세한 내용은 테넌트에 대한 외부 ID 공급자 설정을 참조하십시오.