Run the installer
Run
ABBYYVantageConnectorForUiPath.<version>.exe and follow the instructions of the Installation Wizard. During the installation, specify the connector installation folder. By default, it is set to C:\Program Files\ABBYY Vantage Connector for UiPath.
Enable the nuget.org package source
Make sure the nuget.org package source is enabled. This package source is required in order to install some dependencies for the connector package.
Create a new package source
Go to the Settings tab of the Manage Packages window and create a new package source: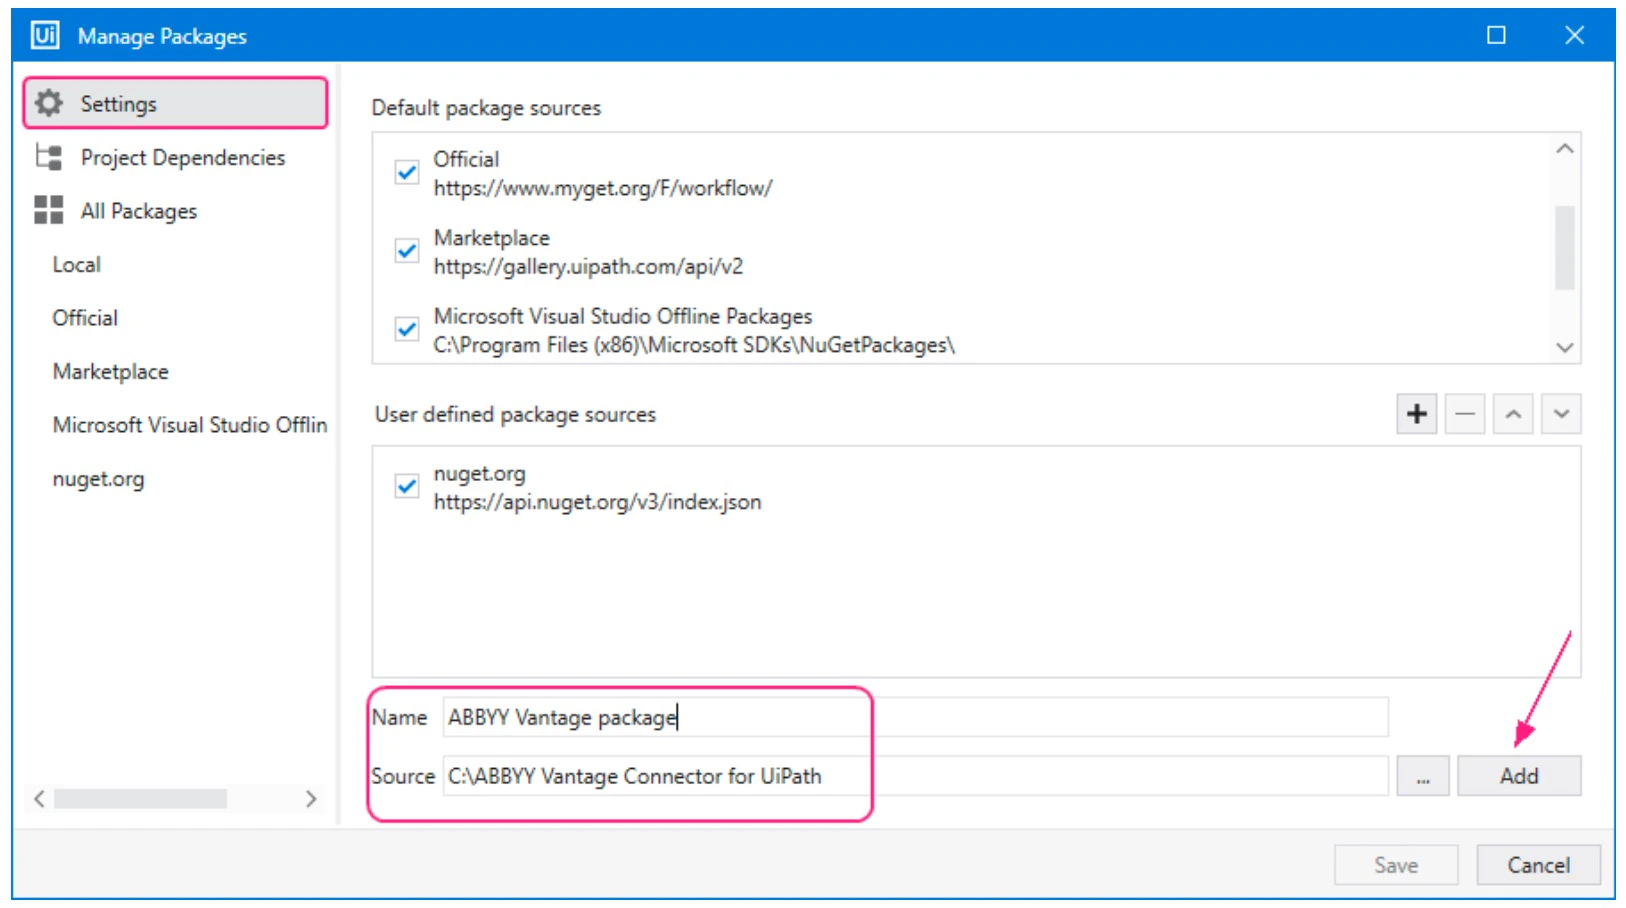
- Enter a name for the new package source.
- Specify the path to the folder where you intend to place the connector NuGet packages.
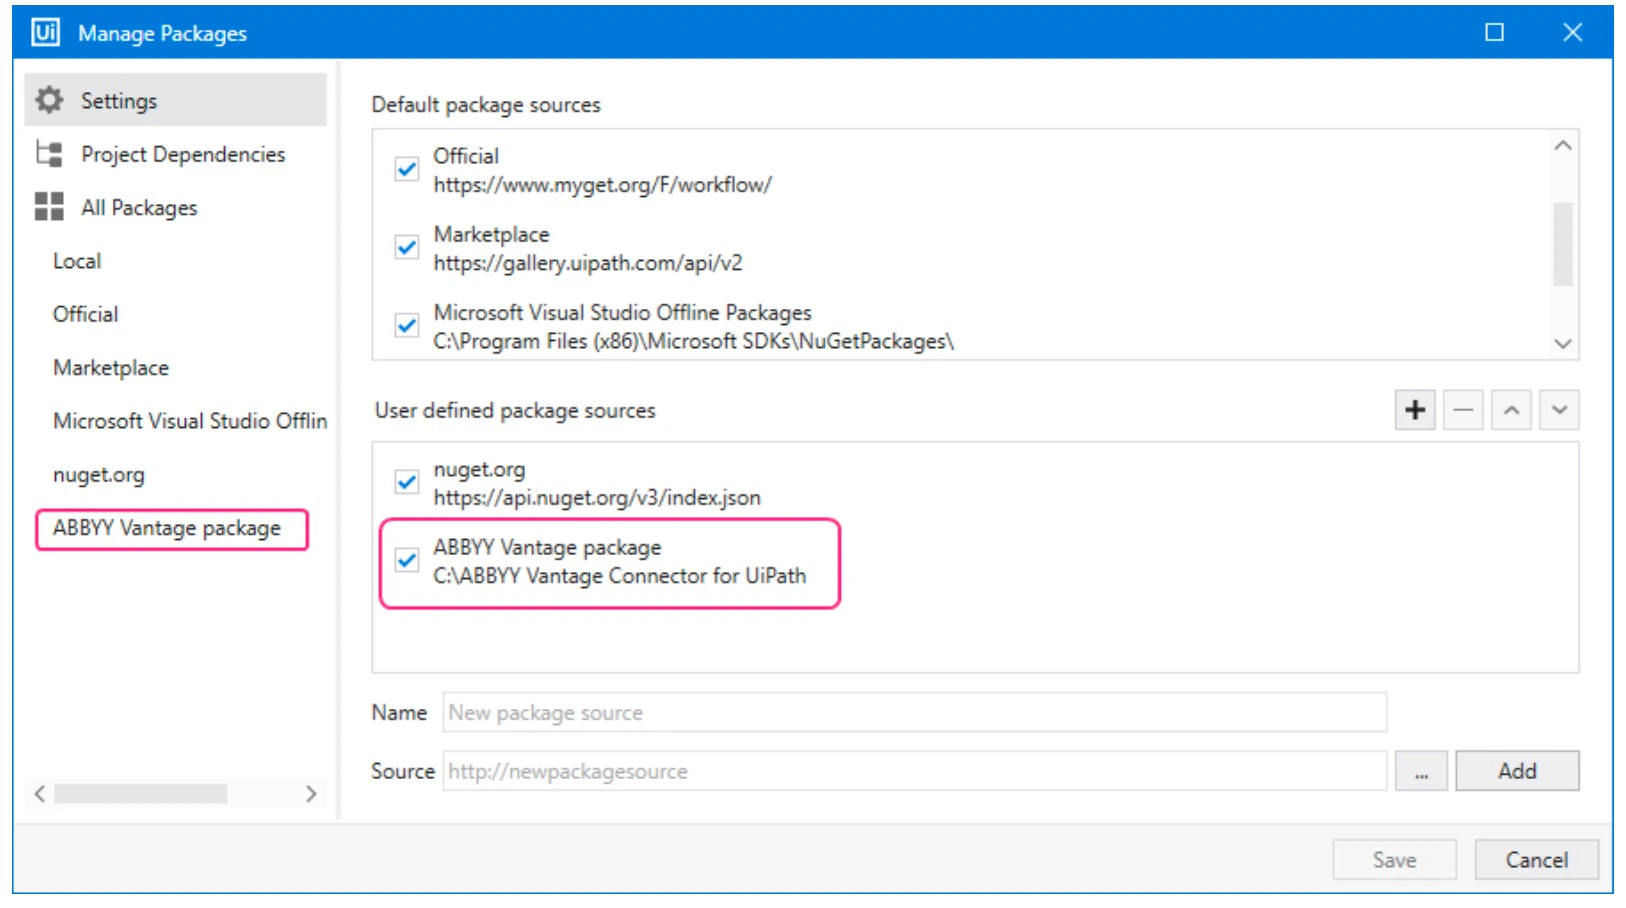
- Click Add to confirm the settings.
Copy the ABBYY Vantage NuGet packages
Copy all the NuGet packages of the ABBYY Vantage Connector for UiPath from the installation folder to your package source folder. The NuGet packages are located in the UiPath Activities subfolder of the installation folder created during the installer step (the default location is
C:\Program Files\ABBYY Vantage Connector for UiPath\UiPath Activities).Once the NuGet connector packages are in the available package source, you can install the connector package to the project dependencies.Install Abbyy.UiPath.Vantage.Activities
In the Manage Packages window, navigate to the All Packages section and do the following: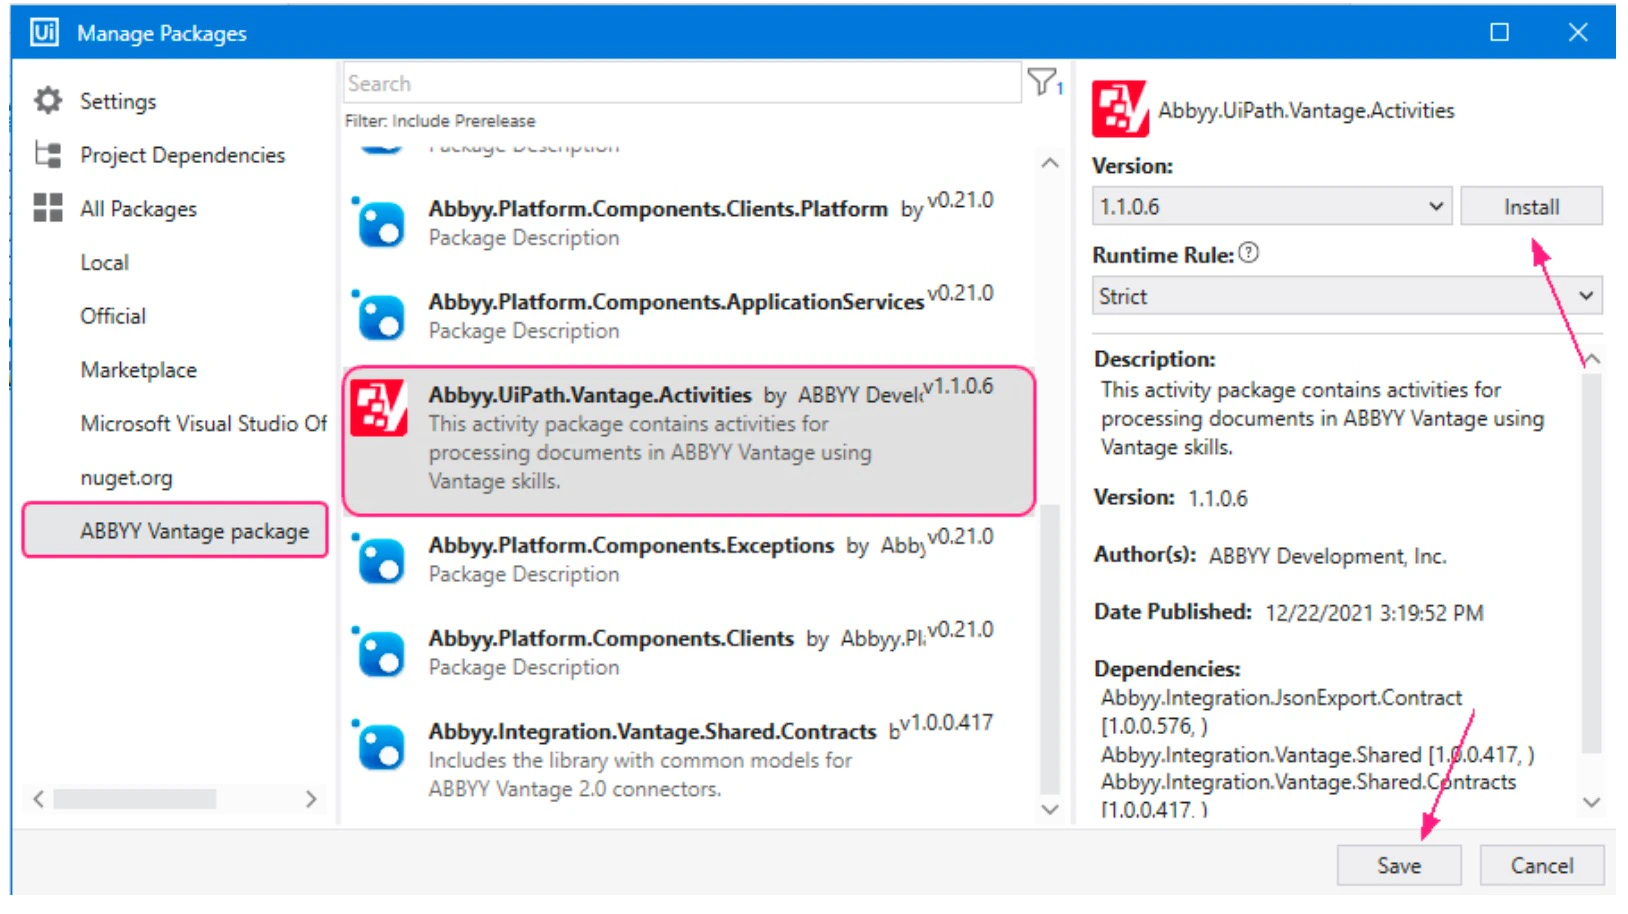
- Click the newly created package source category.
- Select Abbyy.UiPath.Vantage.Activities from the list of available packages and click Install. The License Acceptance window will display licensing terms for each third-party package you install.
- Click View License to read the license terms.
- Click I Accept to agree with the license terms and install the packages, then click Save.
Verify the Vantage activities are available
Once installed, the Vantage activities appear in the ABBYY Vantage section of the list of activities available for your project.
Convert legacy projects
We recommend that you convert Windows-legacy projects to Windows compatibility.To convert a project to Windows compatibility, you need to upgrade the version of the ABBYY Vantage Connector for UiPath. To do this, perform all the install steps above except the Create a new package source step.
Click Convert to Windows
Click the Convert to Windows link in the message that appears under the ribbon.
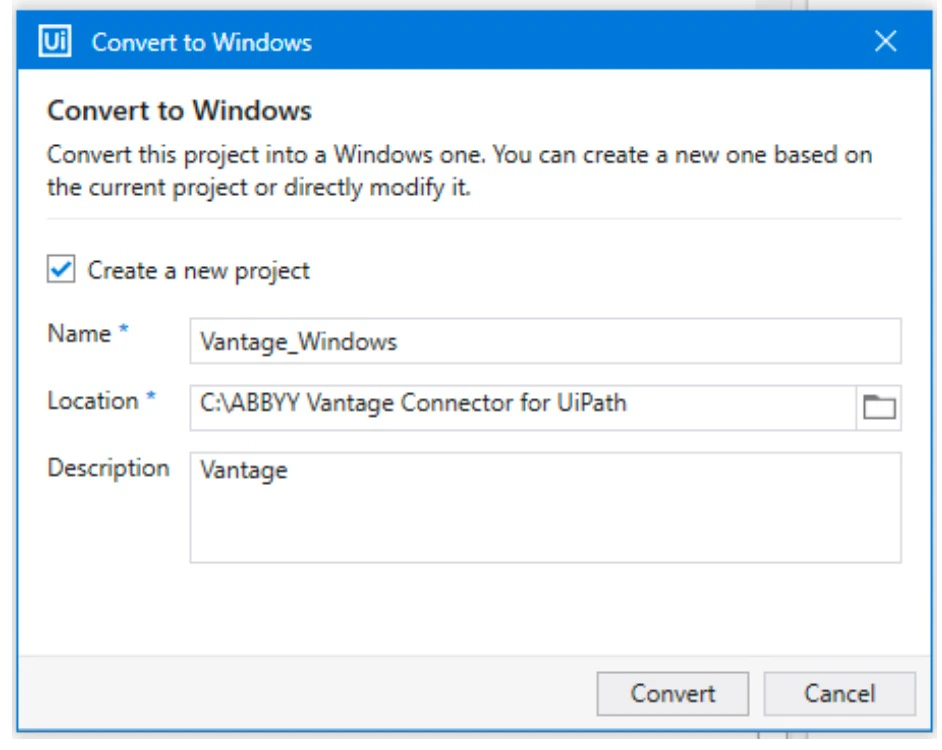
Choose the conversion mode
Specify how the Windows-legacy project will be converted to Windows:
- To create a copy of the current project using Windows compatibility and keep the original Windows-legacy project, select Create a new project. Enter the name of the project, its desired location, and optionally a description for the new project.
- To update the existing project and convert it to Windows compatibility, deselect the Create a new project option. If you deselect this option, the changes made to the project cannot be undone.
Click Convert
Click Convert. For more information about converting Windows-legacy projects to Windows compatibility, see the UiPath Studio Guide.