先決條件
- 在設定身分識別之前,請先確認你已擁有 Vantage 租用戶識別碼 (tenant identifier)。若要取得租用戶識別碼,請在 ABBYY Vantage 中按一下 Configuration。此識別碼位於 General 分頁中。
- 建立一個 Redirect URI 以接收驗證回應。URI 為:
https://<your-vantage-url>/auth2/Saml2/Acs
設定
新增宣告描述
- 開啟管理主控台。
- 選取 Service > Claim Descriptions,然後按一下 Add Claim Description。
- 填寫必填欄位:
- 指定顯示名稱:例如 Persistent Identifier。
- 指定宣告類型:
urn:oasis:names:tc:SAML:2.0:nameid-format:persistent。 - 勾選 Publish this claim description in federation metadata as a claim type that this federation service can accept。
- 勾選 Publish this claim description in federation metadata as a claim type that this federation service can send。
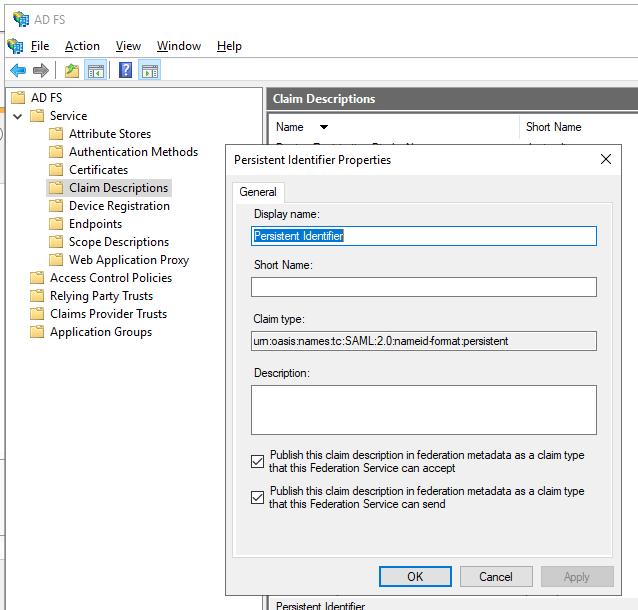
- 按一下 OK。
設定 Relying Party Trust (信賴端信任關係)
- 在主控台樹狀目錄中,於 AD FS 底下,選取 Trust Relationships > Relying Party Trusts > Add Relying Party Trust。
- 在 Welcome 頁面上,選擇 Claims aware,然後選取 Start。
- 在 Select Data Source 頁面上,選取 Enter data about the relying party manually,然後選取 Next。
- 在 Specify Display Name 頁面上,在 Display Name 輸入任意名稱,然後選取 Next。
- 在 Choose Profile 頁面上,選取 ADFS 2.0 設定檔,然後按一下 Next。
- 在 Configure Certificate 頁面上,按一下 Next。
- 在 Configure URL 頁面上,選取 Enable support for the SAML 2.0 WebSSO protocol。在 Relying party SAML 2.0 SSO service URL 下方輸入
https://<your-vantage-url>/auth2/Saml2/Acs,然後按一下 Next。 - 若要設定身分識別,請依照下列步驟進行:
- 在 Relying party trust identifier 下方輸入
api://platform.abbyy.cloud/tenantId,其中 tenantId 為 GUID 格式且不含連字號 (hyphens) 的租戶識別碼 (例如,117489fc1aea41658369d4d18d6557ga) 。此值將用作驗證的 Application ID URI。請複製此值,因為在 Vantage 中設定 External Identity Provider 時會需要用到。按一下 Add。 - 在 Expose an API 索引標籤中,將 Application ID URI 設為與上方輸入的相同值 (例如,
api://a37892f6-c2e9-4092-b804-d054741da4da) 。按一下 Add,然後按一下 Next。
- 在 Relying party trust identifier 下方輸入
- 若要讓所有使用者都能存取 Vantage,請在 Choose Issuance Authorization Rules 視窗中選取 Permit all users to access this relying party。或者,若只想讓特定群組存取,請選取 Permit specific group,並指定所需的群組。按一下 Next。
- 在 Ready to Add Trust 頁面上,檢閱設定。按一下 Next,然後按一下 Close。
新增規則以轉換傳入的宣告 (claim)
- 按一下 Relying Party Trusts。
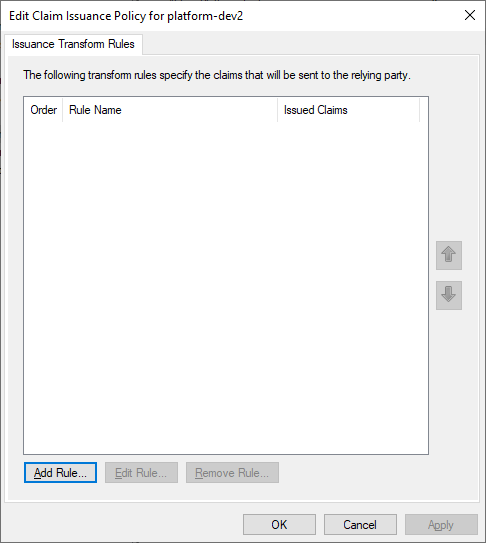
- 在選取的信任項目上按一下滑鼠右鍵,然後按 Edit Claim Issuance Policy。
- 在開啟的
Edit Claim Issuance Policy for <name>視窗中,按一下 Add Rule。
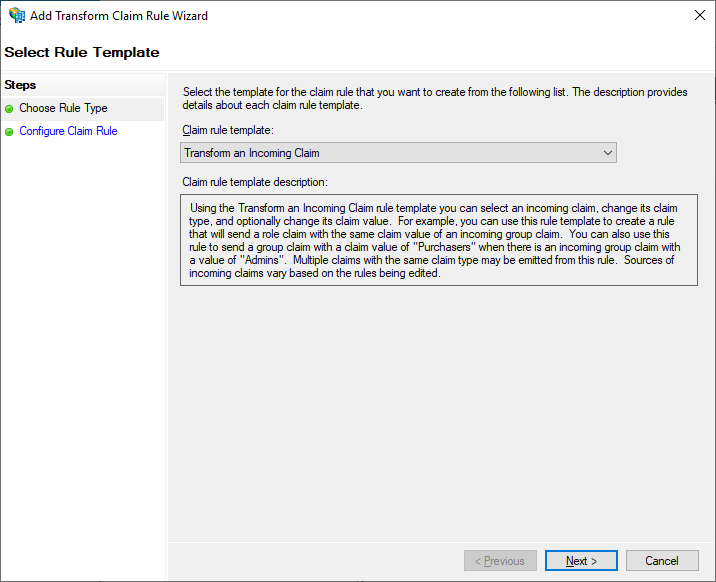
- 選取 Transform an Incoming Claim 宣告規則範本,然後按 Next。
- 在 Configure Claim Rule 步驟中,指定下列內容:
- 在 Claim rule name 中,輸入 TransformWindows account name。
- 在 Incoming claim type 中,選取 Windows account name。
- 在 Outgoing claim type 中,選取 Name ID。
- 在 Outgoing name ID format 中,選取 Persistent Identifier。
- 勾選 Pass through all claim values。
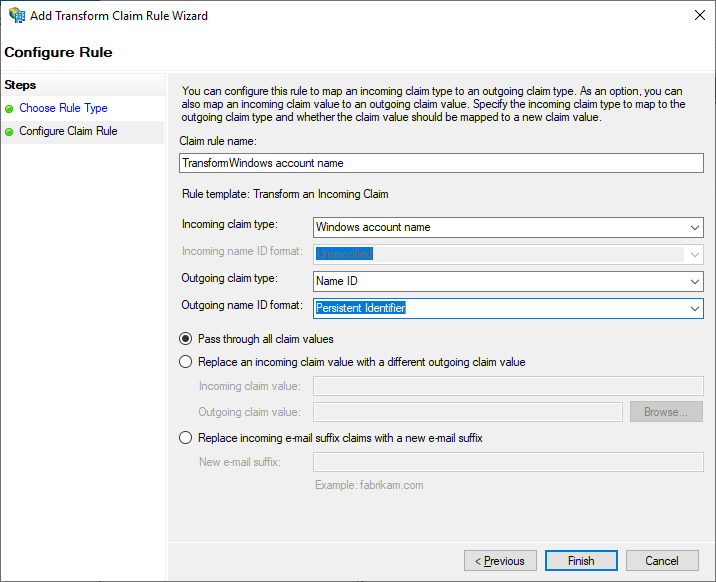
- 按一下 Finish。
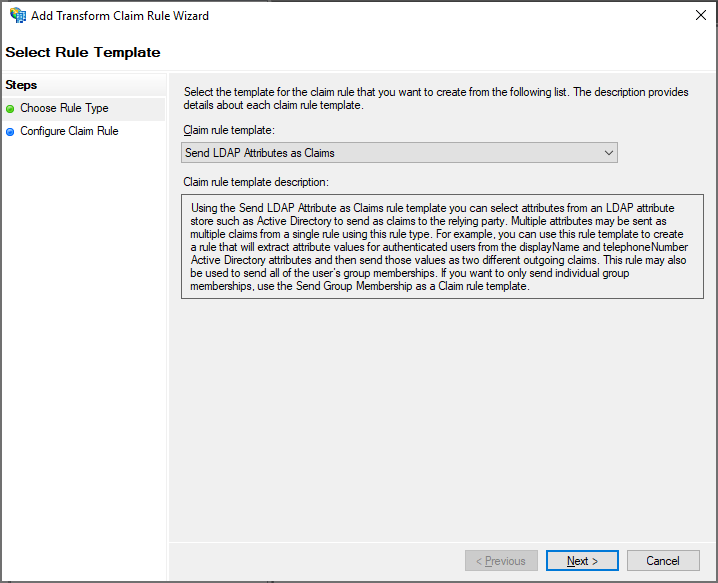
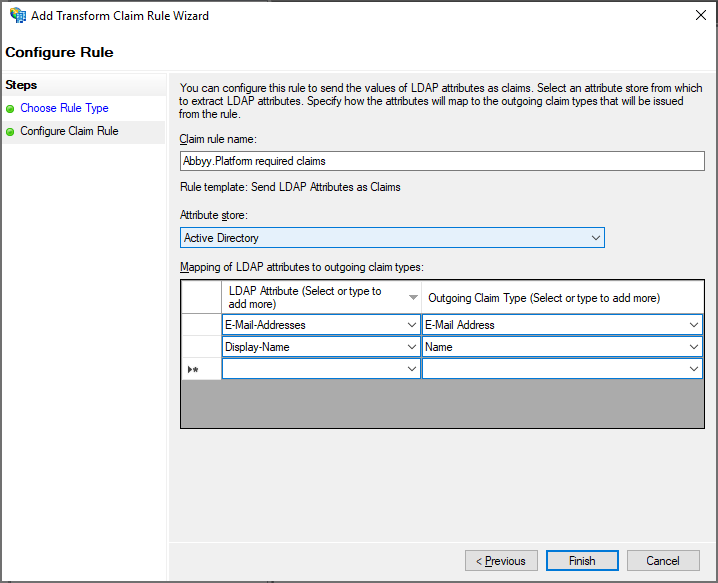
- 新增另一個規則,以確保電子郵件與名稱宣告會包含在發行的權杖中。在 Select Rule Template 頁面上,在 Claim rule template 下選取 Send LDAP Attributes as Claims,然後按 Next。
- 在 Configure Claim Rule 頁面上,在 Claim rule name 下選取 Active Directory 屬性存放區,然後按 Finish。
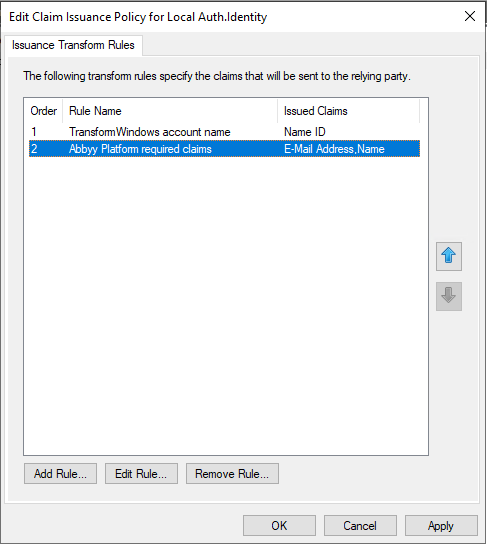
- 新增的規則會顯示在 Edit Claim Rules 對話方塊中。
後續步驟
https://<adfs_server_address>/federationmetadata/2007-06/federationmetadata.xml。例如:https://adfs.platform.local/federationmetadata/2007-06/federationmetadata.xml。
如需詳細資訊,請參閱為租戶設定外部身分識別提供者。