
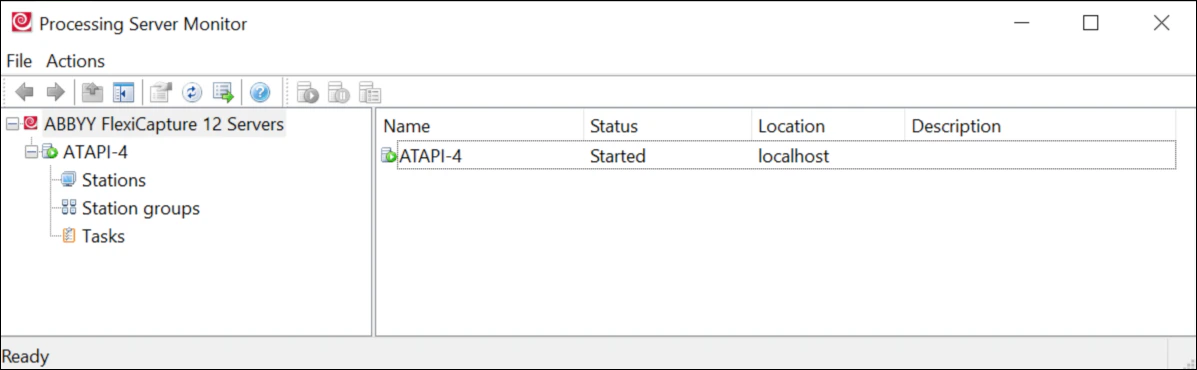
Start the Processing Server
Before starting the Processing Server, make sure that the Processing Server access permissions have been granted to the account under which the server is running.
1
Launch the Processing Server Monitor
Launch the Processing Server Monitor by selecting Start → All Programs → ABBYY FlexiCapture 12 Servers → Processing Server.
2
Add the server
On the server tree, select ABBYY FlexiCapture Servers, right-click, and select Add Server….
3
Specify the server location
In the Add Processing Server dialog box, specify the server location (Network host or Local host).
4
Provide the Application Server path
Select Actions → Properties and provide the path to the Application Server (
https://<ApplicationServer>, where <ApplicationServer> is the name of the computer on which the Application Server is installed). If the Processing Server and the Application Server are installed on the same computer, specify its name directly. Using the IP address 127.0.0.1 or localhost renders the Processing Stations inoperable.5
Assign the Processing Server role
On the Application Server, start the Administration and Monitoring Console and assign the corresponding role to the computer on which the Processing Server is installed.
6
Start the server
Click  to start the Processing Server.
to start the Processing Server.Set up the Processing Stations
1
Add stations
- In the server tree, select Stations and click
 . The Add Stations dialog box opens.
 - Select the stations from the overall list, or identify a computer by its name or IP address:
- A name works even when dynamic IP addresses are used.
- Use an IP address if you have problems accessing the DNS network.
2
Configure the station parameters
Select Actions → Properties and, in the Station Properties dialog box, specify the parameters of the station. For the available parameters, see Station parameters.
3
Start the station
Click  to start the station manually. If the Start automatically option is selected, the station starts automatically within a minute.
to start the station manually. If the Start automatically option is selected, the station starts automatically within a minute.Station parameters
You specify these parameters in the Station Properties dialog box.Acceptable task types
The Acceptable task types parameter includes the following task types:Stop the Processing Server or a Processing Station
You can stop the Processing Server or a Processing Station with a soft stop or a hard stop. Use a soft stop, for example, to upgrade the server or a station, or, for the Processing Server, to move a database.Manage station groups
You can isolate different tenants from one another at the task level. To do so, create the required Processing Station groups and then assign a group to each new tenant you create.Create a station group
1
Add a station group
In the server tree, select Station groups and click . The New Station Group dialog box opens.
. The New Station Group dialog box opens.2
Specify the group
Specify a group name and select the stations from the overall list.
3
Save the group
Click OK.
Edit a station group
To change the name of a group or its list of stations, select the group in the list and click Edit Station Group… on the shortcut menu.Add a station to a group
In the Station Properties dialog box of the station, select the group in the Group field. For more information, see Station parameters.Set up the Processing Server log
1
Open the log settings
Open the Processing Server Monitor settings by selecting File → Settings….
2
Choose which messages to log
Specify which messages should be logged (Errors, Warnings, Information messages).
3
Choose whether to remove completed tasks
Specify whether information about completed tasks should be deleted (Remove completed tasks from the list).Keep this option selected during normal operation of the system. Disabling it may cause a pile-up of data and slow down the Processing Server Monitor. Disable it only when setting up and tuning the system.
4
Choose which messages trigger logging
Specify which messages trigger logging of information about the task.
5
View the task log
Click  to view the task log. To save a task log as a
to view the task log. To save a task log as a .txt file, click the Export Log… button in the dialog box that opens.View task information
To view task details, select Tasks in the Processing Server tree. For each task, the following parameters are displayed: task name, start-up time, progress, status, priority, and the station name. Failed tasks are marked with . If, besides an error message, the task log also contains informational messages, the task is marked with
  .
.
Service log
Besides the regular task processing log, the Processing Server and the Processing Station can keep a service log. ABBYY Support may need information from this log when handling your support requests. Service logging does not slow down your Processing Server or Processing Station. However, the information it contains is useful only to ABBYY Support engineers, so do not keep service logging permanently enabled. Turn it on when an ABBYY Support engineer asks you for a service log.Collect a service log for ABBYY Support
1
Open the properties dialog box
Open the properties dialog box of the component whose log you need:
- For the Processing Server, select Properties on the shortcut menu of the Processing Server. The Processing Server Properties dialog box opens.
- For a Processing Station, select Properties on the shortcut menu of the Processing Station. The Station Properties dialog box opens.
2
Enable logging
Select the Write processing log option and click OK.
3
Collect the log files
After the log files are created, find them in
%programdata%\ABBYY\FlexiCapture\12.0\FlexiBrSvc\Logs. Send copies of these files to ABBYY Support.4
Disable logging
Clear the Write processing log option and click OK.
Manage the Processing Server from the command line
1
Open a command-line prompt
In the Windows Start → Run menu, type
cmd and click OK. A command-line prompt window appears.2
Go to the FlexiBRSvc.exe location
Type the path to the
FlexiBRSvc.exe file (by default, C:\Program Files\ABBYY FlexiCapture 12 Servers).3
Enter commands
Enter commands in the form
FlexiBrSvc Please [command]:- To enable command mode so that you do not type
FlexiBrSvc Pleasebefore each command, useFlexiBrSvc Please obey. - To disable command mode, use
FlexiBrSvc Please quit.
4
View the list of commands
To show the list of allowed commands and other help information, type
FlexiBRSvc.exe /?.