
REST API workflow
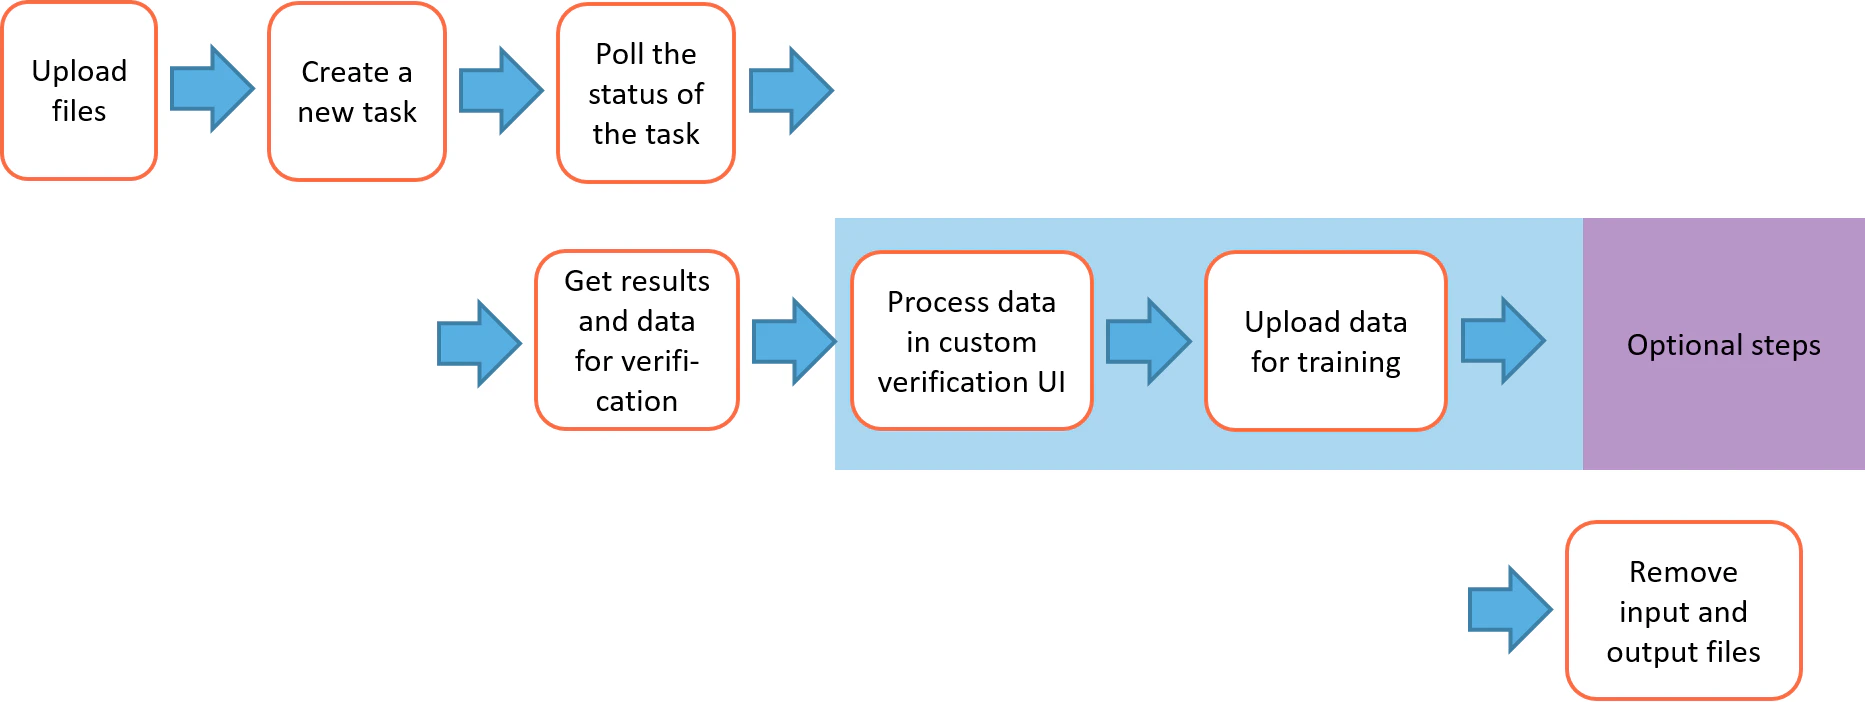
The typical REST API workflow has these stages:- Upload files.
- Create a new task.
- Poll the status of the task.
- Get results and data for verification.
- Process data in a custom verification UI (optional).
- Upload data for training (optional).
- Remove input and output files.
Adjust workflow stages
The REST API always submits data to be processed as the Default batch type. For this reason, all document processing in the project must be configured for the Default batch type.
1
Open the sample project
Launch the Project Setup Station and open the sample Banking Card Application project. The default location is
C:\Users\Public\ABBYY\FlexiCapture\12.0\Samples\FlexiCapture\English\Banking_eng\banking_eng.fcproj.2
Set up the Advanced workflow schema
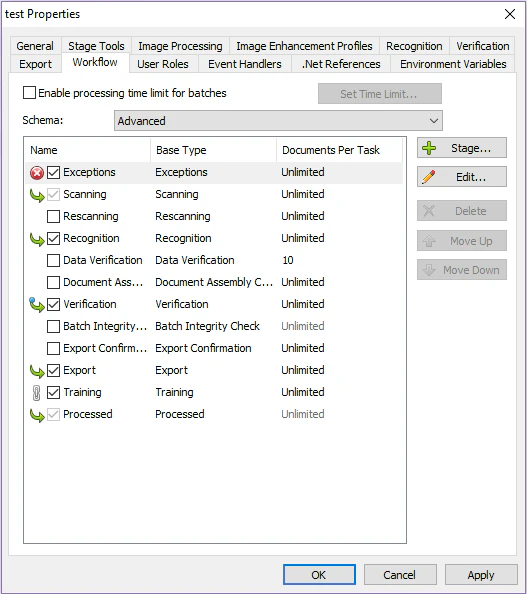
- On the Project menu, click Project Properties, and then click the Workflow tab.
- From the Schema drop-down list, select Advanced.
- Select the Exceptions, Recognition, Verification, Export, and Training stages.
- Clear the Rescanning, Data Verification, Document Assembly Check, Batch Integrity Check, and Export Confirmation stages.
3
Enable web stations for verification
Click Verification → General and select the Enable web stations option. You can omit this setting if you don’t need a verification stage in your project.
4
Set the verification entry condition
Click Verification → Entry Conditions and set the Documents are admitted to stage option to Always.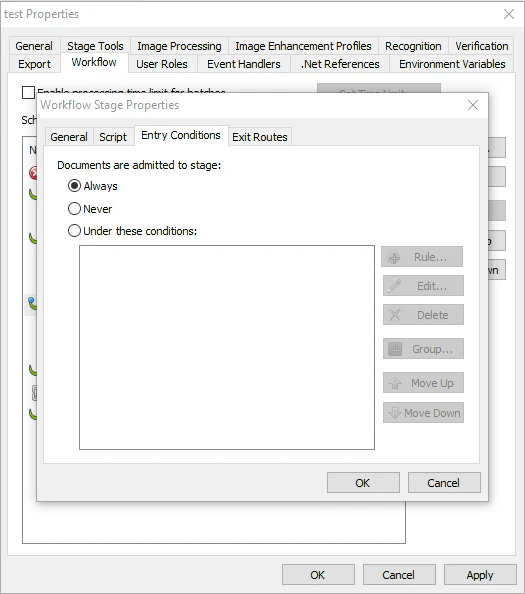
5
Add a stage to export the XML layout
Create a document processing stage immediately before the verification stage. This stage exports the XML file containing the field data and layout, which enables the 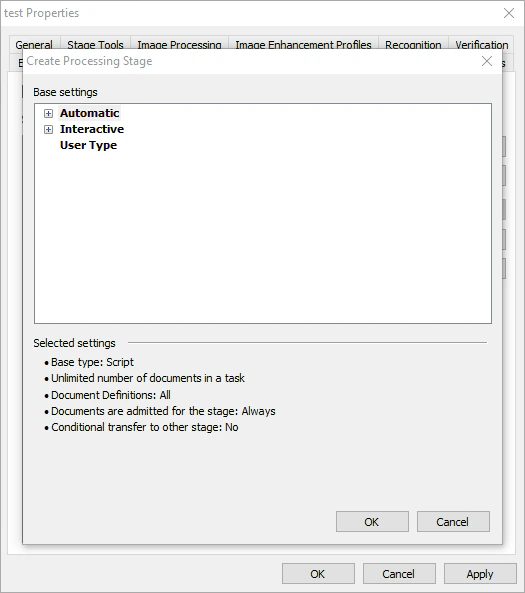
training/layout/{taskId}/{fileId} endpoint for your project.6
Set the new stage's entry condition
On the Entry Conditions tab, choose Always.
7
Open the script editor
On the Script tab, click Edit script….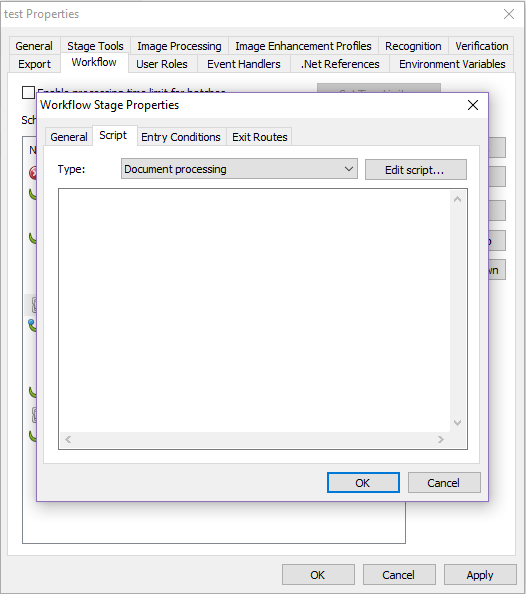
8
Set the script language
Change the script language to C# .NET.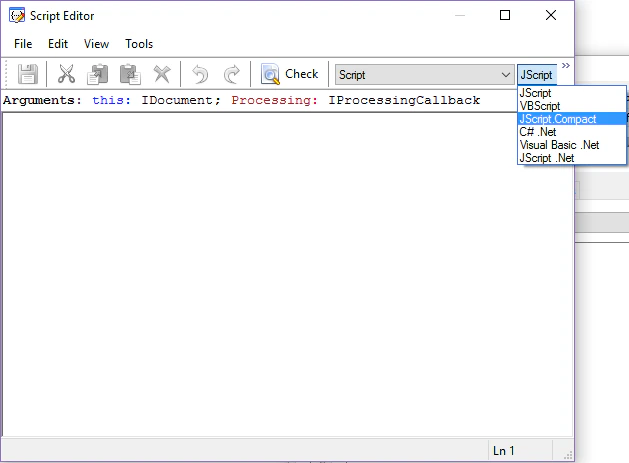
9
Add the export script
Paste this code into the script pane:
10
Save your changes
Click OK to save your changes.
Adjust data export settings
After a batch submitted through the REST API is processed, the REST API picks up any exported files to make them available for download by the client. REST API projects do not require any special folder structure. You can use a flat folder structure, using the name of the root folder for each batch and document IDs as parts of file names. The REST API services assign a unique, random batch name to each batch submitted via the REST API, so unique file names are generated when exporting data from those batches. The sample project’s original export settings create a multi-level folder structure. The modified settings create a flat folder structure.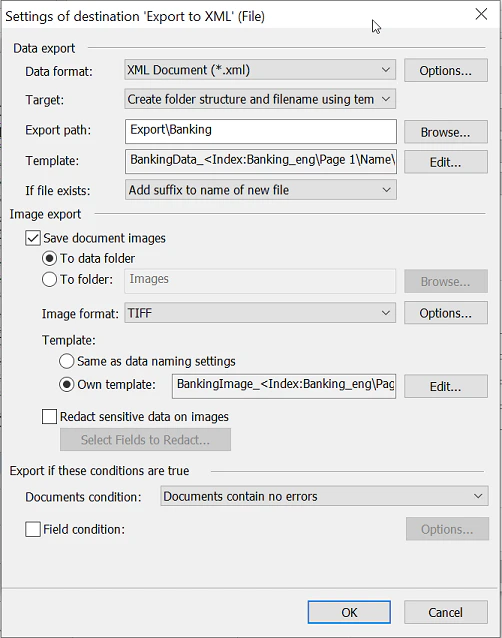
Original export settings (multi-level folder structure)
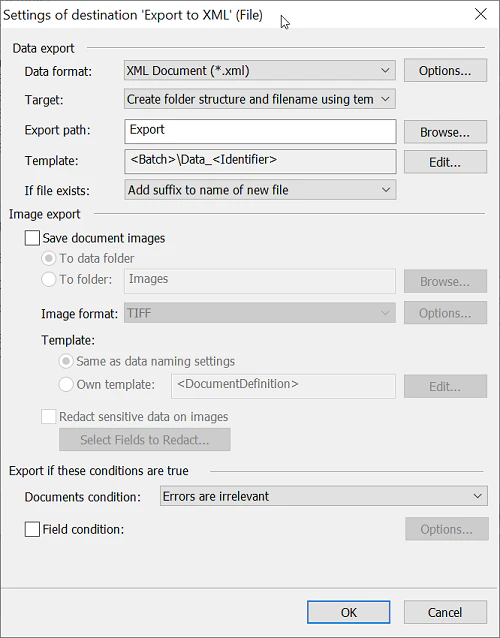
Modified export settings (flat folder structure)
Upload your modified project to ABBYY FlexiCapture Cloud
1
Open the upload dialog
Click File → Upload Project to Server… to upload your project to ABBYY FlexiCapture Cloud.
2
Enter the server and tenant
In the dialog box that opens, enter the URL of the cloud server hosting your tenant and specify the name of your tenant.
3
Enter your credentials
Select Use server authentication and enter your tenant admin credentials.
4
Test the connection
Click Test connection to check your connection settings.
5
Upload the project
Click OK and wait until your project is uploaded.
Next steps
After you upload your project to ABBYY FlexiCapture Cloud:- Create an application that is connected to your project. For more information, see Create applications using the FlexiCapture REST API interface.
- To test whether you have connected your application correctly, process a sample batch.
- If you encounter any problems, see Processing error diagnostics.