AbbyyVantageComponent, which includes:
- A set of Connect REST rules
- An authentication profile
- Dynamic System Settings used by the connector
- A Process documents case type that demonstrates how the connector works
- Data pages, data transforms, activities, flows, flow actions, and other rules
Import the application
1
Open the Import wizard
Open Pega Dev Studio. In the upper area of the window, select Configure > Application > Distribution > Import to launch the Import wizard.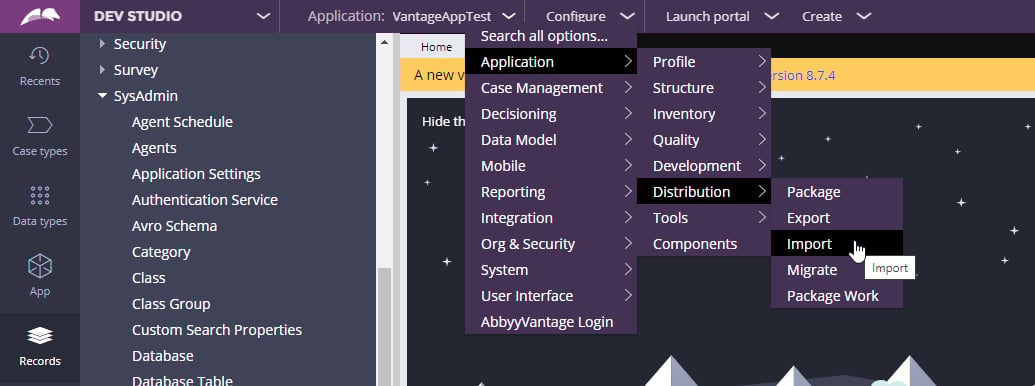
2
Import the application file
Import the
Abbyy_Vantage_Sample_App_v1.4.jar file to the server.Grant access to the application
1
Open the operator menu
Open the menu for the appropriate operator. To choose the current operator, click the icon in the lower-left area of the window and select Operator. The Edit Operator ID window opens.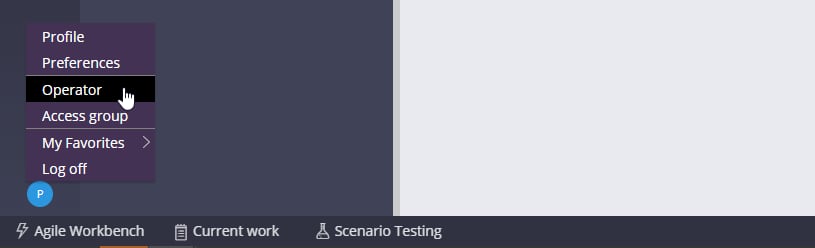
2
Add the access group
In the Application Access section of the Edit Operator ID window, add the 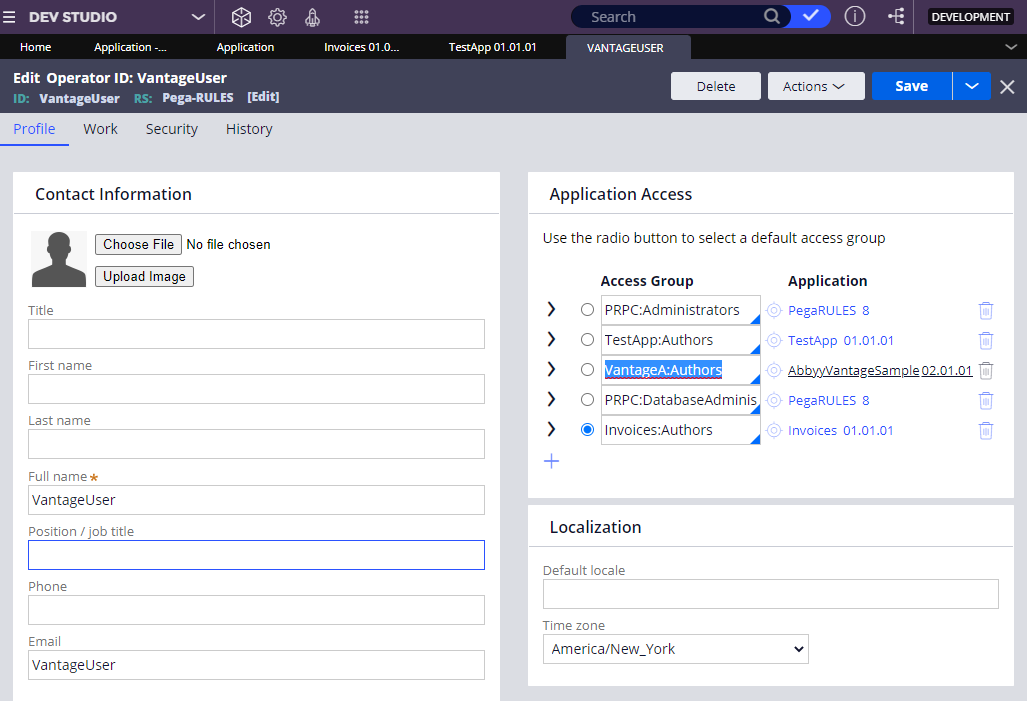
VantageA:Authors access group.3
Log out and log in
Log out and log in again. The application then appears in the Application > Switch Application menu.
Add AbbyyVantageSample to built-on applications
If you have a Pega application already, proceed with this section. Otherwise, jump to Configure a connection to ABBYY Vantage to continue setup with theAbbyyVantageSample application directly.
After AbbyyVantageSample is imported, add it as a built-on application to your own application. This lets you reuse the sample application’s elements in your application.
The sample application is built on the Theme Cosmos UI. If your application uses a different UI, create a new application with the Theme Cosmos UI and follow this section to configure it. If your Pega project has a different UI configuration or a headless implementation, you can invoke the process flow and data model of the ABBYY Vantage component and configure the sections according to your business scenario.
1
Open your application definition
Navigate to Records > Application Definition > Application and open your application.
2
Add the built-on application
In the Built on applications section of the Definition tab, click +Add application. Enter 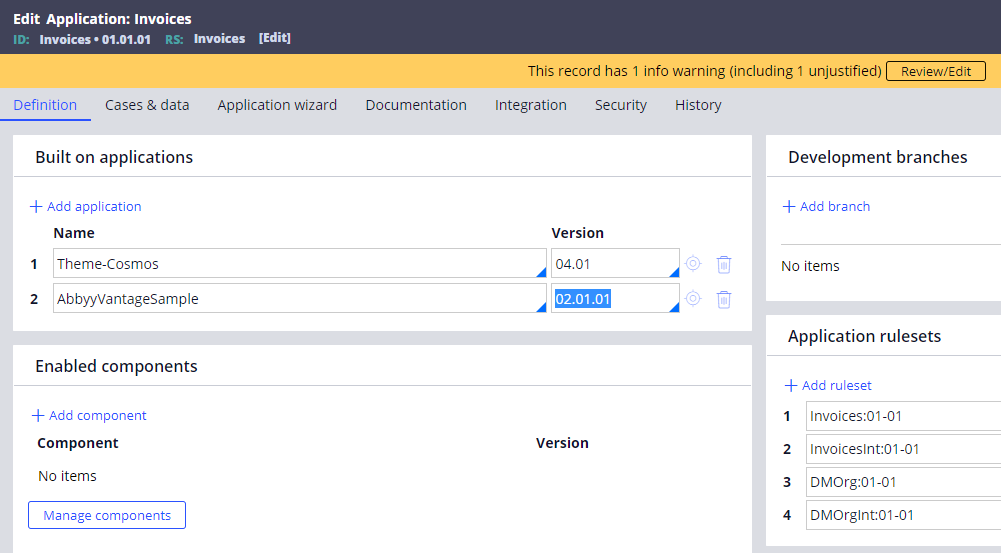
AbbyyVantageSample in the Name field and select 02.01.01 in the Version field.3
Save the application
Save the application. You can now reuse the elements of
AbbyyVantageSample.Inspect the component rules
1
Open Components
Open Configure > Application > Components.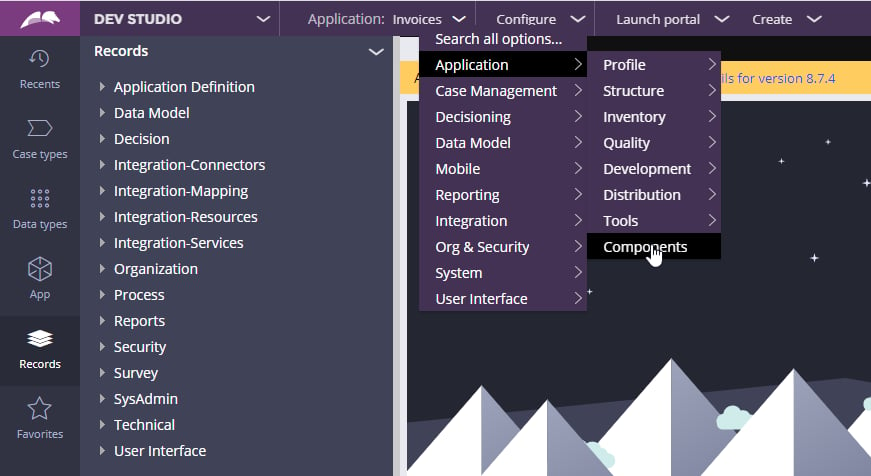
2
Open the component rulesets
Open 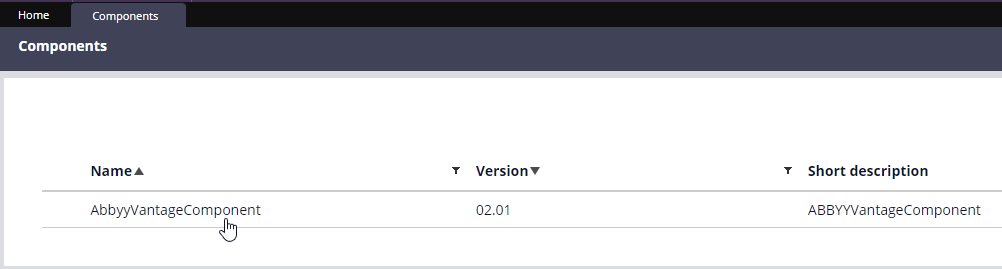
AbbyyVantageComponent, and then open the rulesets in the Component rulesets section to inspect the rules.Create and configure case types
WhenAbbyyVantageSample is added to your application’s built-on applications, create a case type to process documents with ABBYY Vantage.
Create a case type and set inheritance
1
Create a case type
Switch to your application, which already has 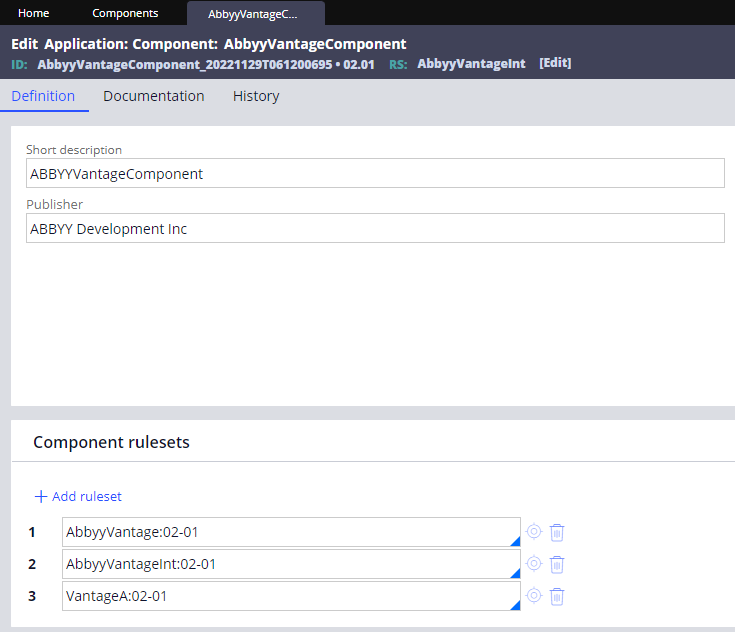
AbbyyVantageSample added as a built-on application. Go to the Case types menu and create a case type (for example, Invoice processing).2
Open the class definition
Go to the App menu. On the Classes tab, right-click the class of the created case type, and then select Definition.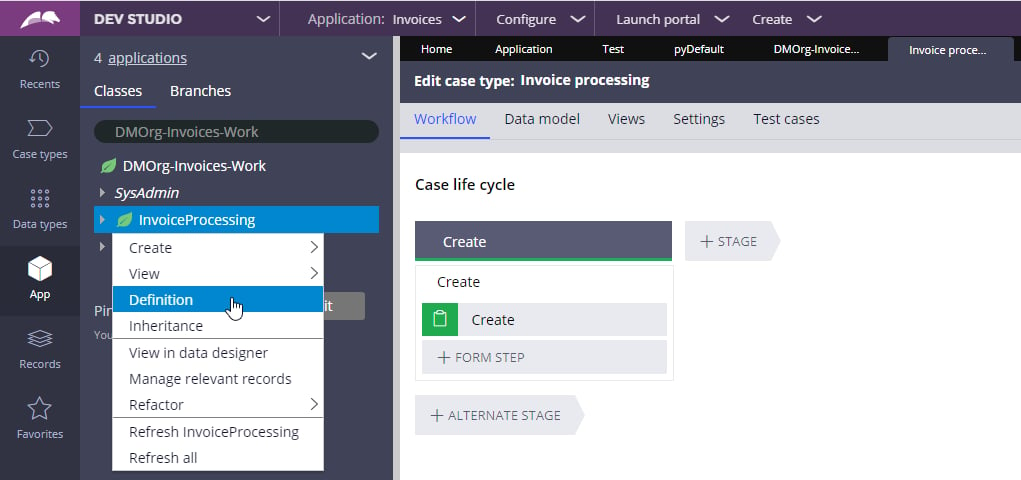
3
Change the class inheritance
In the Class inheritance section, change inheritance to 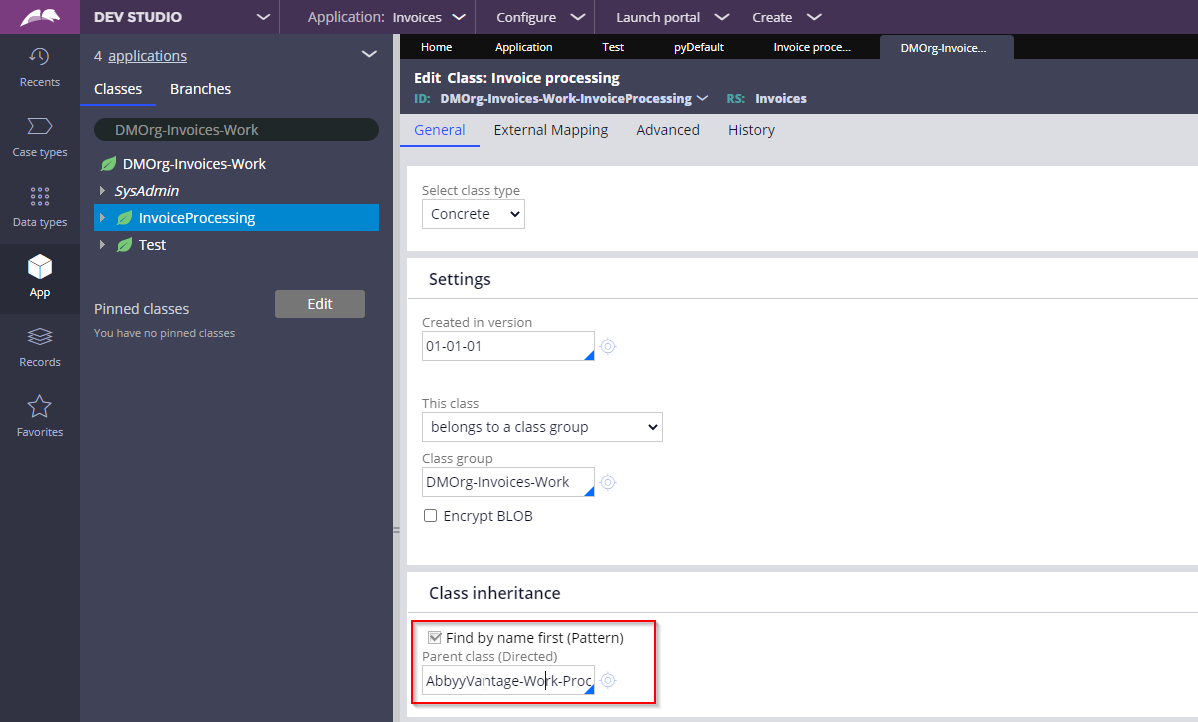
AbbyyVantage-Work-ProcessDocuments, and then save the definition.Add steps to the case workflow
1
Open the case type stages
Open the Case types menu, right-click the created case type, and select Open. Open the Stages tab.
2
Replace the default Create process
In the Initialization Stage section, select Create. In the Automatically launched processes section, open the default 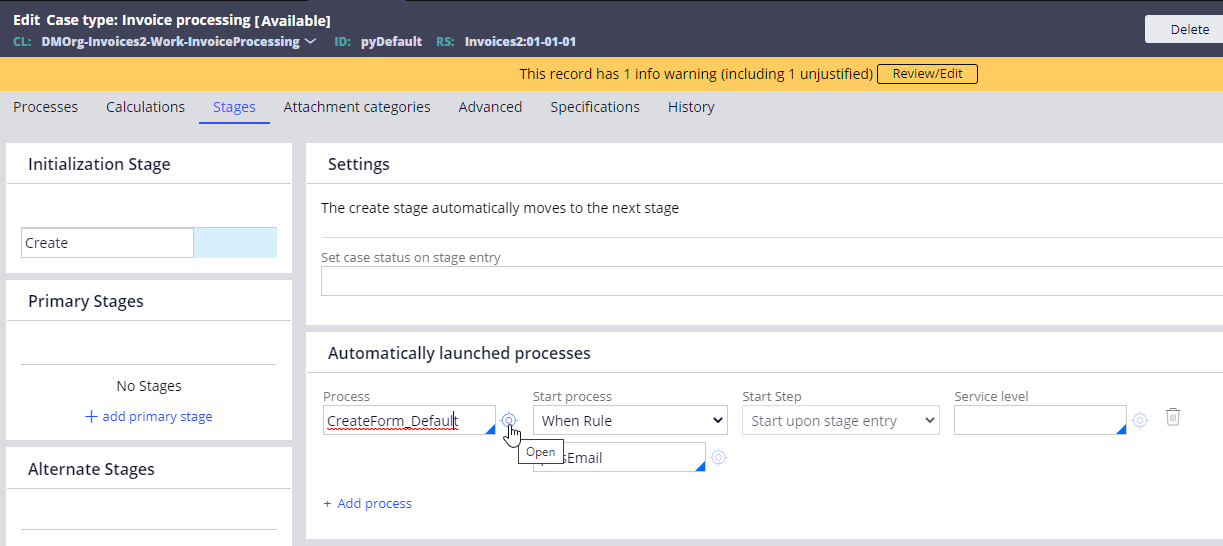
CreateForm_Default process and delete it. Then select CreateForm_Default (AbbyyVantage-Work-ProcessDocuments) for the Create initialization stage.3
Add the Get Status stage
Add a primary stage and name it (for example, Get Status). With this stage in focus, select 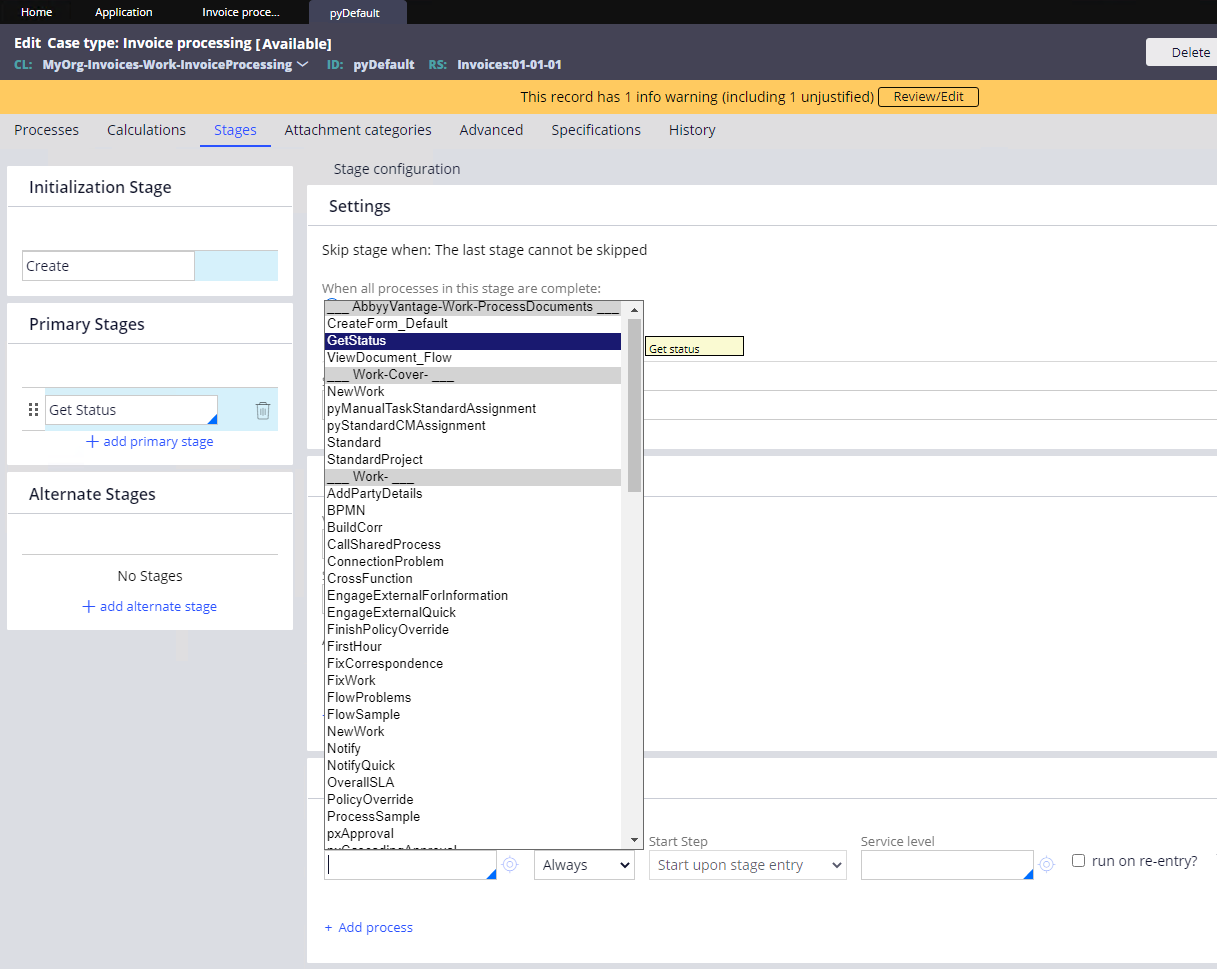
GetStatus (AbbyyVantage-Work-ProcessDocuments) in the Automatically launched processes section.4
Add the Get Processing Results stage
Add another primary stage and name it (for example, Get Processing Results). With this stage in focus, select 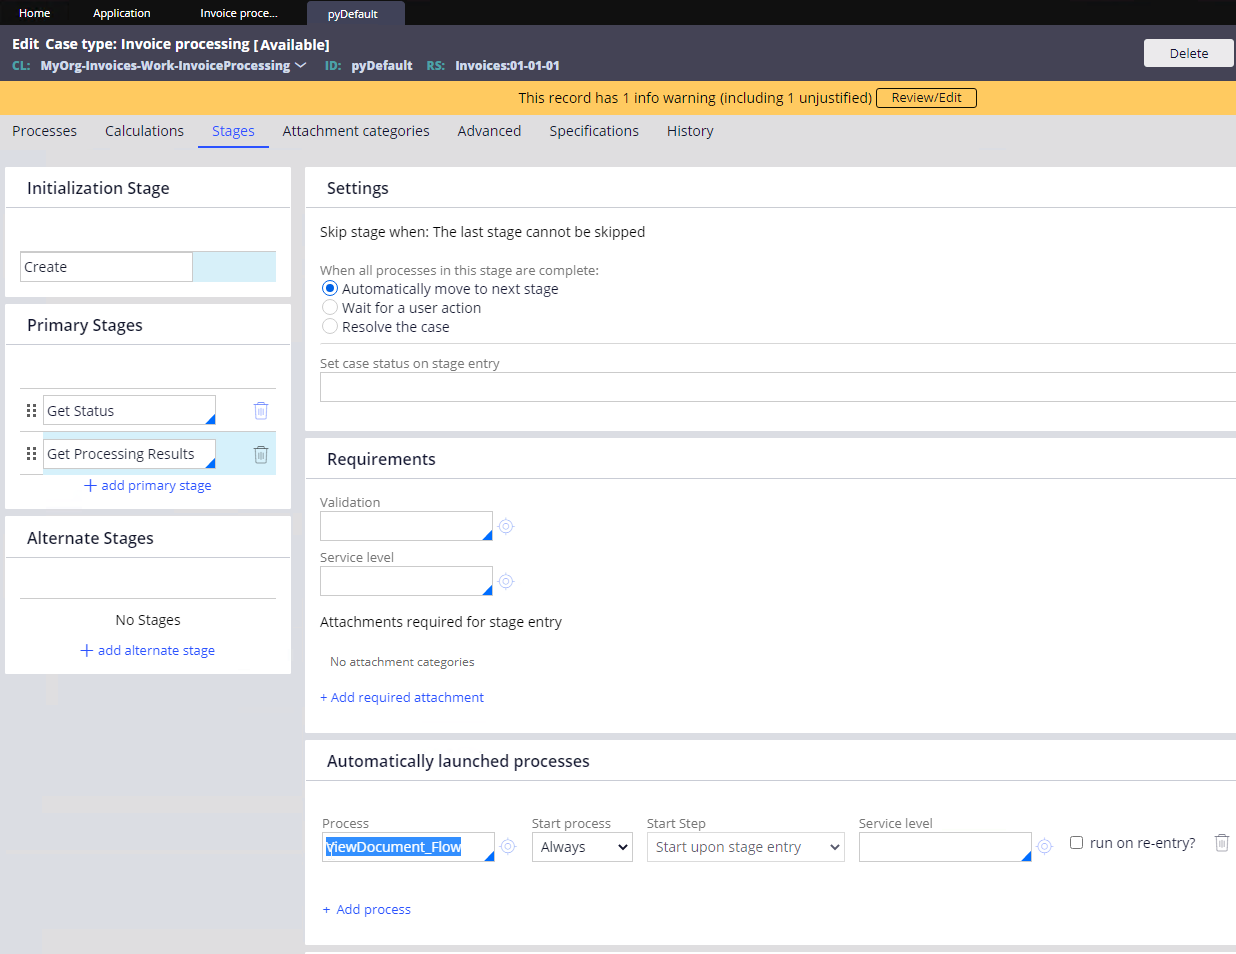
ViewDocument_Flow (AbbyyVantage-Work-ProcessDocuments) in the Automatically launched processes section, and then save the case type.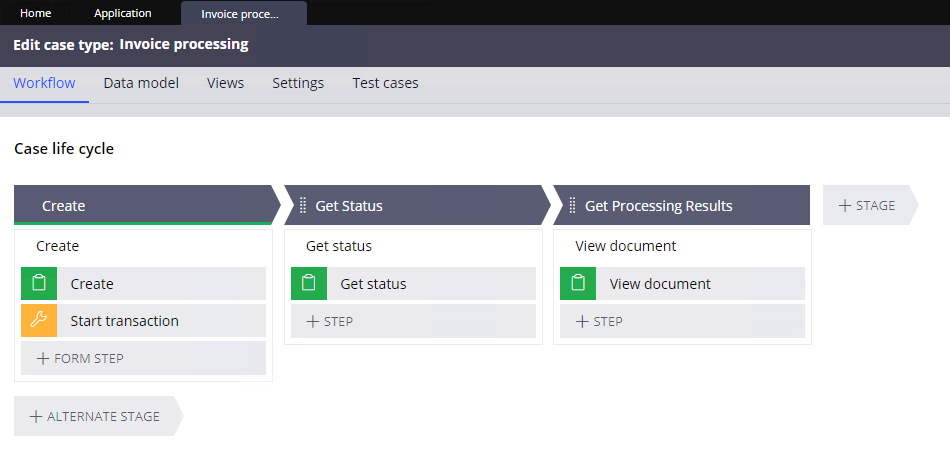
Add a section to the application context
1
Open the Create section
Navigate to Records > User Interface > Section. Find and open the Create section for the 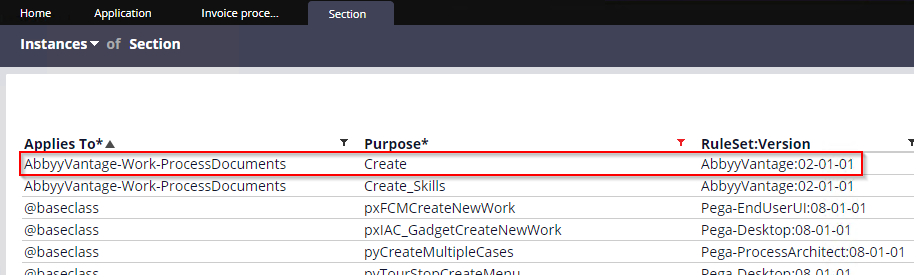
AbbyyVantage:02-01-01 ruleset version.2
Save the section into your context
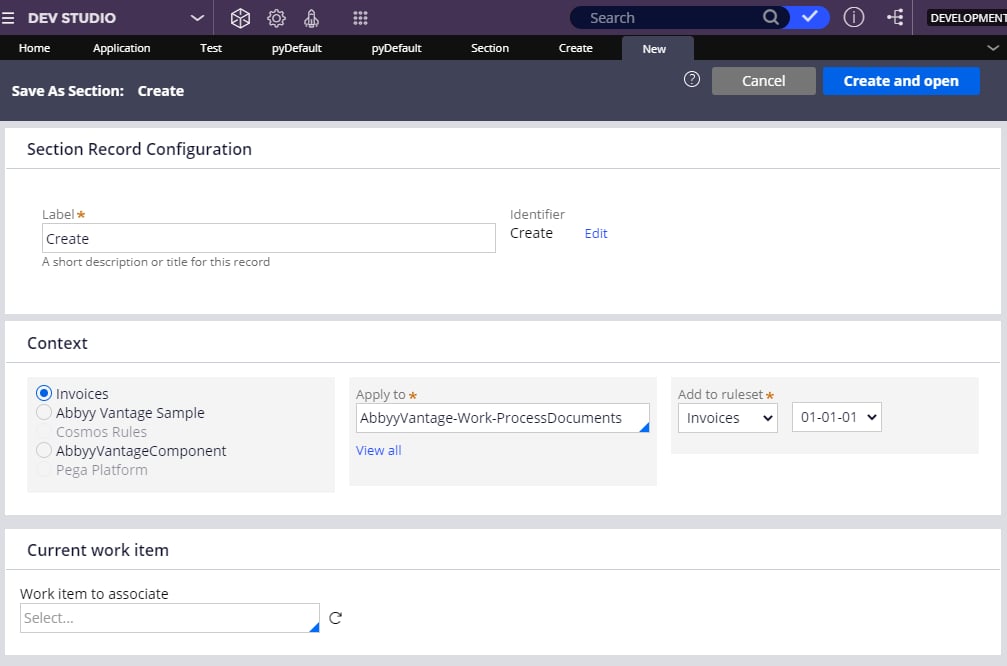
Click Save As. In the window that opens, ensure your application and its ruleset are selected in the Context section. Click Create and open, and then save the Create section.