Create and run a case
1
Open the User Portal
In Pega Dev Studio, choose either your Pega application (Invoices as shown in the screenshot) or Abbyy Vantage Sample. Click Launch Portal > User Portal.
2
Create a case
Create a case of the case type you configured (for example, Invoice processing).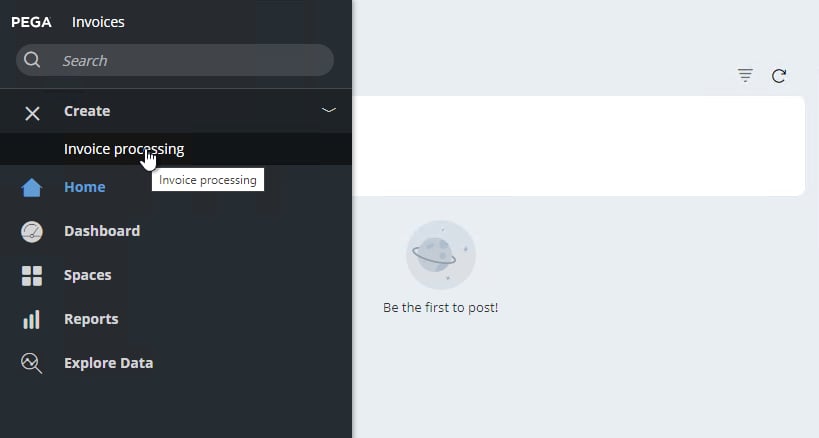
3
Upload a document and select a skill
In the window that opens, upload the document image. You can use the sample images in the connector distribution archive, such as 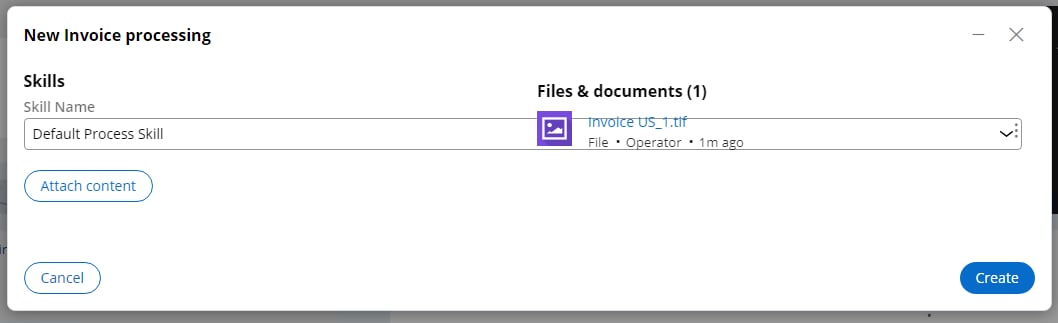
Invoice US_1.tif. In the Skills drop-down list, select Default Process Skill, and then click Create.If you cannot get a list of skills, review Configure a connection to ABBYY Vantage to check that your connection settings are correct.
Get the transaction status
1
Open the case
Your new case appears with a transaction identifier and a transaction status.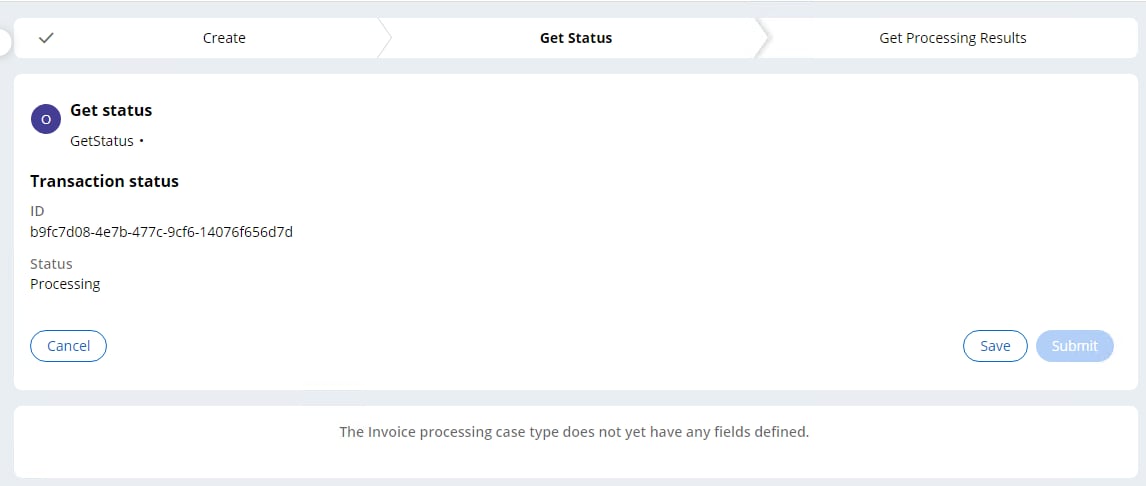
2
Refresh on the Get Status stage
On the Get Status stage, click Actions > Refresh. This sends a request to get the transaction status. Wait for the transaction to be processed, and then refresh the case again.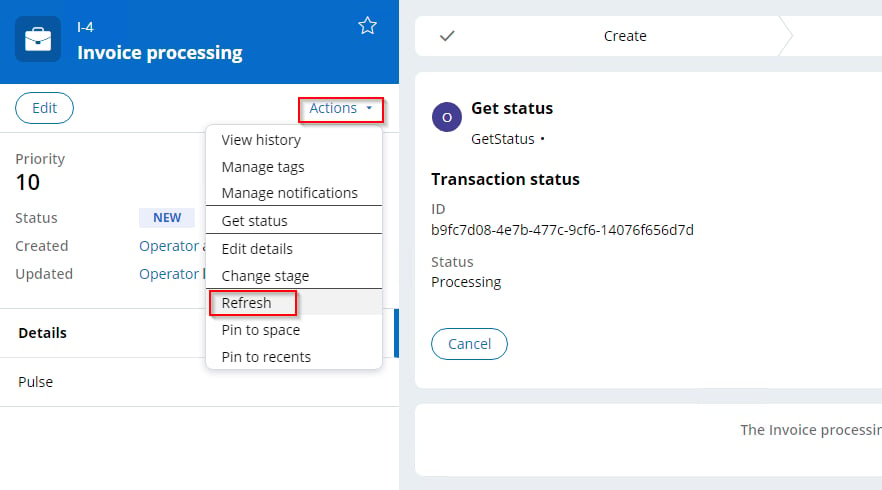
3
Submit when the transaction is processed
Once the transaction reaches the Processed status, the Get Status page displays the status, a list of documents, and result files for each document. Click Submit to continue to the next stage.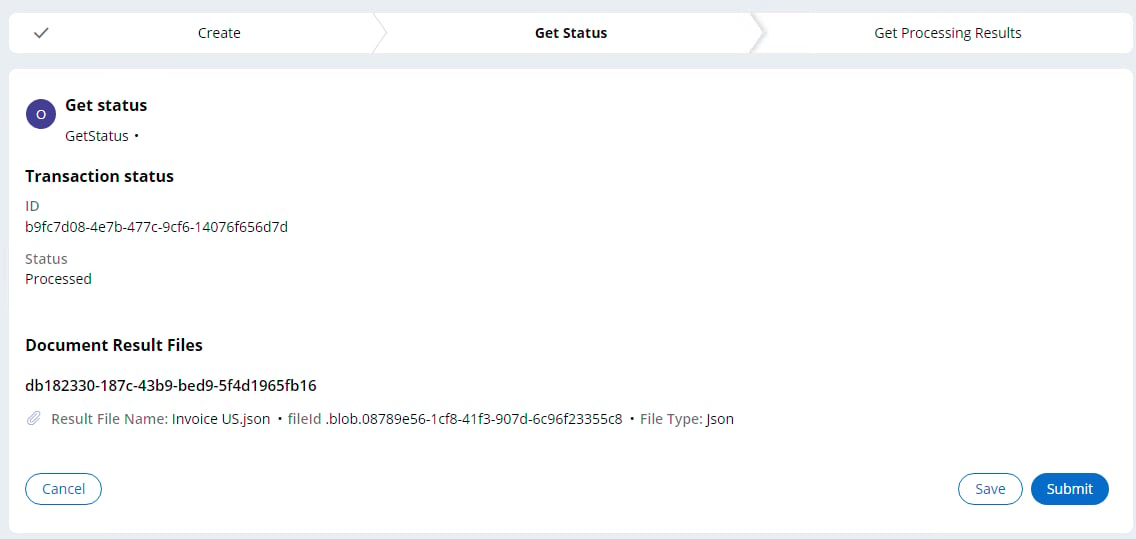
Get the processing results
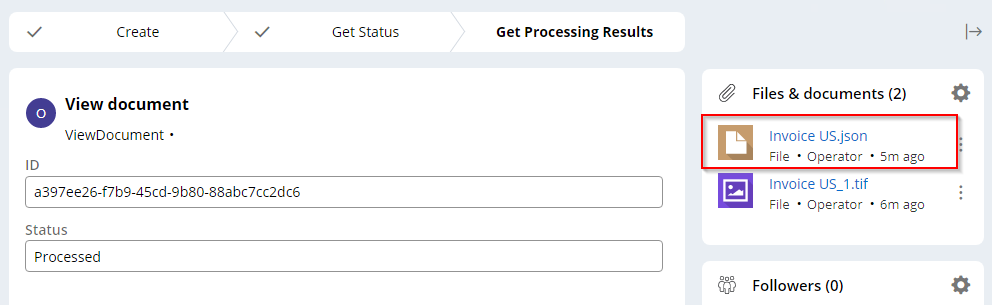
On the Get Processing Results stage, a form displays all the data extracted from your document. The form is created dynamically. To see other extracted fields, process theBankStatement.tif sample image in a new case.
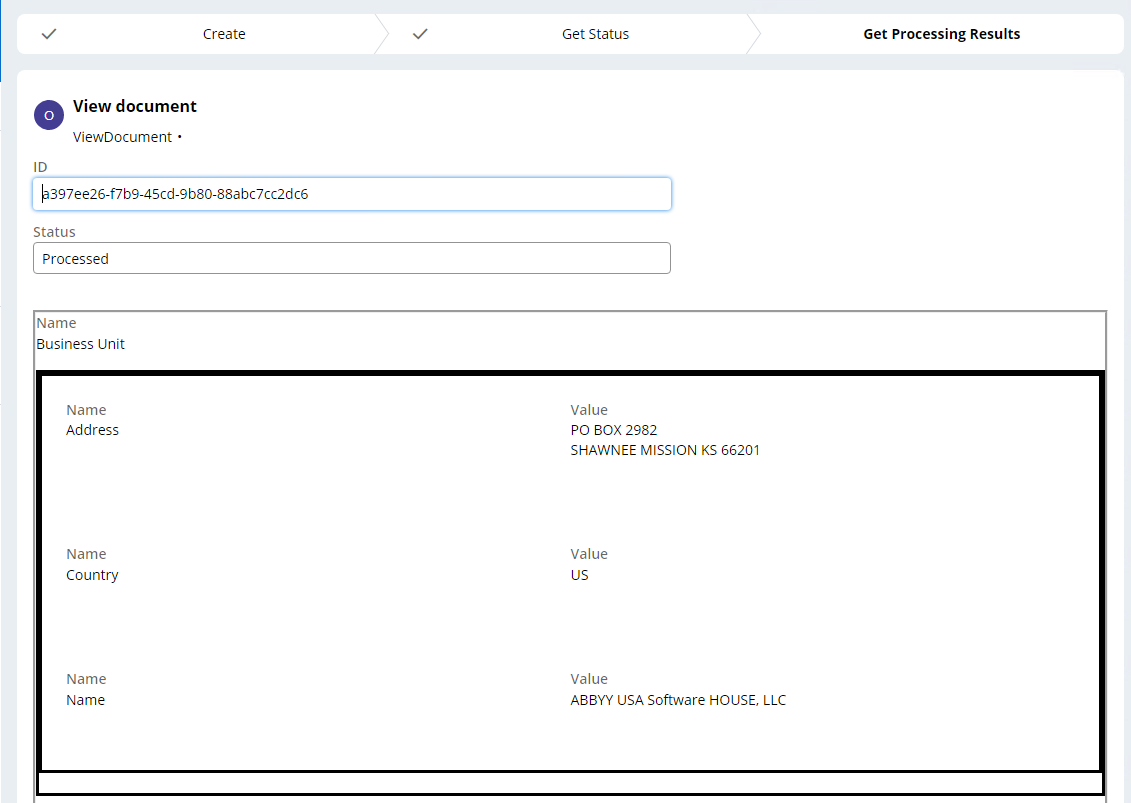
Json is used to get the fields.
The Get Processing Results stage displays the data extracted for the first document in a transaction only, and classification results are not shown on this stage. To work with all documents in a transaction and get classification data, set up an additional configuration.