
- Header of the table – Specify the column names using the already detected auxiliary elements.
- Footer of the table – Use the already detected required Paragraph element from the InvoiceFooter group, which identifies the beginning of the final part. This element was described as the closest to the bottom of the table.
- Search area for the table – Limit the search area on the right with the name of the last column, Sales, which is not needed for any other purpose.
Create the InvoiceTable element
1
Create the Table element
In the SearchElements tree, create a Table element and name it InvoiceTable.
2
Select the table block
Click the Columns tab, and then click Select to select the InvoiceTable block created earlier in Step 3 as the block to search for.
3
Assign the column names
Specify the search parameters for the table columns. For each column, select it in the list, click Properties…, select Use found element as column name, click  , and select the previously detected element:
, and select the previously detected element:4
Set the column order
Click the Order tab. Because the columns being searched for may be separated by other columns (for example, ExtraQtyTag) but their order is always fixed (first Designation, then Unit Price, then Total), select Rules for column order, click Add…, and add the columns in this order: 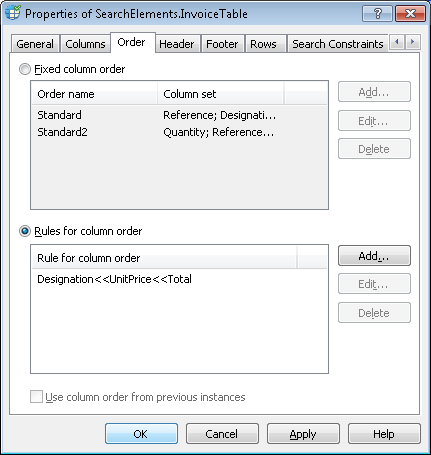
Designation << Unit Price << Total.5
Keep the header defaults
Click the Header tab. The table header is needed, but no additional constraints are imposed, so keep the default values.
6
Set the table footer
Click the Footer tab. Use the previously detected , and select the 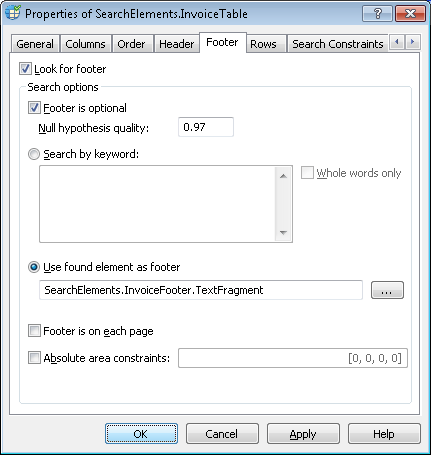
InvoiceFooter.Paragraph element for the final part of the table. Select the Use found element as footer option, click , and select the InvoiceFooter.Paragraph element.7
Set the master columns for rows
Click the Rows tab. Because the cells in some columns may contain multiple lines, specify master columns for line separation, and select Use master columns to detect rows.Specify the Total column first, because it always contains data and has one line of data per table record. If this column is not detected on the image, specify the Unit Price and Quantity columns as the next line-separation option. Use the button to select these columns.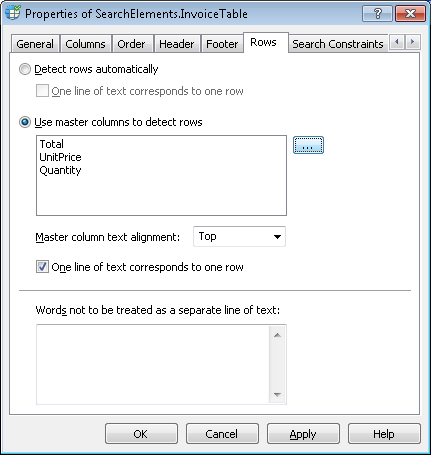
button to select these columns.8
Limit the table on the right
Click the Relations tab. Because the table columns of interest are to the left of the Sales column name, add this search constraint:
- Left of the
TableHeader.kwSaleselement, Offset = 0.
9
Match and check the Quantity column
Match the FlexiLayout with the test images. FlexiLayout Studio correctly detects the table element on all the images, but on some images the Quantity column includes redundant text from the preceding column. To separate the good data in the Quantity column from the irrelevant data, specify the content type for this column.
10
Set the Quantity content type
Open the Properties dialog box of the InvoiceTable table element. Click the Columns tab, open the Properties… dialog box of the Quantity column, and select the Check content type option. In Type of column content, select Number.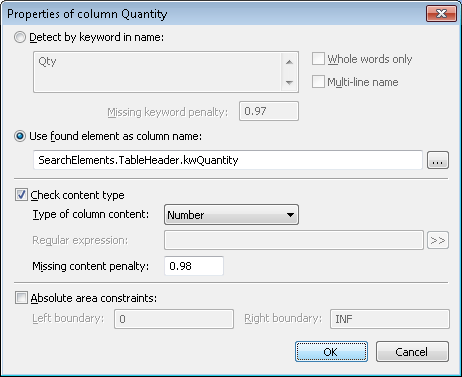
11
Set the currency content types
Match the FlexiLayout again and confirm that the Quantity column contains only digits, as required. Similarly, specify the Currency content for the UnitPrice and Total columns.
12
Set the block source element
To specify the location of the InvoiceTable block, select the Source element option, click , and specify InvoiceTable as the source element.
, and specify InvoiceTable as the source element.