
Unhandled exception at 0x00007FFAEAB2A839 (KernelBase.dll) in FlexiEx.exe: 0xC06D007E: Module not found (parameters: 0x000000E126EFE040). のようなエラーが発生する場合があります。COM+ アプリケーションを作成して設定すると、この問題を解決できます。
MAPI インポートには Microsoft Outlook 2016 が必要です。Microsoft Outlook の後続バージョンはサポートされていません。
COM+ アプリケーションを作成する前に
まず、Processing Station を停止します。Processing Station を実行したまま MAPI インポート を設定していてThe RPC server is unavailable エラーが発生した場合は、ABBYY FlexiCapture と Processing Stations を再起動します。
また、次の 2 つのアカウント条件を満たす必要があります。
- ABBYY FlexiCapture サービスは、Microsoft Outlook プロファイルと同じユーザー アカウントで実行する必要があります。これを設定するには、そのアカウントで Microsoft Outlook を開き、ドキュメントのインポート元となるメールボックスを追加します。
- COM+ アプリケーションの作成に使用するため、同じアカウントには管理者権限が必要です。
COM+ アプリケーションを作成する
1
Component Services コンソールを開く
Console Root → Computers → My Computer → COM+ Applications に移動します。
2
インストール ウィザードを開始する
COM+ Applications を右クリックし、ショートカット メニューで New → Application をクリックします。COM+ Application Install Wizard が開きます。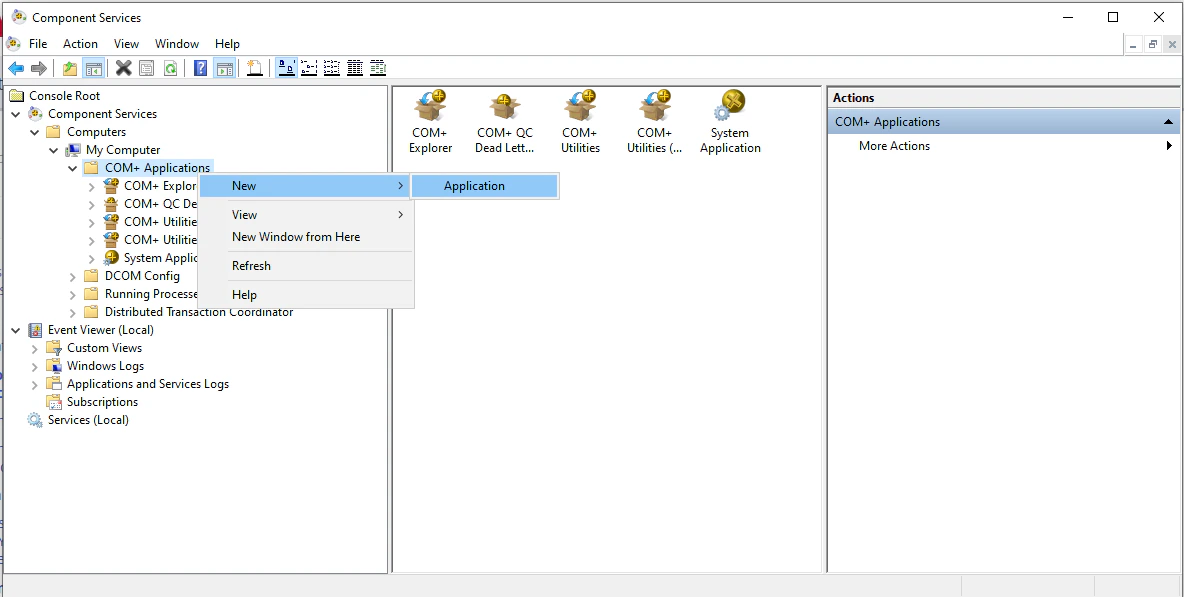
3
空のアプリケーションを作成する
Install or Create a New Application ダイアログで、Create an empty application をクリックします。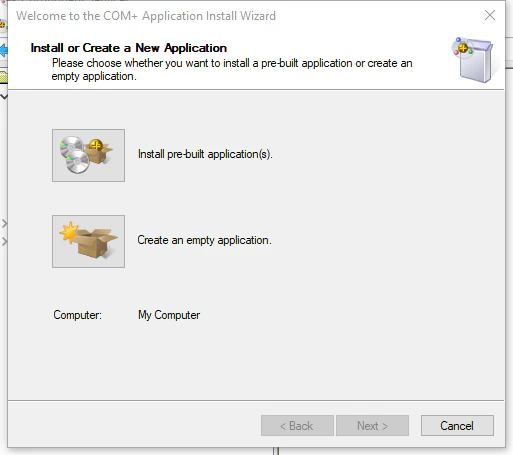
4
アプリケーションに名前を付ける
Create Empty Application ダイアログで名前を入力し、Server application を選択して Next をクリックします。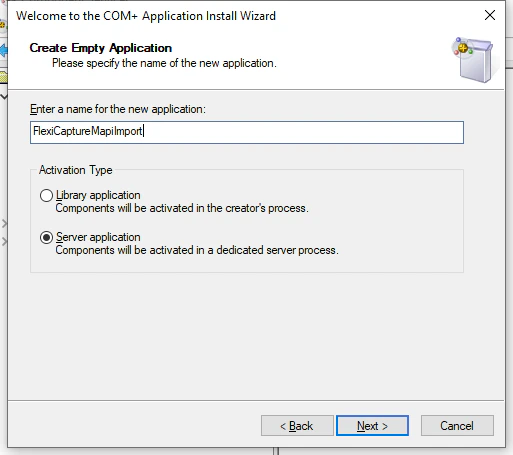
5
アプリケーション ID を設定する
Set Application Identity ダイアログで、Interactive user - the current logged on user を選択し、Next をクリックします。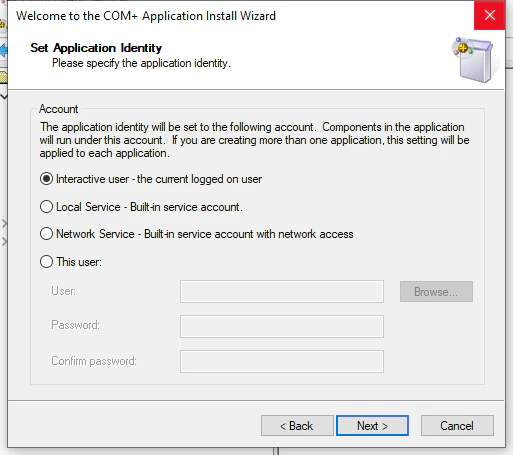
6
ウィザードを完了する
残りのダイアログでは既定の設定のまま、Next をクリックして進みます。
FlexiCapture コンポーネントをインポートする
1
新しいコンポーネントを追加する
リストで新しい COM+ アプリケーションを見つけ、Components フォルダーを右クリックして、New → Component をクリックします。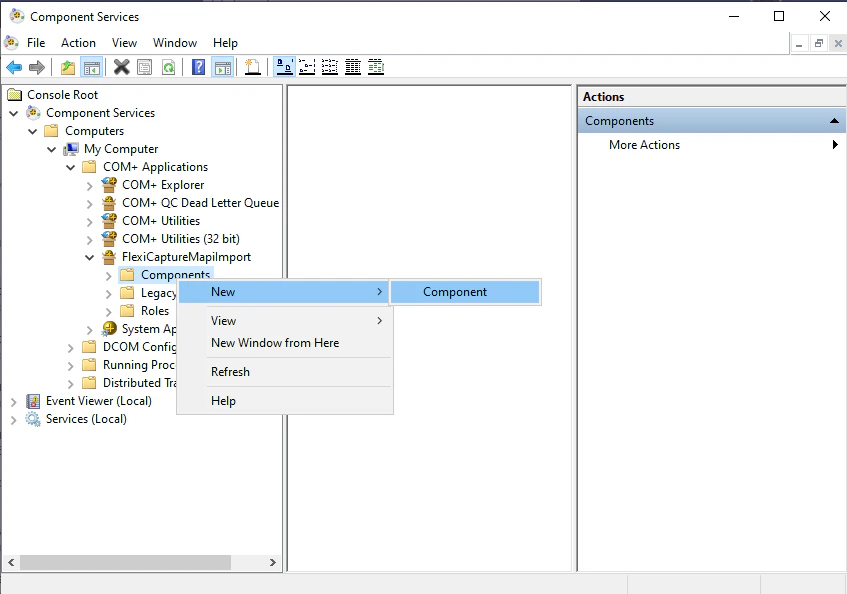
2
登録済みのコンポーネントをインポートする
Import or install a component ダイアログで、Import component(s) that are already registered をクリックします。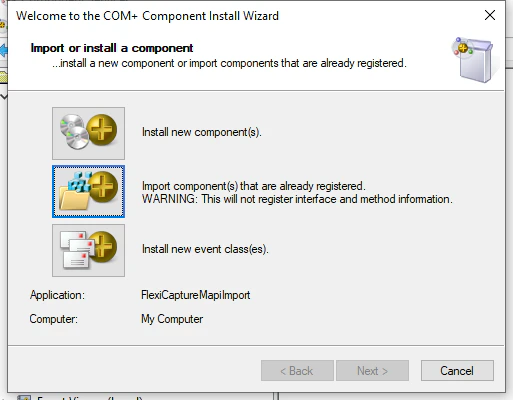
3
Office のビット数に対応するコンポーネントを選択する
Choose Components to Import ダイアログで、次の操作を行います。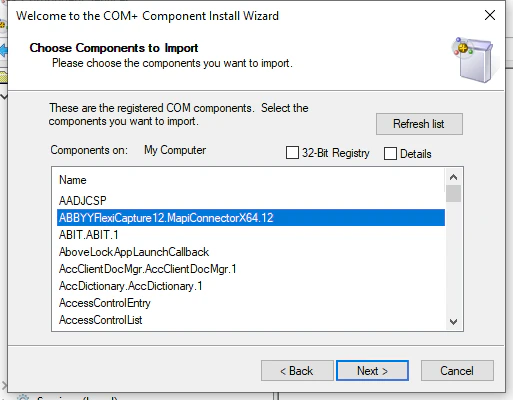
- 64 ビット版 Microsoft Office の場合は、
ABBYYFlexiCapture12.MapiConnectorX64.12を選択し、Next をクリックします。 - 32 ビット版 Microsoft Office の場合は、32-Bit Registry オプションを選択してから、
ABBYYFlexiCapture12.MapiConnectorX86.12を選択し、Next をクリックします。
4
アプリケーションのプロパティを開く
リスト内の COM+ アプリケーションを右クリックし、ショートカットメニューで Properties をクリックします。Pooling & Recycling タブを開きます。
5
プールの値を設定する
Expiration Timeout (minutes) ボックスに 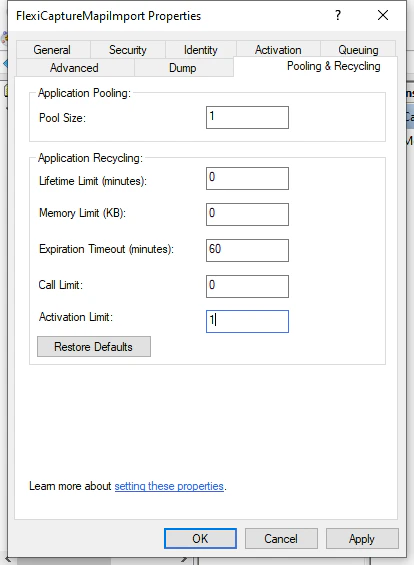
60、Activation Limit ボックスに 1 と入力し、OK をクリックします。