
Configure the Microsoft Graph connection
1
Register an Azure application
Register an application in Microsoft Azure Active Directory.
2
Grant Microsoft Graph API permissions
Grant the required Microsoft Graph API permissions, such as
Mail.Send.3
Configure the connection credentials
In the IBM watsonx Orchestrate connection
microsoft_abbyy_e073d849, configure the following credentials and store them securely:GRAPH_CLIENT_IDGRAPH_CLIENT_SECRETGRAPH_TOKEN_URL- Scope:
offline_access openid profile User.Read - Authorization URL
- Server URL
4
Create the connection and copy the callback URL
In IBM watsonx Orchestrate, create and save the Microsoft Graph API connection. Copy and save the generated Callback URL from the connection settings.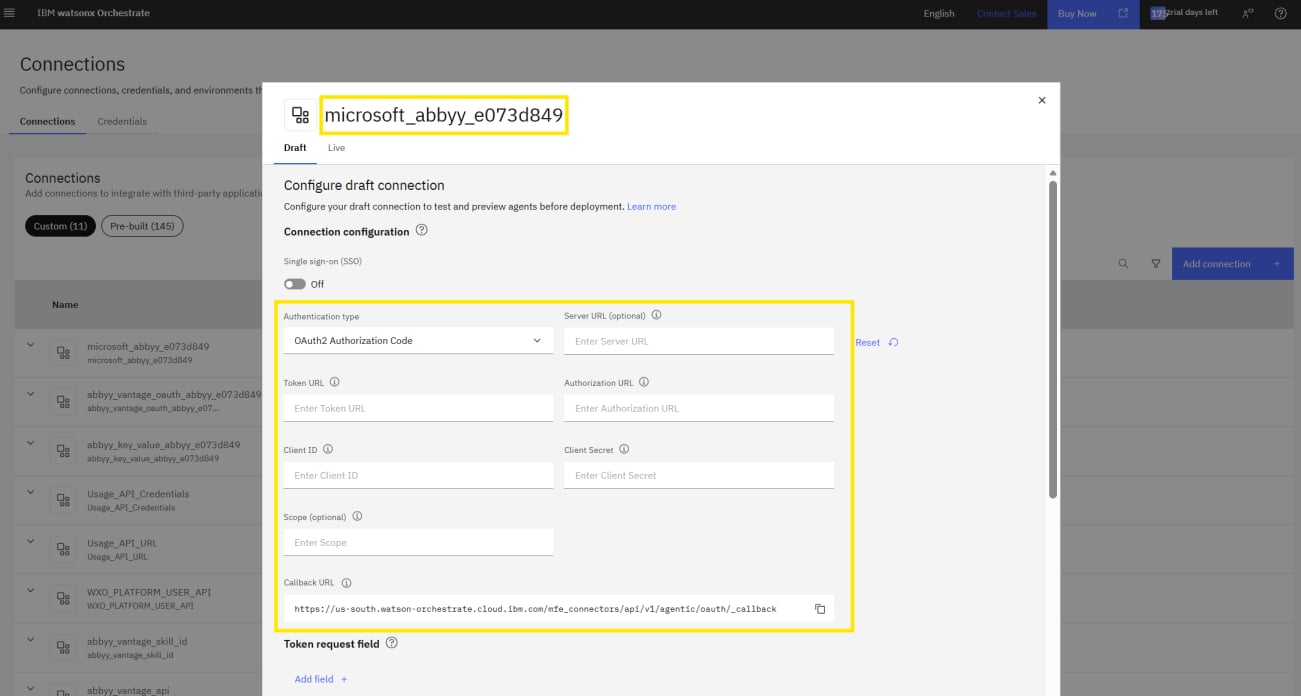
5
Add the callback URL to Azure
Add the Callback URL to the Redirect URI configuration of the Azure application.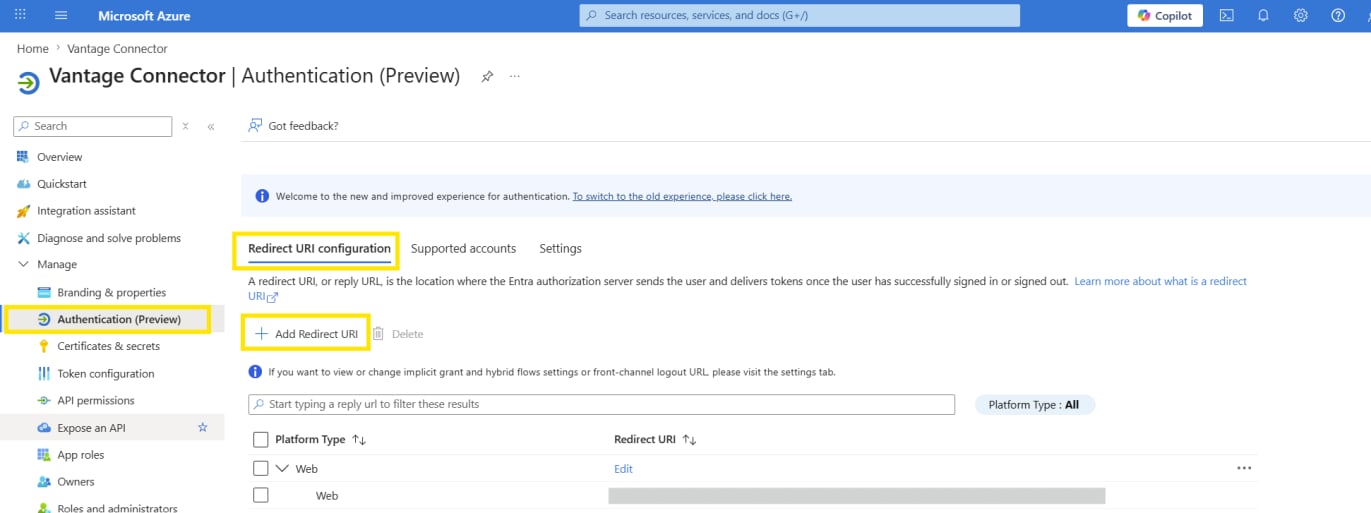
6
Save and validate the connection
Save and validate the connection in IBM watsonx Orchestrate.
7
Point the KYC Agent at the connection
Configure the KYC Agent to use the Microsoft Graph API connection for sending email notifications and workflow updates.