
After you set up ABBYY Vantage and ABBYY Timeline, configure the IBM watsonx Orchestrate connections with the values you collected in the previous steps.

Configure the connections

1

Configure the ABBYY Vantage OAuth connection

Populate the abbyy_vantage_oauth_abbyy_e073d849 connection with your ABBYY Vantage details: Server URL, Client ID, Client Secret, and Token URL.
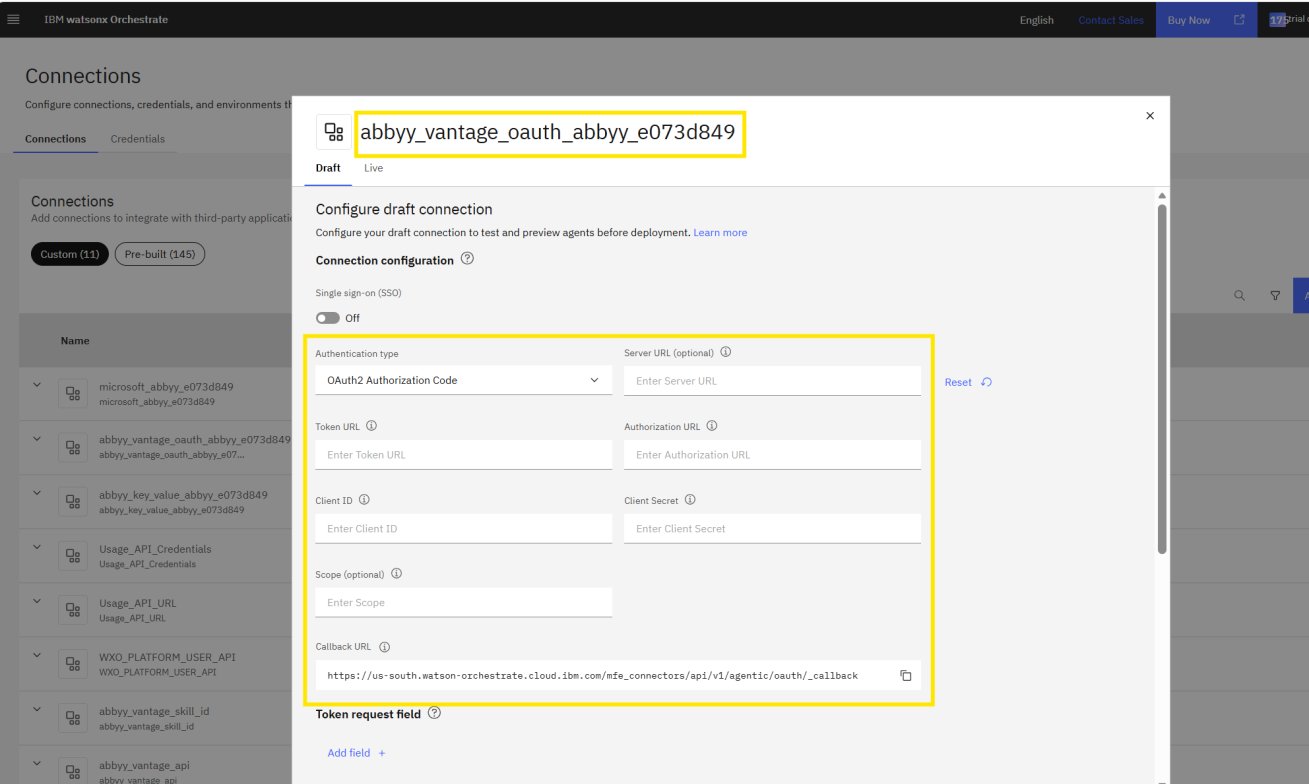
Screenshot of the abbyy_vantage_oauth connection in IBM watsonx Orchestrate, showing the OAuth2 Authorization Code fields for Server URL, Token URL, Client ID, and Client Secret.
2

Configure the key-value connection

Populate the abbyy_key_value_abbyy_e073d849 connection with vantage_skill_id, timeline_base_url, timeline_access_token, and timeline_project_id.
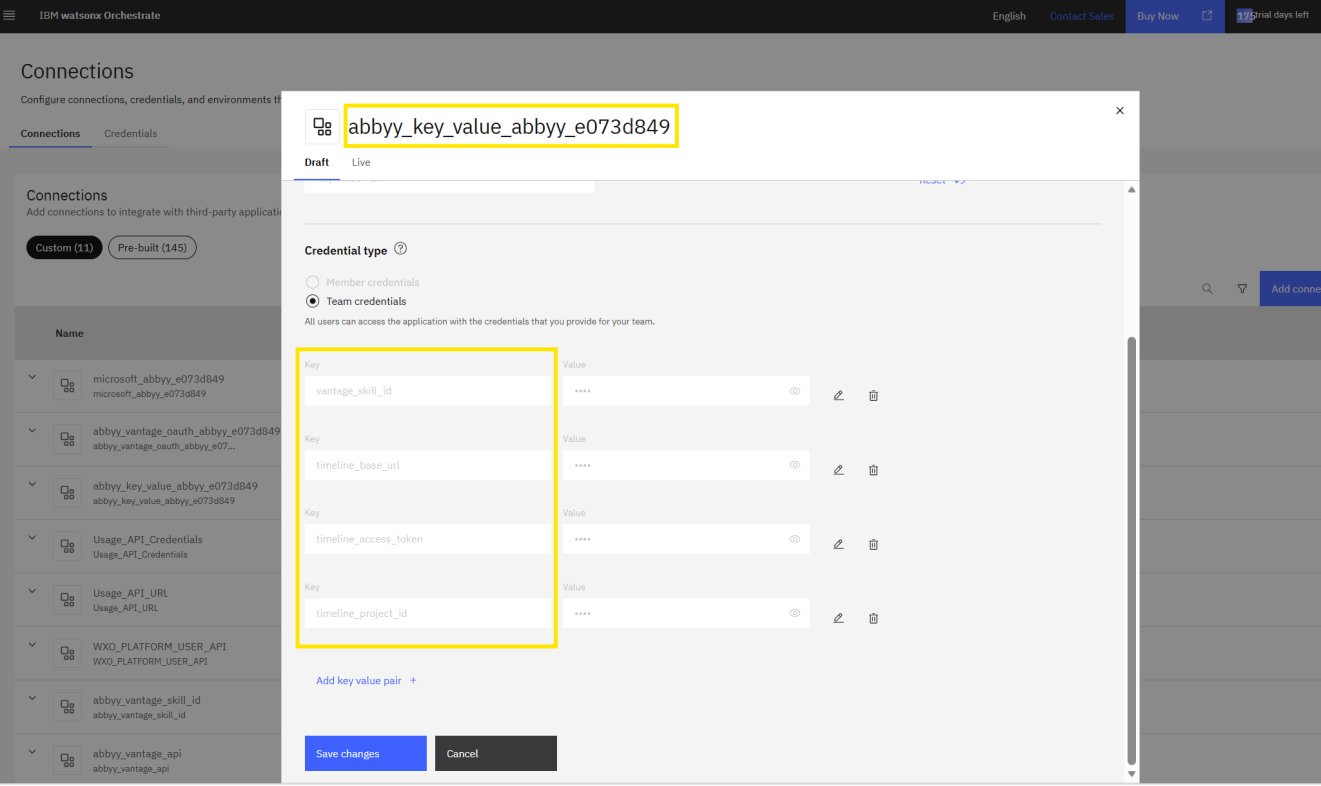
Screenshot of the abbyy_key_value connection in IBM watsonx Orchestrate, showing the vantage_skill_id, timeline_base_url, timeline_access_token, and timeline_project_id key-value pairs.
3

Save and validate the connections

Save and validate all configured connections in IBM watsonx Orchestrate.
4

Secure the credentials

Make sure all credentials are stored securely before you deploy and run the KYC Agent.
For the complete list of keys in each connection, see System requirements.

Next steps

Continue to Configure the Microsoft Graph API.