Prerequisites
- Ensure that you have a Vantage tenant identifier before configuring identities. To get a tenant identifier, click Configuration in ABBYY Vantage. The identifier is on the General tab.
- Create a Redirect URI to receive the authentication responses. The URI is:
https://<your-vantage-url>/auth2/Saml2/Acs
Setup
The setup process consists of the following steps:- Adding a claim description
- Configuring a relying party trust
- Adding rules to transform an incoming claim
Adding a claim description
Fill in the claim description
Specify the following: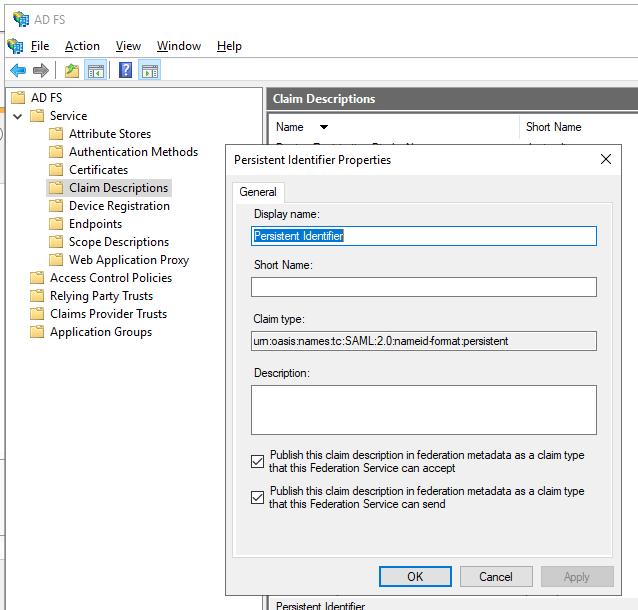
- Display name — for example,
Persistent Identifier. - Claim type —
urn:oasis:names:tc:SAML:2.0:nameid-format:persistent. - Select Publish this claim description in federation metadata as a claim type that this federation service can accept.
- Select Publish this claim description in federation metadata as a claim type that this federation service can send.
Configuring a relying party trust
To create an AD FS relying party trust, follow these steps:Add a Relying Party Trust
In the console tree, under AD FS, select Trust Relationships > Relying Party Trusts > Add Relying Party Trust.
Select the data source
On the Select Data Source page, select Enter data about the relying party manually, then click Next.
Specify a display name
On the Specify Display Name page, enter any name in Display Name, then click Next.
Configure the URL
On the Configure URL page, select Enable support for the SAML 2.0 WebSSO protocol. Under Relying party SAML 2.0 SSO service URL, enter
https://<your-vantage-url>/auth2/Saml2/Acs, then click Next.Configure identities
- Under Relying party trust identifier, enter
api://platform.abbyy.cloud/tenantId, wheretenantIdis the tenant identifier in GUID format without hyphens (for example,117489fc1aea41658369d4d18d6557ga). This value will be used as the Application ID URI for authentication. Copy this value — you’ll need it when configuring the External Identity Provider in Vantage. Click Add. - In the Expose an API tab, set the Application ID URI to the same value you entered above (for example,
api://cccc3333-dddd-4444-eeee-5555ffff6666). Click Add, then click Next.
Choose Issuance Authorization Rules
To grant Vantage access to all users, select Permit all users to access this relying party. To restrict access to a specific group, select Permit specific group and specify the group. Click Next.
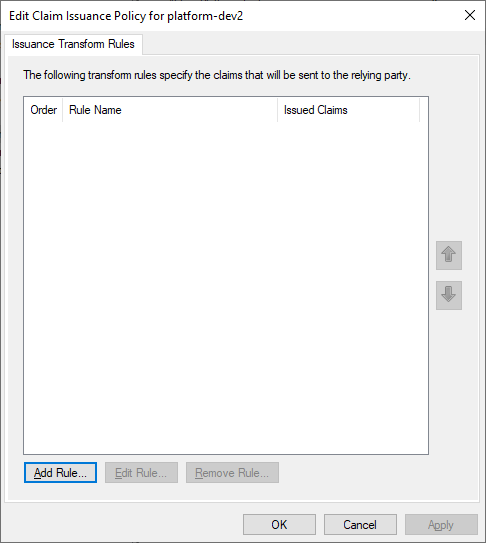
Adding rules to transform an incoming claim
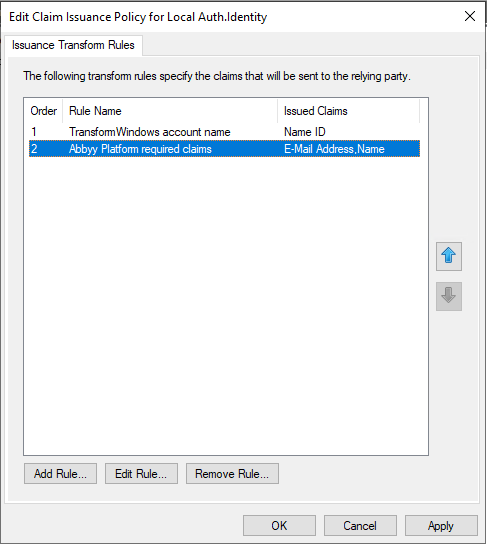
To apply rules to transform an incoming claim, follow these steps:Edit the Claim Issuance Policy
Right-click the selected trust, then click Edit Claim Issuance Policy.
Select the rule template
Select the Transform an Incoming Claim claim rule template, then click Next.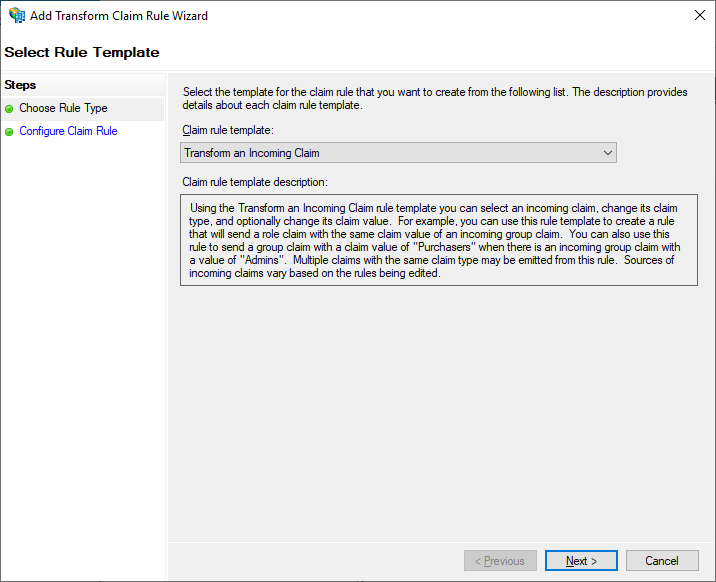
Configure the claim rule
Select the Configure Claim Rule step, then specify the following: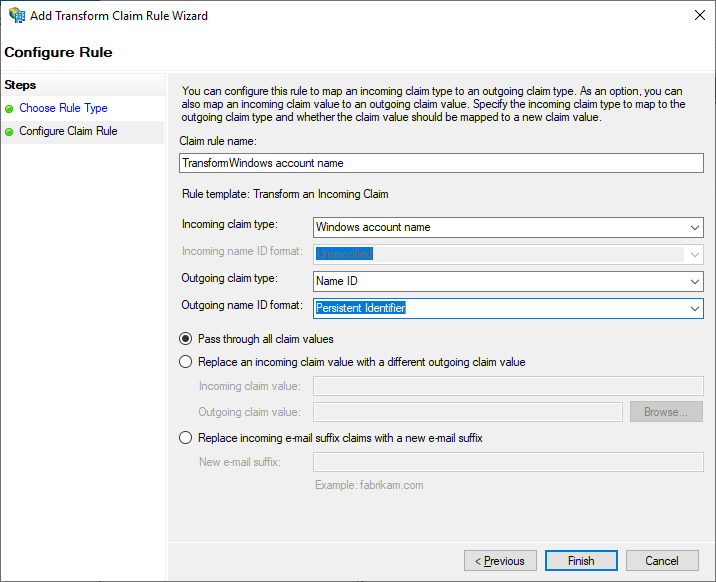
- Claim rule name —
TransformWindows account name. - Incoming claim type — Windows account name.
- Outgoing claim type — Name ID.
- Outgoing name ID format — Persistent Identifier.
- Select Pass through all claim values.
Add a Send LDAP Attributes rule
Add another rule to ensure email and name claims are included in the issued token. On the Select Rule Template page, select Send LDAP Attributes as Claims under Claim rule template, then click Next.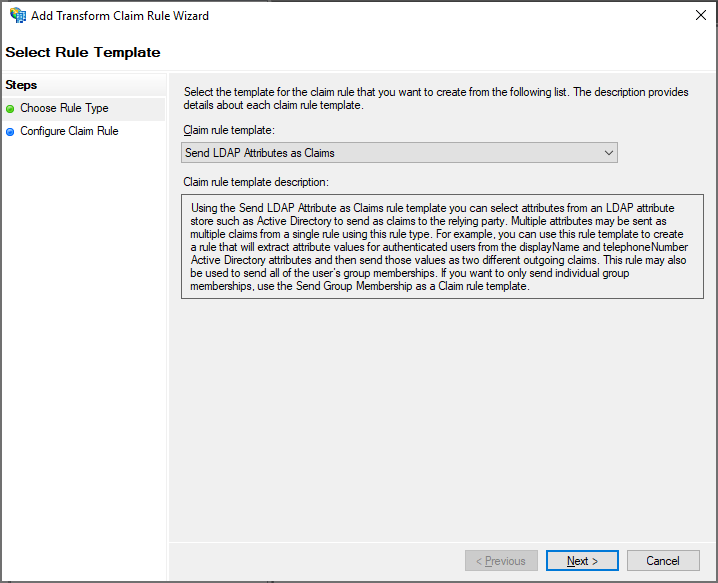
Configure the LDAP rule
On the Configure Claim Rule page, select the Active Directory attribute store under Claim rule name, then click Finish.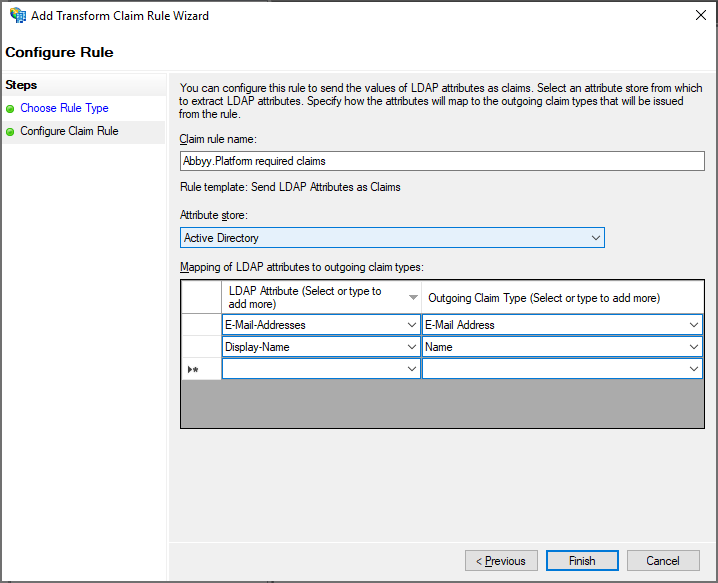
Next steps
Once AD FS is configured, connect it to your Vantage tenant. You’ll need the federation metadata document URL in the formathttps://<adfs-server-address>/federationmetadata/2007-06/federationmetadata.xml — for example, https://adfs.platform.local/federationmetadata/2007-06/federationmetadata.xml.
For the Vantage-side setup, see Setting up an External Identity Provider for a tenant.
Related topics
Configuring a SAML 2.0 External Identity Provider
Overview of SAML 2.0 setup for AD FS or Azure AD
Azure Active Directory as a SAML 2.0 External Identity Provider
Configure Azure AD instead of on-premises AD FS
Setting up an External Identity Provider for a tenant
Connect AD FS to your Vantage tenant
Testing external authentication
Verify the External Identity Provider before users sign in