Setting Up a Shared Folder Connection
ABBYY Vantage lets you use shared folders hosted on the Vantage server for importing and exporting documents and skills, as well as updating data catalogs. Before you can start using shared folders (NFS share), you need to set up a connection to those shared folders from a client computer. Perform the following steps on a client computer running Windows:- Run Windows PowerShell as an Administrator.
- Install Windows NFS Client:
- Configure a mapping of Windows users to Unix UIDs and GIDs depending on your company policies:
- Restart NFS Client:
Setting Up a Database Connection
ABBYY Vantage uses databases hosted on external servers and may become inoperable if those servers fail. The system administrator can restore such databases on a different server and set up a connection to the new databases using Consul.Before starting, make sure that the kubectl command line tool is installed and that a connection to the Kubernetes cluster has been established.
- Access the Consul web interface by running the command below:
http://localhost:8500/ui/dc1/kv/secret/.
- Use the Key/Value tab that will open to select the correct Vantage environment.
- Select either the platform or the vantage project, as well as the appropriate service that uses the database (for example, mail).
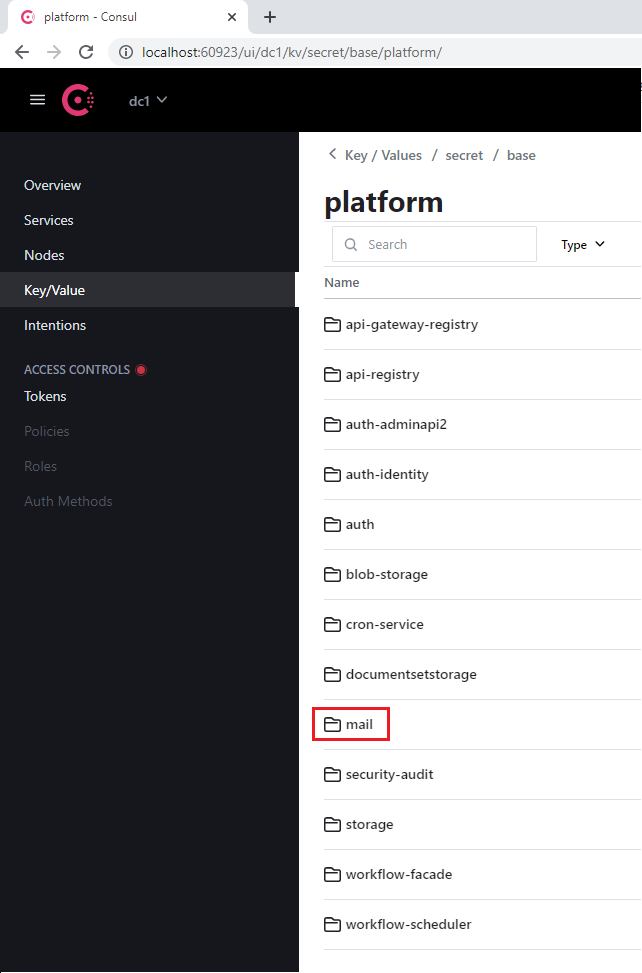
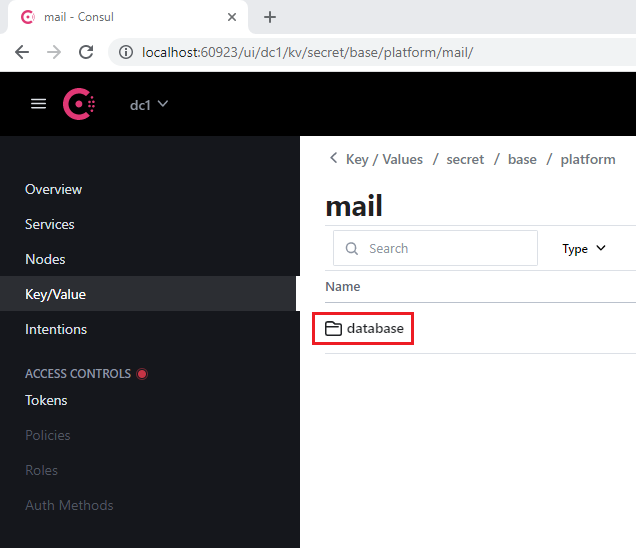
- Navigate to the database section that every service contains.
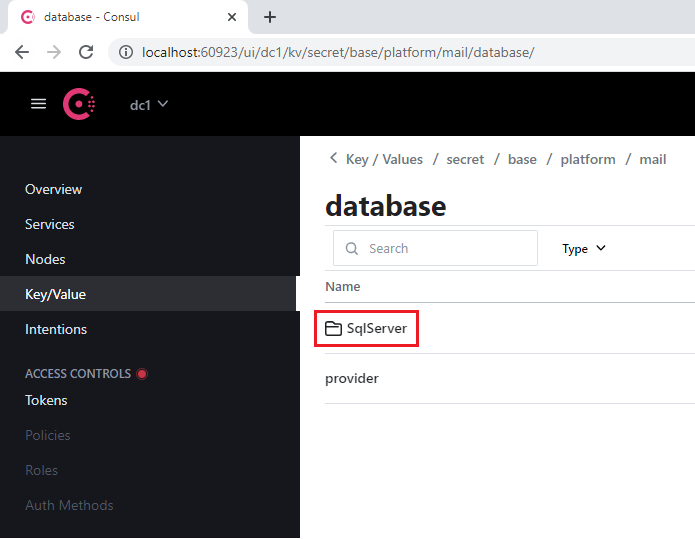
- Open the SqlServer section.
- In the connectionString key:
- Replace the old value of Server with the address of the new server
- Specify the new database in the Database parameter
- Specify the login credentials in the User Id and Password parameters
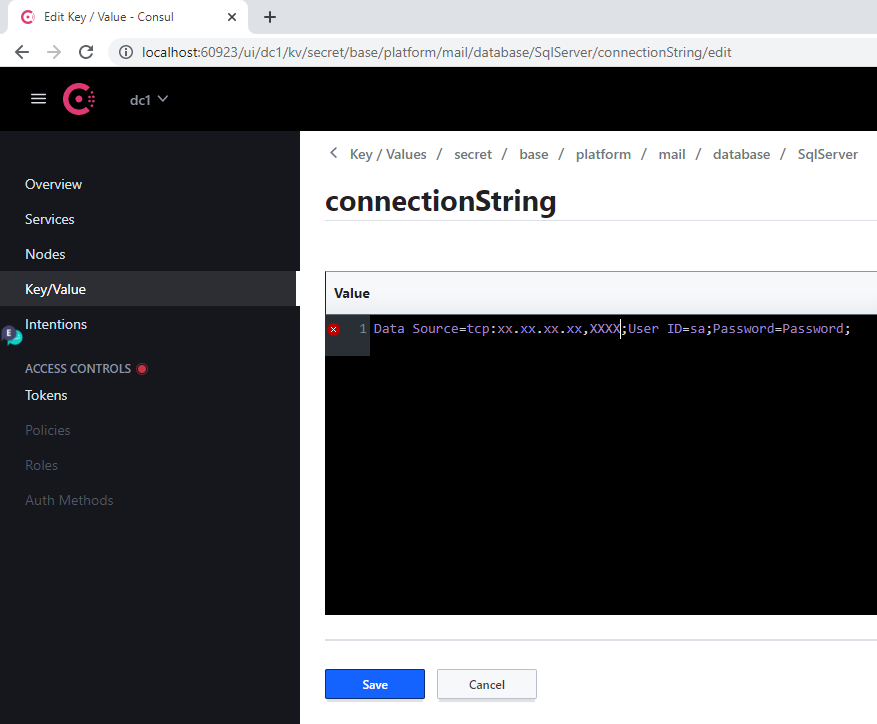
- Click Save.
- Restart the modified service by running the following command:
When a server address changes, this procedure has to be carried out for every database.
Database Services Reference
Below is a table listing all services that use the database, as well as their label for restarting each service.Platform Services
| Consul Section Name | Service Label | Notes |
|---|---|---|
| api-gateway-registry | api-gateway-registry | |
| api-registry | api-registry | |
| auth-adminapi2 | auth-adminapi2 | |
| auth-identity | auth-identity | |
| auth | auth-sts-identity, auth-adminapi2 | This database is used by two services |
| blob-storage | blob-storage | |
| cron-service | cron-service | |
| documentsetstorage | documentsetstorage | |
| security-audit | security-audit | |
| storage | storage | The database section is stored in the fileMetadata catalog |
| workflow-facade | workflow-facade | |
| workflow-scheduler | workflow-scheduler |
Vantage Services
| Consul Section Name | Service Label |
|---|---|
| catalogstorage | catalogstorage |
| folderimport | folderimport |
| interactive-jobs | interactive-jobs |
| mailimport | mailimport |
| permissions | permissions |
| publicapi | publicapi |
| reporting | reporting |
| secretstorage | secretstorage |
| skill-monitor | skill-monitor |
| skillinfo | skillinfo |
| subscriptions | subscriptions |
| tokenmanagement | tokenmanagement |
| transactions | transactions |
| workspace | workspace |
Setting Up GPU
Vantage allows you to use GPU to train skills with the Deep Learning activity for extracting data from semi-structured documents.System Requirements for GPU
- Minimum virtual GPU RAM: 12 GB
- 1 CPU and 4 GB RAM for each virtual GPU on host (e.g., a VM with a single virtual GPU of 12 GB must have at least 2 CPU and 8 GB RAM)
Virtual GPU
You can use a virtual GPU (vGPU) to split one physical GPU into several virtual machines, allowing Vantage resources to be used more efficiently. To set up vGPU:- Copy the nVidia GRID driver package from the nVidia application hub to a virtual machine with a GPU and run the following commands:
-
Install the nVidia GPU operator onto the Kubernetes cluster:
a. Place the license token file (generated in the nVidia application hub) in the
$PWD/gpu/folder before running the Vantage installer container. b. Add the-v $PWD/gpu:/ansible/files/gpu:roparameter to the command for running the Vantage installer container:
[abbyy_workers] group. The name of the virtual machine with the GPU must contain “gpu”:
- Set up vGPU by running the following playbook:
GPU Passthrough
You can set up GPU passthrough which gives a virtual machine direct access to your GPU. To set up GPU passthrough:- Run the Vantage installer container:
- Add a GPU node (e.g., worker2-12-a40-gpu01) to the inventory file in the
[abbyy_workers]group:
- Run the playbook:
- Install the GPU operator helmchart:
- Add a node taint:
Testing and Deploying GPU
For both vGPU and GPU passthrough modes, to test a GPU operator installation:- Run this command:
- Create a YAML file with the following contents and apply it:
- Check the pod log. You should see a response containing
Test PASSED:
- Add the following parameters to the
env_specific.ymlfile:
- Do one of the following:
- If Vantage is already installed, run the following playbook to deploy GPU workers:
- If Vantage is not installed yet, GPU workers will be deployed during the installation.
Setting Up a Manual Review Inactivity Timeout
In manual review, if no actions are taken by the operator for a period of 15 minutes with regards to an open task, a timeout is triggered. The System Administrator can change the length of inactivity required for a timeout using Consul. To configure the timeout:- Access the Consul web interface by running:
http://localhost:8500/ui/dc1/kv/secret/.
- Use the Key/Value tab to select the correct Vantage environment.
- Change the values of the following keys:
| Key | Description |
|---|---|
secret/abbyy-vantage/vantage/verification/interactiveJobsOptions/popTimeout | The minimum period of time a user is inactive before a task will be returned to the interactive task queue. Any interactive action (mouse movement, keyboard input, patch processing, etc.) resets the countdown. Default: 00:15:00 (15 minutes) |
secret/abbyy-vantage/vantage/verification/interactiveJobsOptions/processingPopTimeout | The minimum period of user inactivity after which the task will be returned to the queue if there are long-term operations (applying a skill, turning pages, etc.). When a long-running operation starts, this value is set to the maximum allowable inactivity period. When the operation completes, the inactivity period resets to the popTimeout value. Default: 1.00:00:00 (24 hours) |
- Click Save.
- Restart the verification and manualverification services:
Updating the SSL Certificate
When the SSL certificate expires, you will need to change to the new certificate.Using Lens
- Go to Config > Secrets and find all secrets called
platform-wildcard. - For each secret, find the Data subsection, click the Show icon, and update the values:
- Enter the value of the new certificate in the
tls.crtfield - Enter the value of its key in the
tls.keyfield
- Enter the value of the new certificate in the
The certificate and the key must be PEM files with base64 ASCII encoded contents (PKCS#8). They should start with
-----BEGIN CERTIFICATE----- for the certificate and -----BEGIN PRIVATE KEY----- for the key.- Click Save.
Using Linux Command Line
- Make sure you have access to the Kubernetes cluster:
- Place the certificate and key in PEM format into the current folder:
cert.pem,key.pem.
- Run the following commands: