You can connect the ABBYY FlexiCapture Application Server to a file share in Microsoft Azure. Store the share credentials either in Windows Credential Manager or in Azure Key Vault.
These instructions assume a storage account already exists in Microsoft Azure Files and is available to ABBYY FlexiCapture.

Connect using Windows Credential Manager

1

Open the Files service in your storage account

On the Azure portal, go to your storage account, abbyystorage in this example, and click Files in the storage account pane.
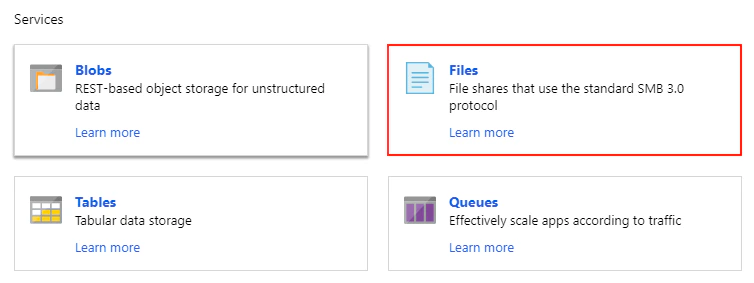
Screenshot of the Microsoft Azure portal showing the abbyystorage storage account pane with the Files service highlighted.
2

Create the file share

Give it a name, fcstorage in this example, and a space quota.
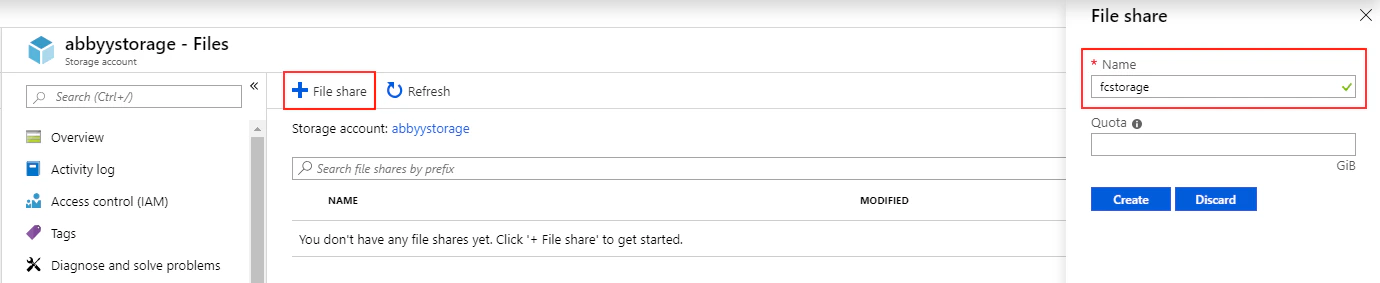
Screenshot of the Microsoft Azure portal where a new file share named fcstorage is being created with a specified name and quota.
3

Open the new file share and click Connect
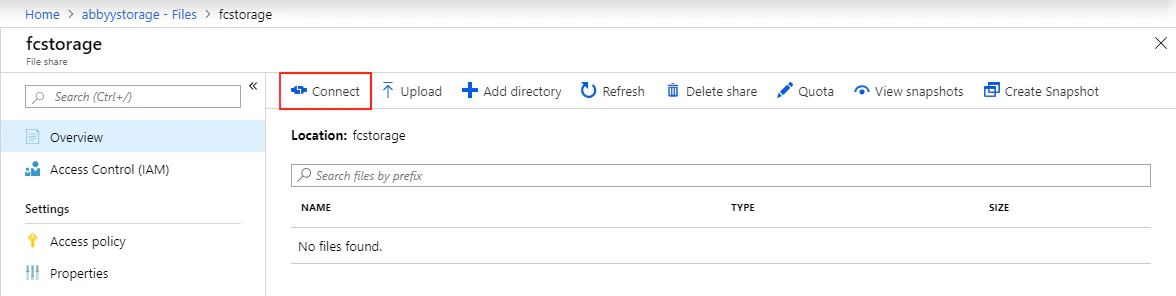
The Connect pane shows the command you need in the next step.
Screenshot of the Microsoft Azure portal showing the created file share open with the Connect option selected.
4

Copy the cmdkey command to the Clipboard
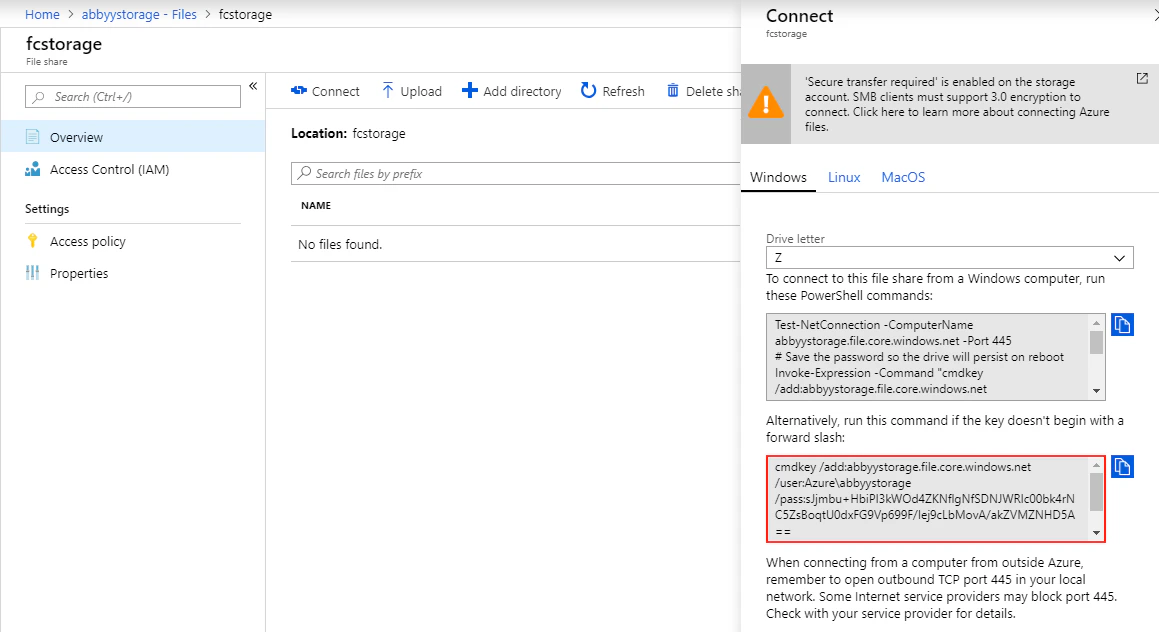
Take it from the Connect pane.
Screenshot of the Microsoft Azure portal Connect pane showing the cmdkey command being copied to the Clipboard.
5

Run the cmdkey command on the Application Server

Log on to the virtual machine running the FlexiCapture Application Server. Use a system user with permission to reach the FlexiCapture services, fcuser in this example.Open the command line prompt, and then paste and run the cmdkey command. This adds the file share credentials to Windows Credential Manager.
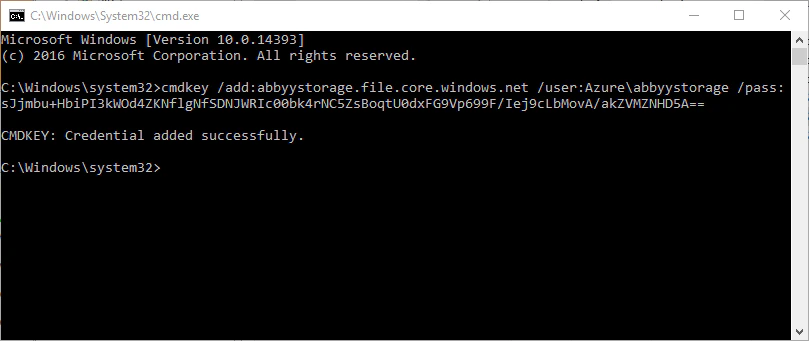
Screenshot of the Windows command line prompt where the cmdkey command is pasted and executed to add the file share credentials to Windows Credential Manager.
6

Check that the user can reach the file share
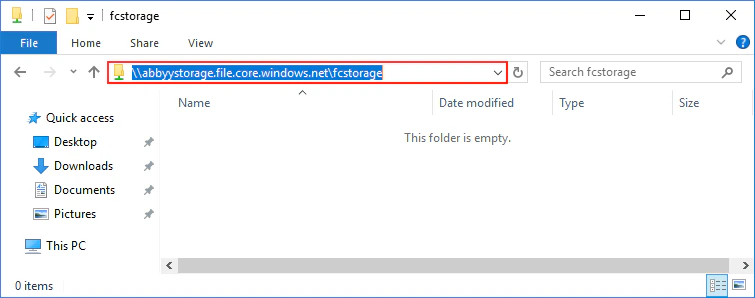
Open Windows Explorer and confirm access.
Screenshot of Windows Explorer confirming that the user can access the connected Azure file share.
7

Open the FlexiCapture application pool settings
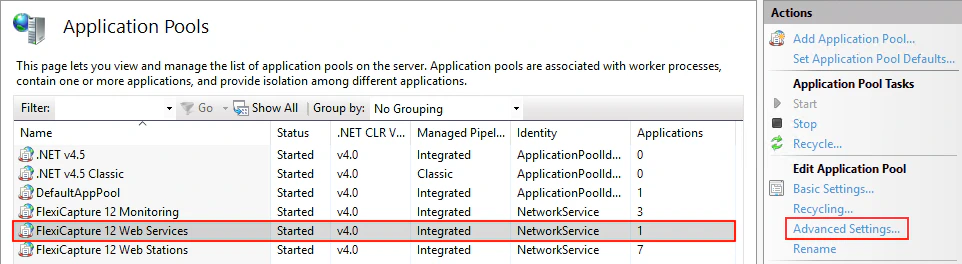
In Internet Information Services (IIS) Manager, select the FlexiCapture application pool and click Advanced Settings.
Screenshot of IIS Manager with the FlexiCapture application pool selected and the Advanced Settings option highlighted.
8

Set the pool identity and load the user profile
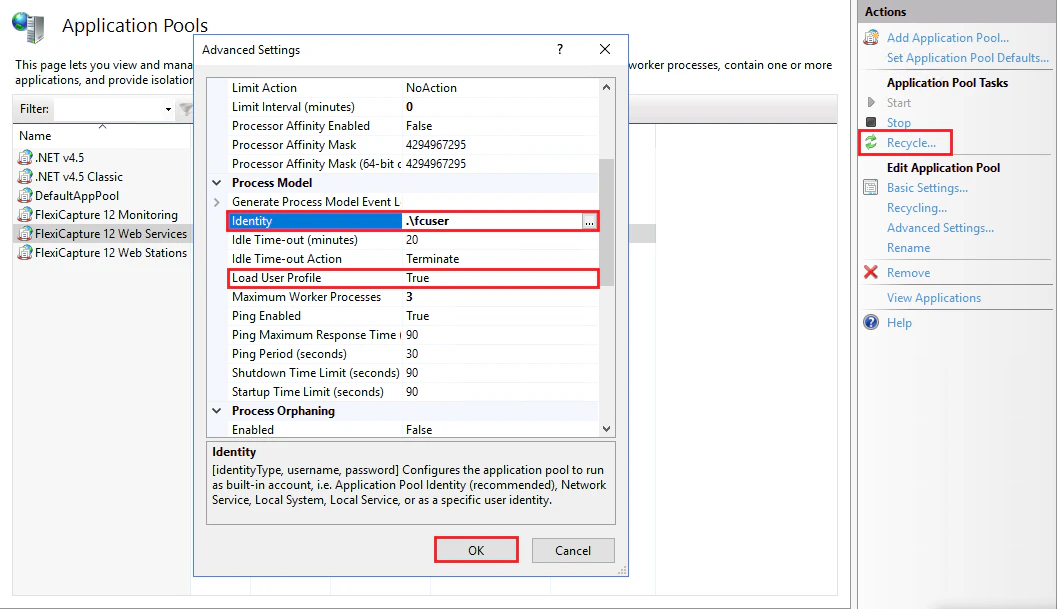
Change the pool identity to the FlexiCapture user account with the required permissions, and set Load User Profile to True. Click OK, and then recycle the application pool.
Screenshot of the IIS Advanced Settings dialog with the application pool identity set to the FlexiCapture user account and Load User Profile set to True.
9

Point ABBYY FlexiCapture at the share
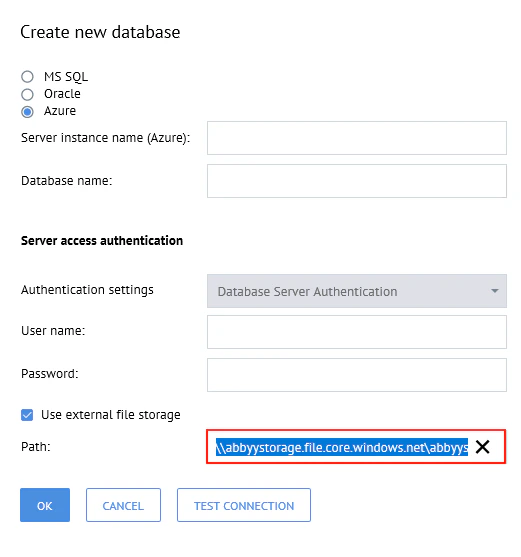
In the Administration and Monitoring Console, select Use external file storage and specify the path to the file share in Microsoft Azure.
Screenshot of the Administration and Monitoring Console with the Use external file storage option selected and the Microsoft Azure file share path specified.

Use Azure Key Vault to connect to Microsoft Azure Files

Azure Key Vault is a cloud service for securely storing secrets, such as API keys, passwords, and certificates. It protects the sensitive data that your cloud applications and services use. You create and manage key vaults through the Azure portal. For more information, see Azure Key Vault basic concepts in the Microsoft documentation. Configure the Azure portal first, and then each Application Server.

On the Azure portal

1

Set up virtual machines for your Application Servers
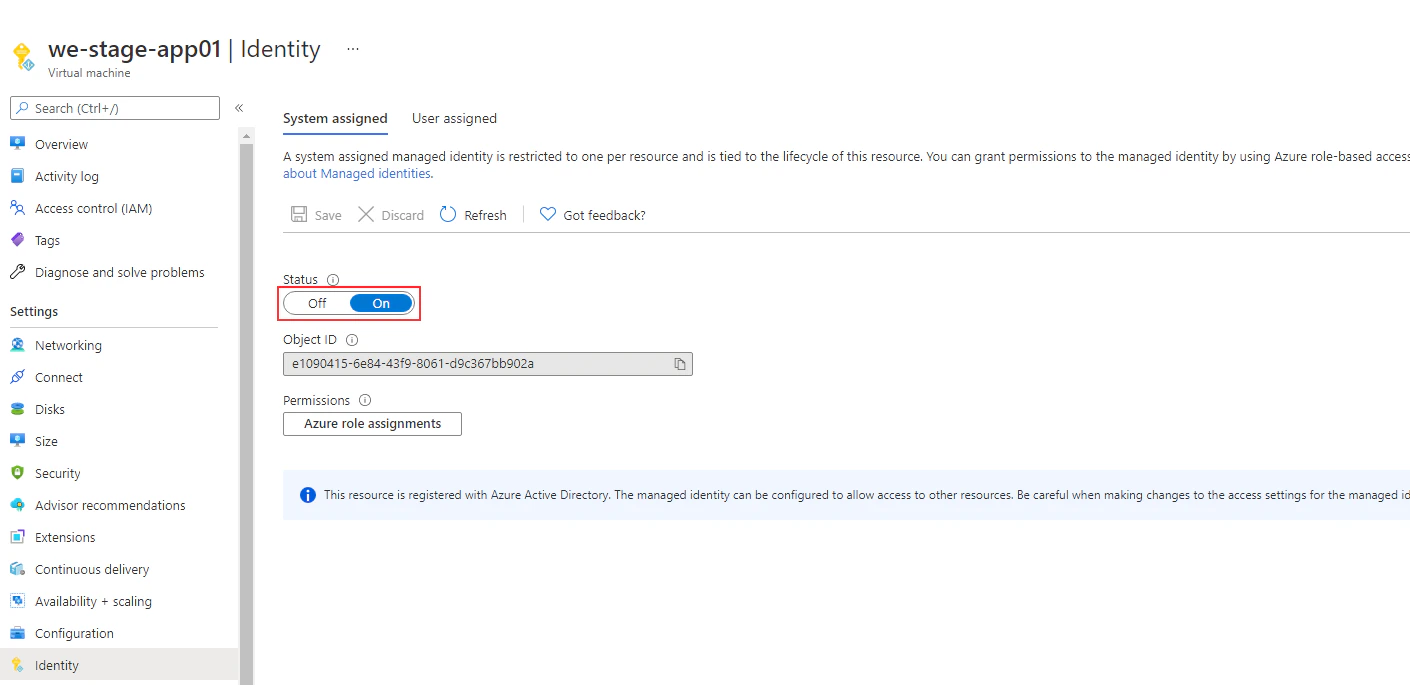
Every virtual machine running the Application Server must be registered in Azure Active Directory. For more information, see configuring a system-assigned managed identity in the Microsoft documentation.
Screenshot of the Azure portal showing a virtual machine for the ABBYY FlexiCapture Application Server registered in Azure Active Directory.
2

Create a new key vault

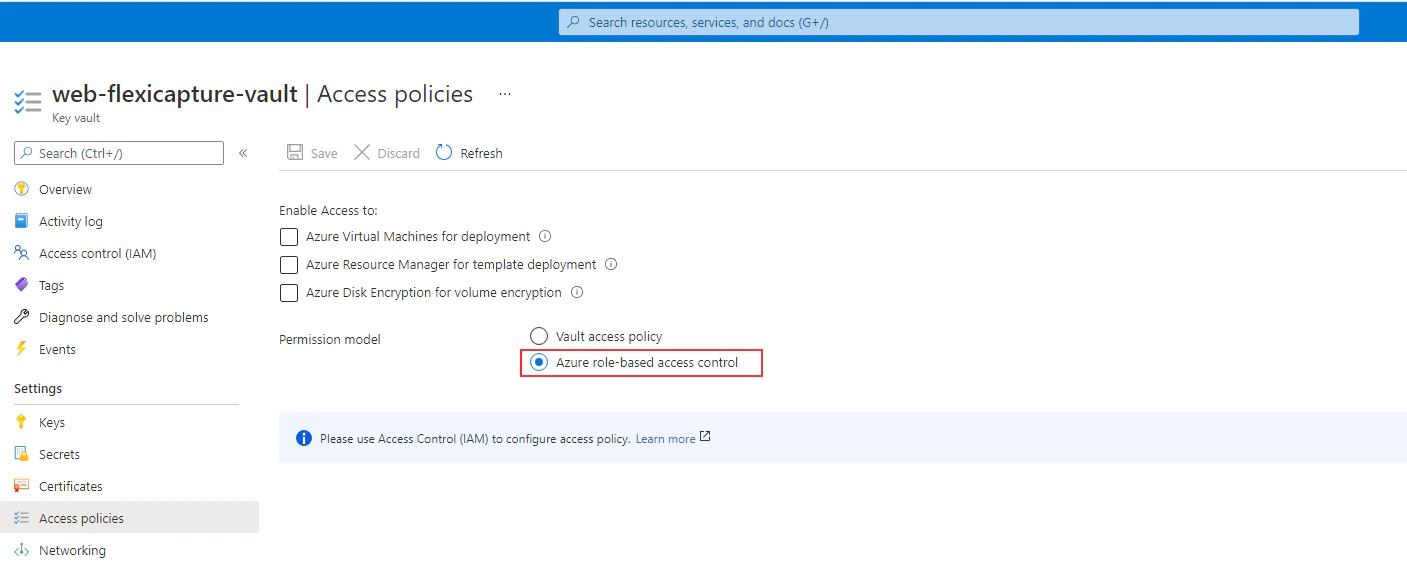
Under Permission model, select Azure role-based access control.
Screenshot of the Create a key vault page in the Azure portal with Azure role-based access control selected under Permission model.
3

Add the two roles that allow secrets to be saved and viewed

Add Key Vault Secrets Officer for your account, and Key Vault Secrets User for the virtual machine objects. For more information, see granting a virtual machine access to Azure Resource Manager in the Microsoft documentation.
4

Add your storage account access key to the key vault as a secret
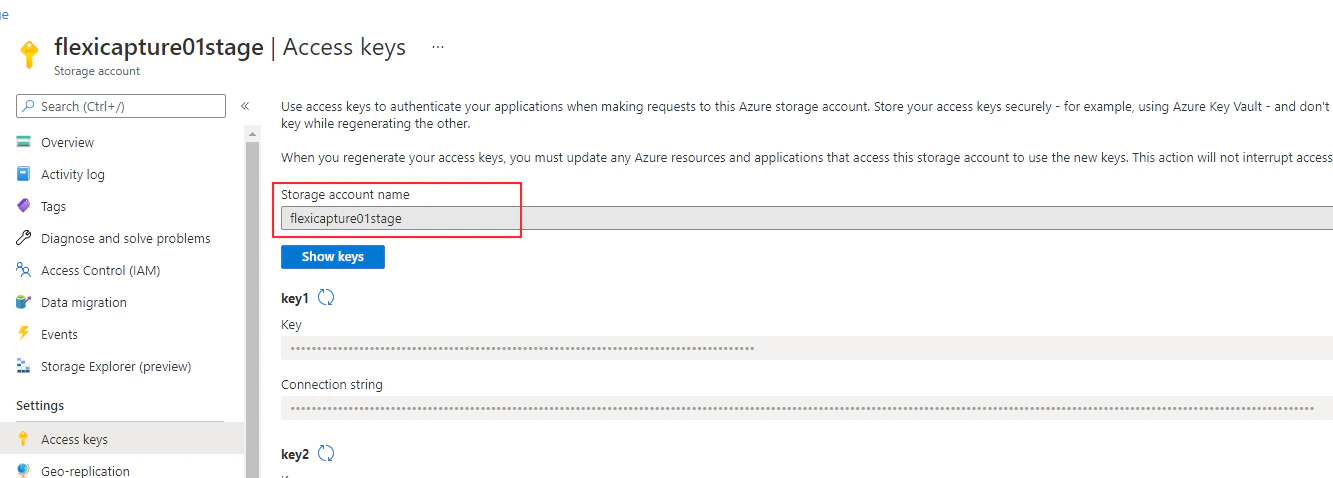
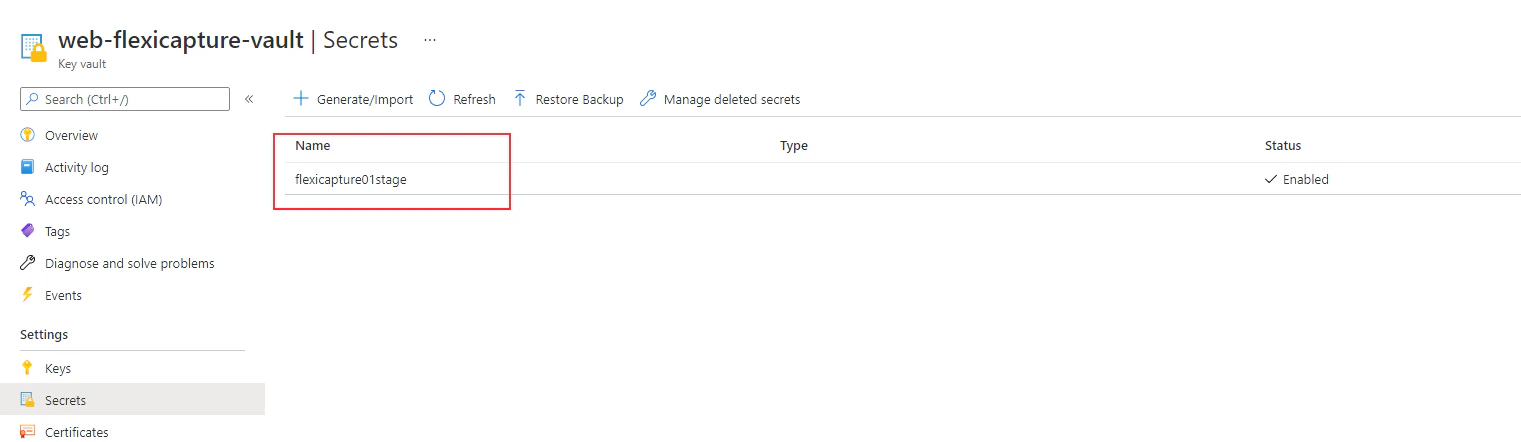
The secret name must match your storage account name, or the connection to Azure Files fails. For more information, see adding a secret to a key vault in the Microsoft documentation.
Screenshot of the Azure portal where a secret is added to the key vault with the secret name matching the Azure Storage account name.
Screenshot of the Azure Storage account Access keys page in the Azure portal, where the access key used as the key vault secret is copied.

On each Application Server

Configure your system account to access Azure Files.
1

Save the connection script on every Application Server virtual machine

The script takes two parameters:
  • The path to the root of the network Azure folder, such as \\<name of Azure Storage account>.file.core.windows.net\<name of network folder>.
  • The URI of the key vault holding the access key for your Azure Storage account. Copy it from the Vault URI field on the Overview tab in the Azure portal.

Screenshot of the key vault Overview tab in the Azure portal with the Vault URI field highlighted.
Run the script like this:
2

Schedule the script to run at system startup
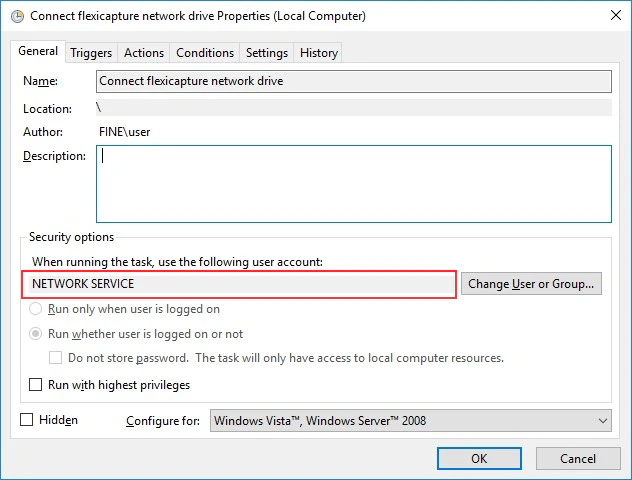
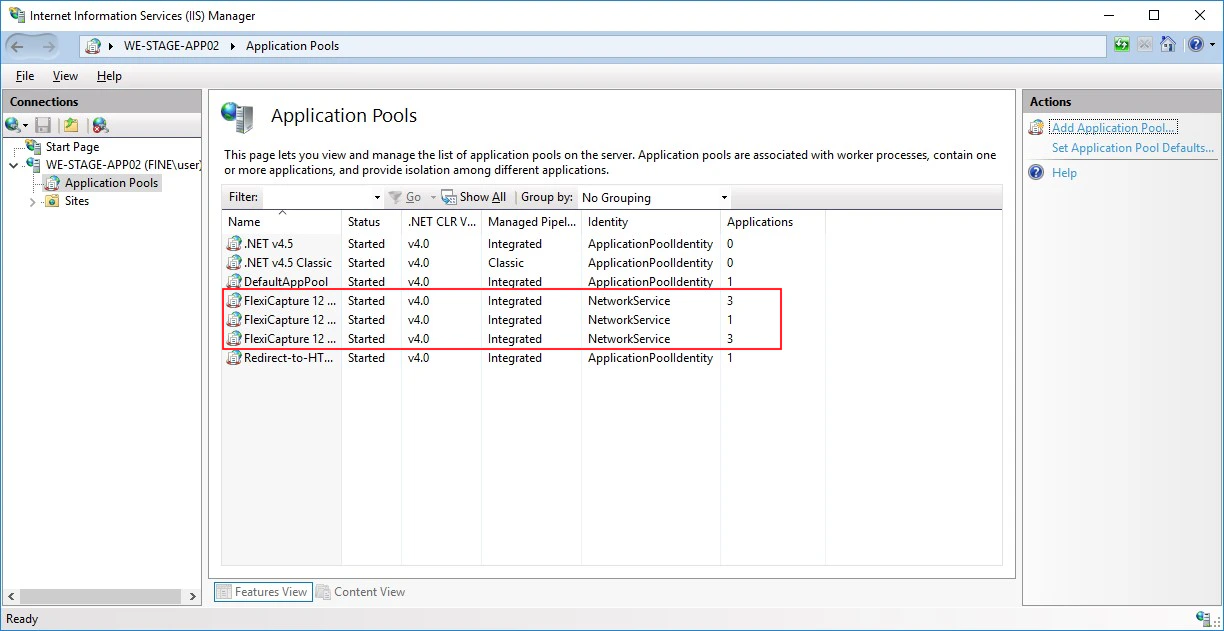
Create a task in Task Scheduler triggered by a system startup event. Run the task under the System, Network Service, or Local Service user account. The IIS application pool must run under that same account.
Screenshot of Task Scheduler showing a new task triggered by a system startup event.
Screenshot of the Task Scheduler task configured to run under the System account that also runs the IIS application pool.
3

Delay the IIS service so it starts after the script
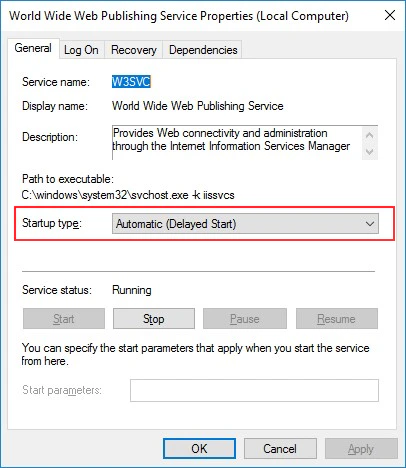
Open the World Wide Web Publishing Service Properties dialog box. On the General tab, select Automatic (Delayed Start) in the Startup type list.
Screenshot of the World Wide Web Publishing Service Properties dialog with Startup type set to Automatic (Delayed Start).
4

Restart the Application Server

The script then runs at startup and maps the share before IIS starts.