
PostgreSQL is enabled by default from ABBYY FlexiCapture Release 4 Update 2. On earlier versions, enable PostgreSQL before you can work with PostgreSQL databases.
Create a new database
1
Install the database client driver
On the computer where the Application Server is installed, install one of the following client drivers:Attempting to create a database without Microsoft SQL Server Native Client produces the error
- Microsoft SQL Server Native Client 2012 or later
- Oracle Data Access Components (ODAC) of the same bitness as the Application Server
- psqlODBC version 11 or later
Microsoft SQL Server Native Client is unnecessary if you already have Microsoft SQL Server 2016 SP2 or later. It is also unnecessary with Microsoft SQL Management Studio 2016 SP2 or later.
Provider cannot be found. It may not be properly installed.2
Open the Administration and Monitoring Console
On the computer running the Application Server, sign in with the Windows administrator account.Open the Administration and Monitoring Console and click Service → Application Server. That opens 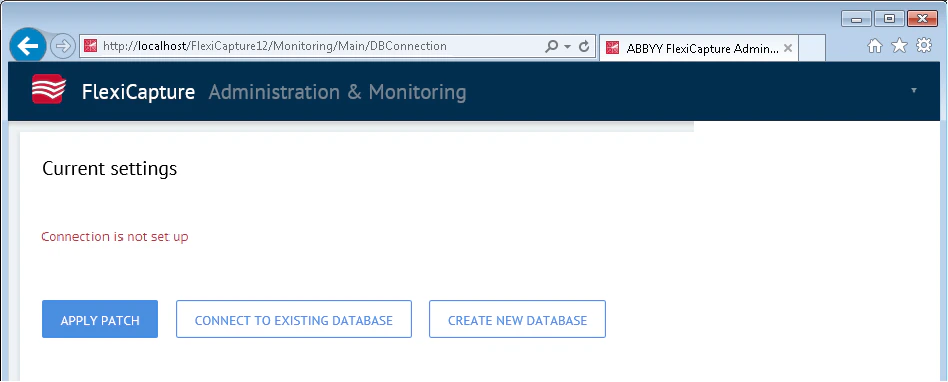
https://<ApplicationServer>/FlexiCapture12/Monitoring/#Settings/DbConn, where <ApplicationServer> is the computer hosting the Application Server.web.config file in <IIS Root Directory>\FlexiCapture12\Monitoring. The default IIS root is C:\inetpub\wwwroot.false, which prompts you to close the sessions.3
Specify the connection settings
Click the Create New Database button. On the database creation page that opens, specify: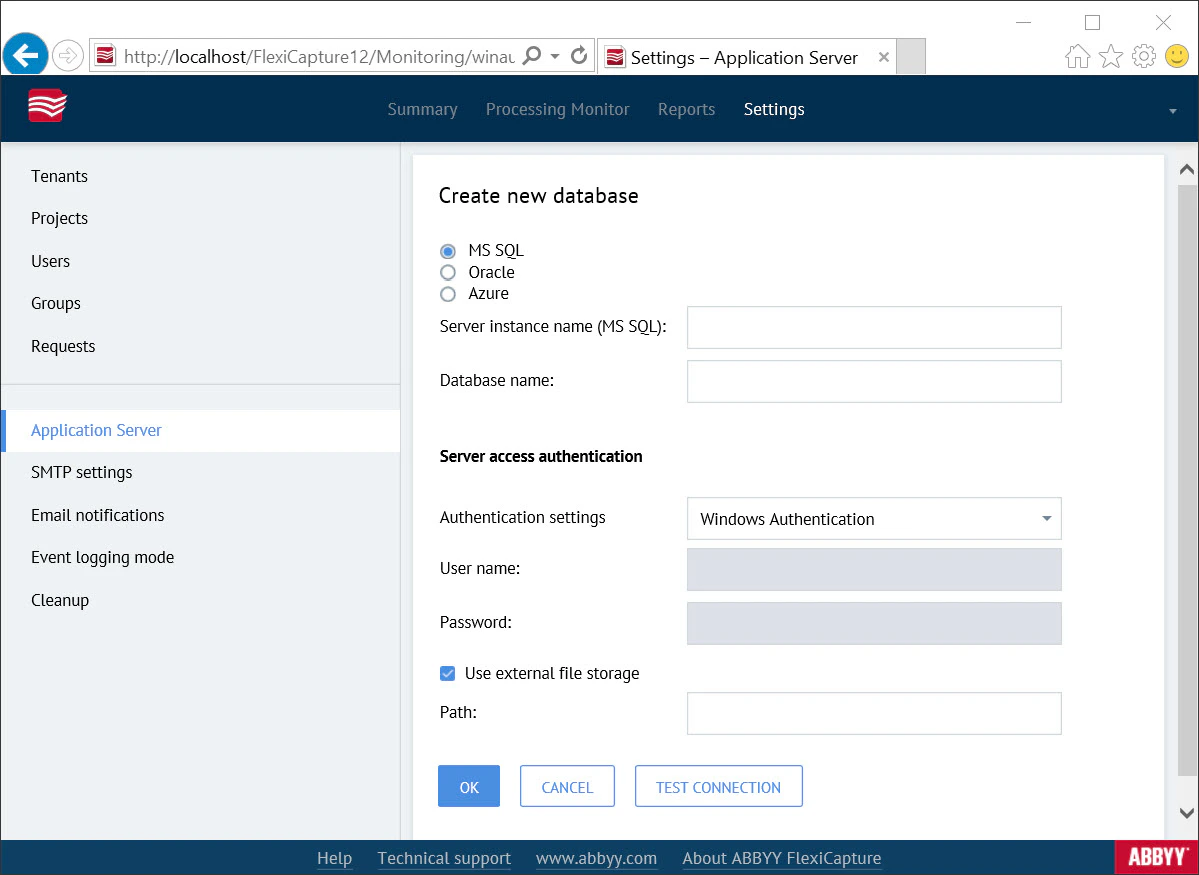
- The server instance name, in the format
<server name>\<instance name>. - The name of the new database.
- A user account with the necessary permissions for your database.
- Microsoft SQL Server
- Oracle
- Azure
- PostgreSQL
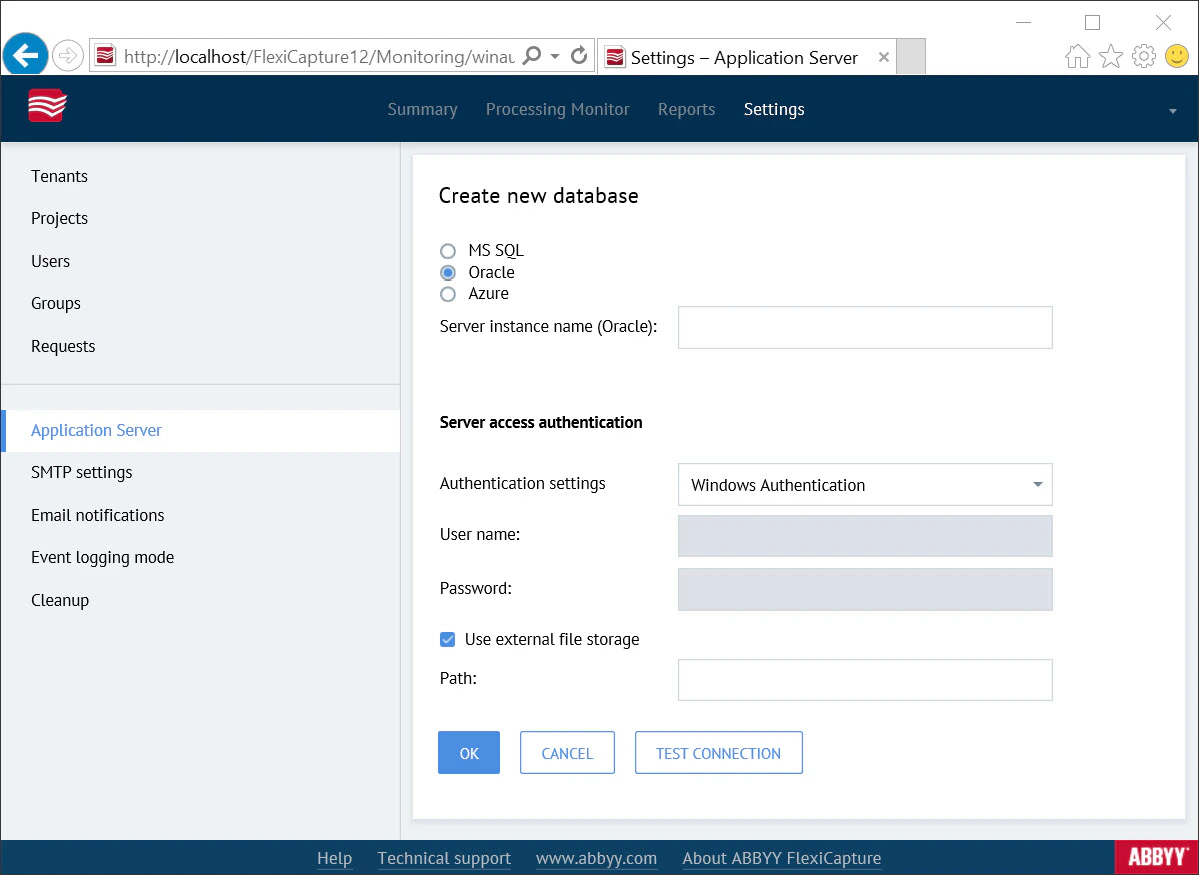
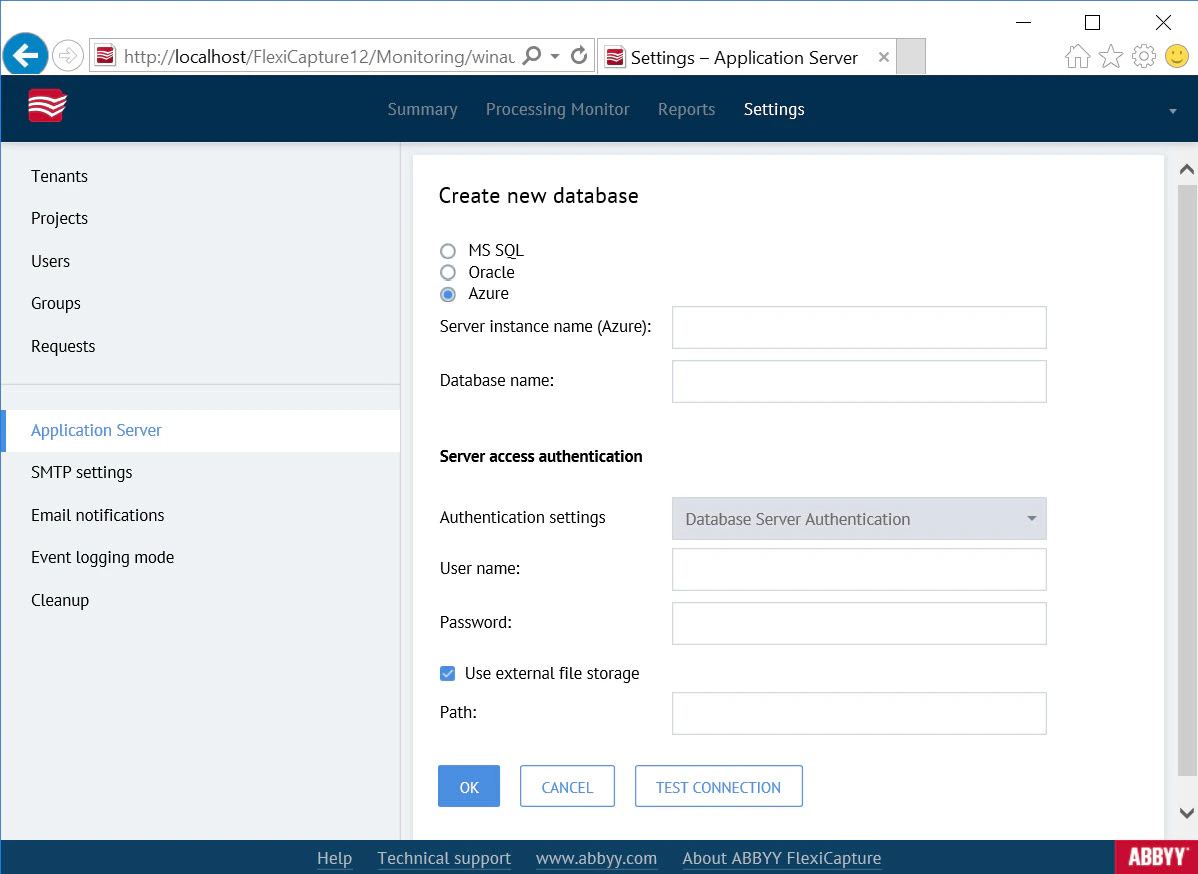
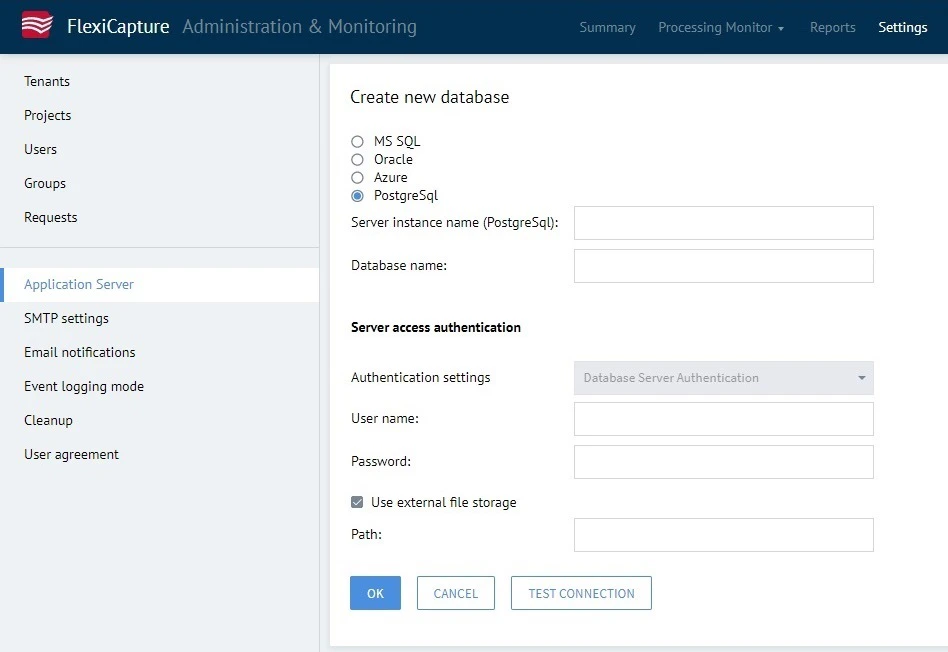
4
Set up file storage
Select the Use external file storage option and specify the path to the file storage. The file storage holds binary data such as document images, project settings, and captured data.For best performance, place the file storage on the same disk as the Application Server. In enterprise environments, use a fail-safe disk, RAID, or high-performance external storage. Add the file storage to the exceptions of your antivirus software and the Windows Search indexer.For more information, including how to run without a file storage, see Set up a file storage.
5
Test the connection
Click the Test Connection button to check the entered values. If the test is successful, click OK.If the connection test raises authentication problems, check that Microsoft SQL Server has Mixed Authentication Mode enabled. It appears as SQL Server and Windows authentication.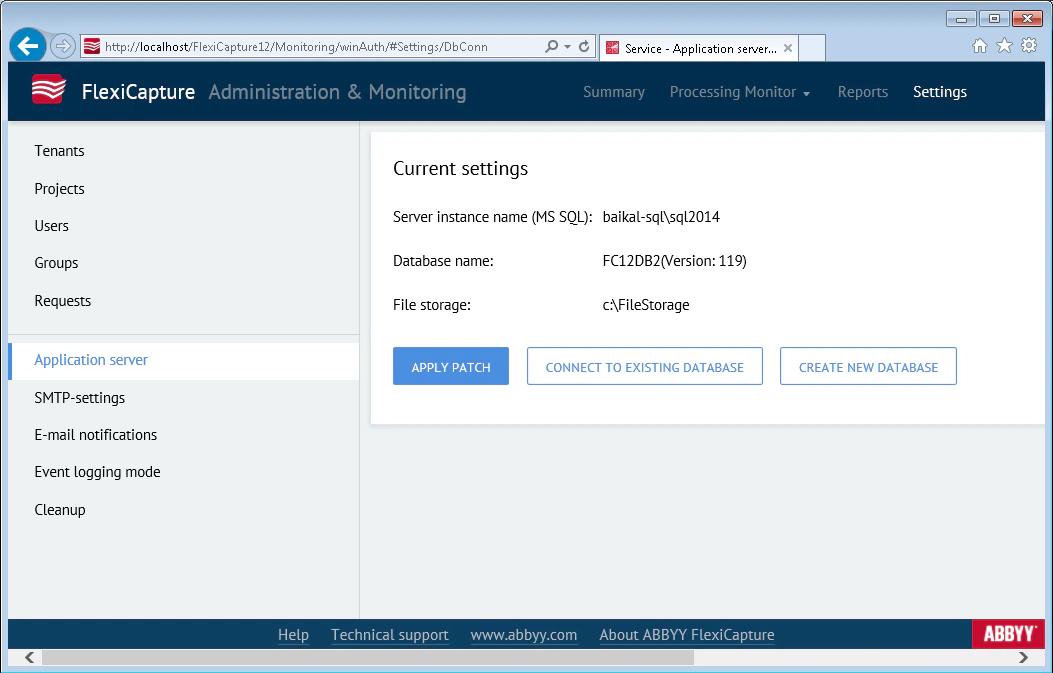
After you create the database
After the database is created, the user name and a temporary password are displayed. The temporary password is the wordpassword.
The user changes the temporary password on the login page at https://<ApplicationServer>/FlexiCapture12/Login, where <ApplicationServer> is the name of the computer running the Application Server. After the change, the user is redirected to the Administration and Monitoring Console.
The user who creates the database automatically becomes an Administrator. An Administrator can:
- Change the Application Server settings
- Upload projects
- Grant access permissions for projects
- Create users and manage their roles and permissions
- Grant the Administrator role to another user and delegate further configuration of the system
What happens when the database is created
-
A FlexiCapture 12 database is created. The account used depends on the authentication method:
- Server authentication – the account specified on the Settings → Application Server → Connect to Existing Database / Create New Database page.
- Windows authentication – the account under which the browser displaying the Application Server runs.
Description.sql, which creates the database, and thenDBInitFill.sql, which populates it with data. Both scripts are in<IIS Root Directory>\FlexiCapture12\Server(the default isC:\inetpub\wwwroot). TheUpgrade*.sqlfiles in the same folder are not used for database creation. - A Database Server account is added. This is the account under which the FlexiCapture 12 Web Services application pool runs on the Application Server (Network Service by default).
-
The step 2 account is granted
db_ownerpermissions on theFlexiCapture12database from step 1. The Application Server uses the step 2 account for all further database work. You can delete the step 1 account if you no longer need it.
Database permissions and privileges
Microsoft SQL Server
When creating a new database:CREATE ANY DATABASE(required to create a new database)SECURITYADMIN(required to create a new user under whose account the Application Server is running)
EXECUTE ON SCHEMA::DBOSELECT ON SCHEMA::DBO
DB_DATAREADERDB_DATAWRITER(DBInitFill)DB_DDLADMINALTER ON DATABASE::<DB_NAME>(required for specifying the recovery model and enabling Snapshot isolation)EXECUTE ON SCHEMA::DBOGRANT EXECUTE ON SCHEMA::DBODB_BACKUPOPERATOR(required for creating backups and restoring the database)DB_ACCESSADMIN(required for adding users to the database)DB_SECURITYADMIN(required for managing database permissions)
Oracle
Oracle database users need the following privileges to work with the database and install patches:CONNECTCREATE SESSIONCREATE TABLECREATE VIEWCREATE SEQUENCECREATE PROCEDURECREATE TYPECREATE TRIGGEREXECUTE ON SYS.DBMS_LOCK
PostgreSQL
Creating a PostgreSQL database works the same way as creating a Microsoft SQL database, but the user must have one of the following privileges:CREATEDB+CREATEROLESUPERUSER