
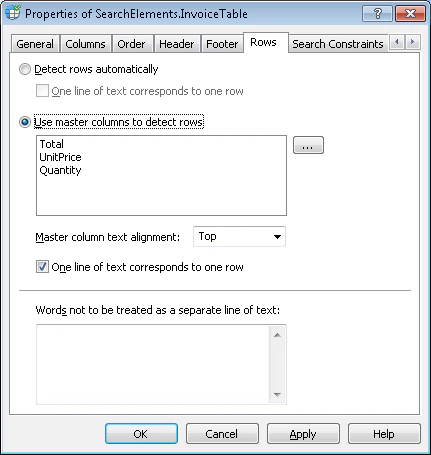
Detect rows automatically
To detect rows automatically, select the Detect rows automatically option. The program relies on the black separators and white gaps present in all of the columns to divide them into rows. To mark each line of text as a row, select One line of text corresponds to one row.Use master columns to detect rows
If a table has columns whose data defines how the table splits into rows, select the Use master columns to detect rows option and specify the columns in the Master columns list. The first Master column found in the image is used to detect the table rows. Master columns are the columns whose rows are used to divide the rest of the columns into rows. The composition of columns can vary from image to image, so the list of master columns must cover all the possible variations.Create a list of master columns
1
Open the Select Master Columns dialog box
Click the  button next to the Use master columns to detect rows option.
button next to the Use master columns to detect rows option.2
Select and order the columns
In the Select Master Columns dialog box:
- Select the required columns from the List1 list and click
 . The names of the selected columns appear in the List2 list.
 - Use the
 and
and  buttons to arrange the columns in order of priority. The program uses the top-most column it finds in the image to detect rows.
3
Apply the selection
Click OK to display the selected columns in the Use master columns to detect rows list.
Edit the list of master columns
1
Open the Select Master Columns dialog box
Click .
.2
Change the list
Use the ,  ,
,  , , and buttons to make the necessary changes to the List2 list.
, , , , and buttons to make the necessary changes to the List2 list.