
事前準備
このコネクタを使用するには、Power Automate のプレミアム ライセンスが必要です。
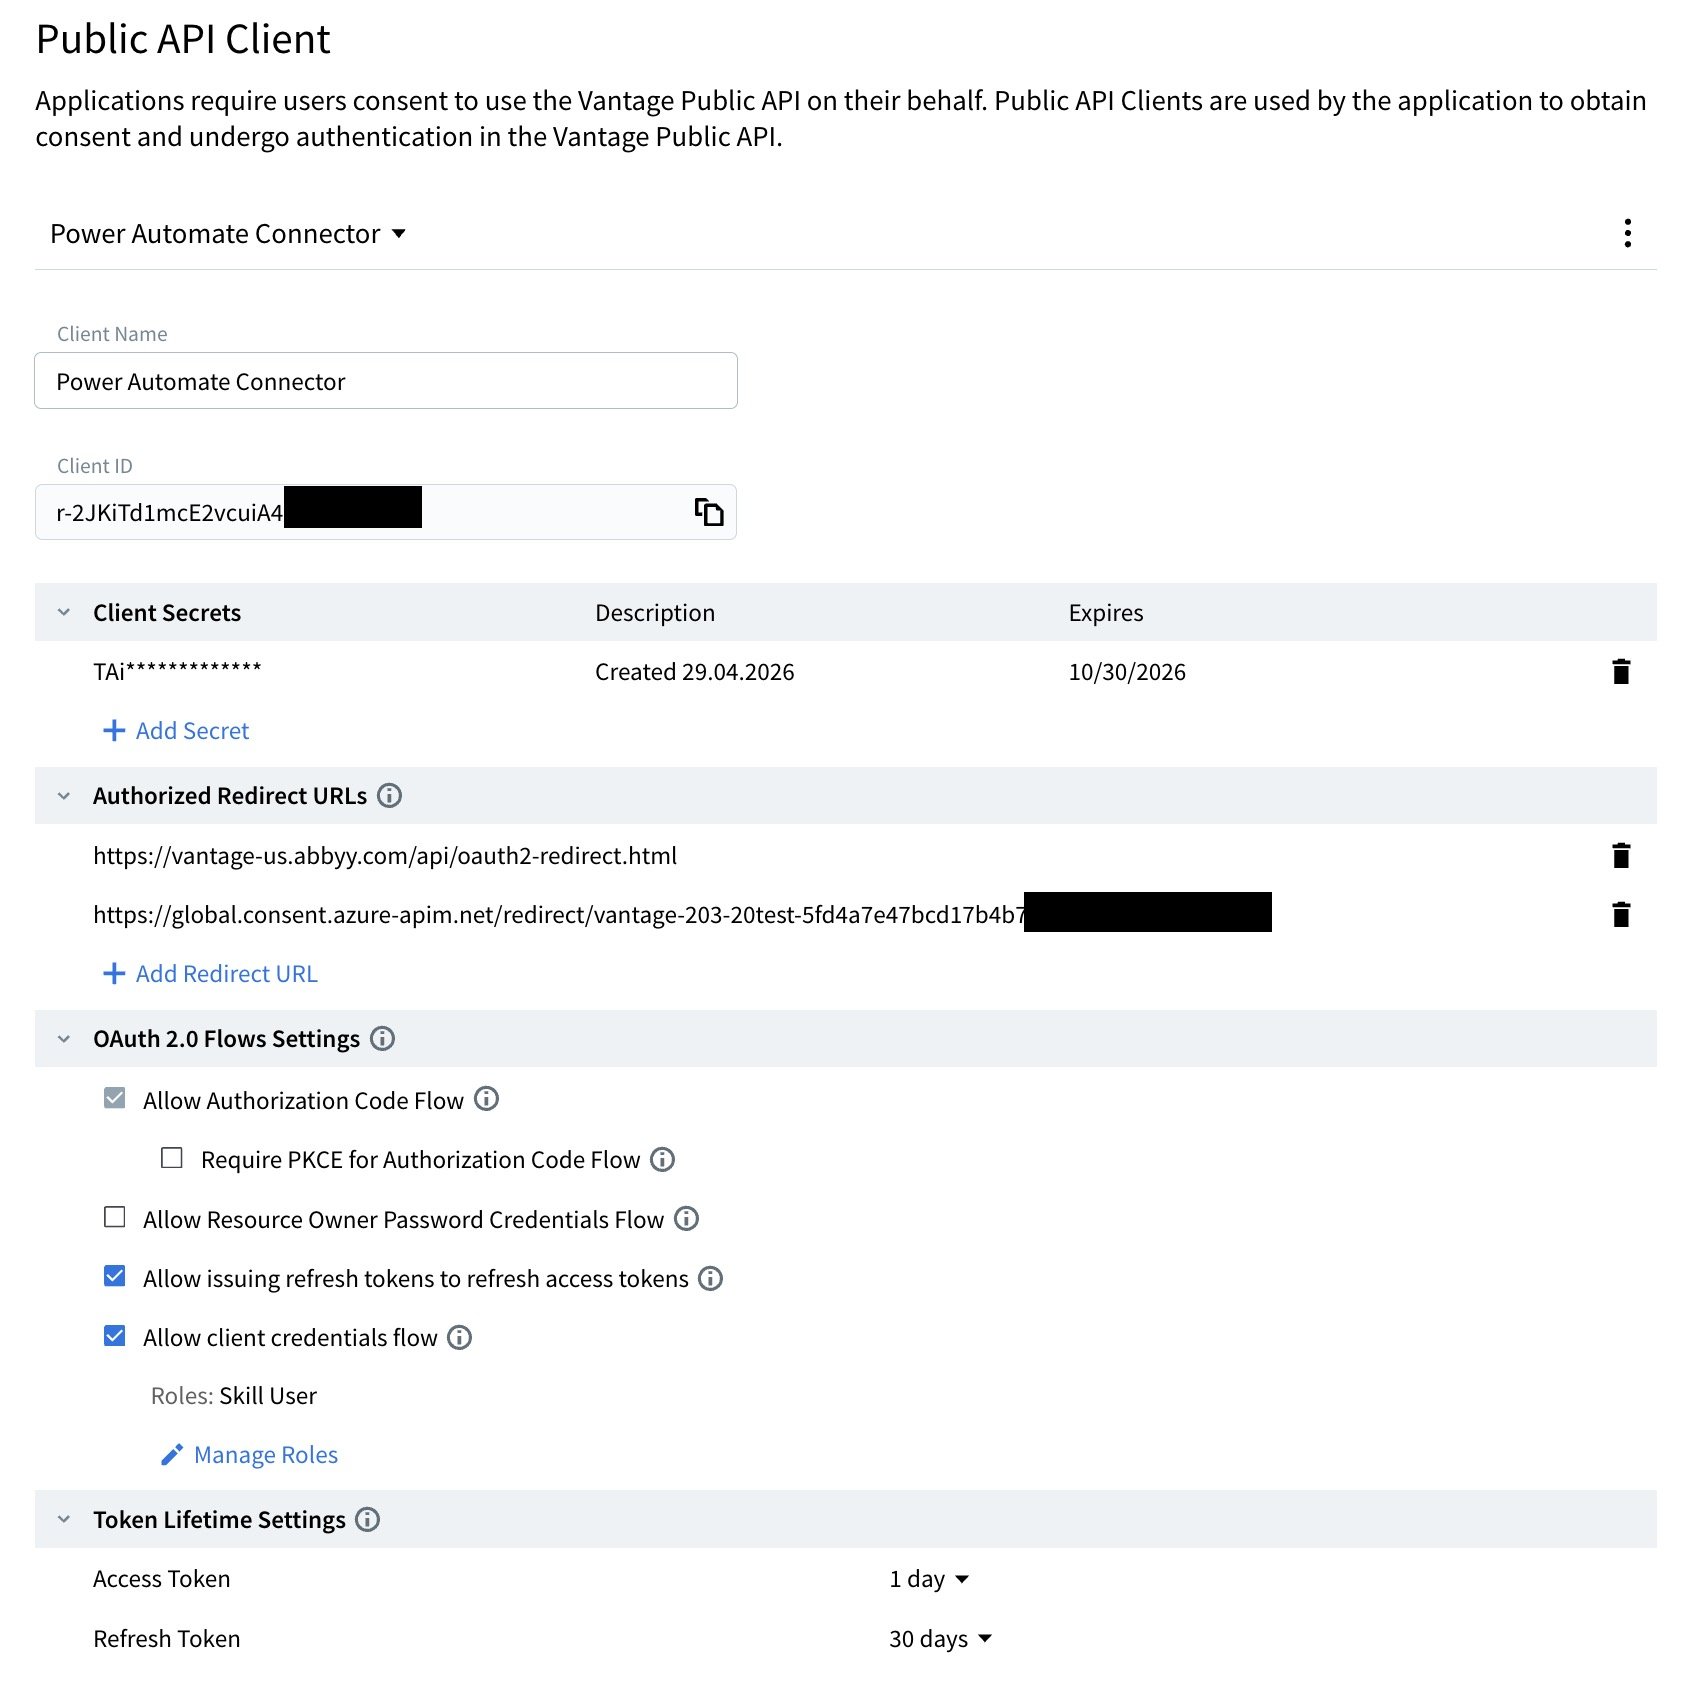
- Authorized Redirect URL: このセットアップ ガイドの後半で Power Automate から取得します。abbyy.com のリダイレクト URL はそのまま使用してください。
- Client ID: 公開 API クライアントの ID です。
- Client Secret: クライアントシークレットです。
- Require PKCE for Authorization Code Flow を無効にします。
- Allow issuing refresh tokens to refresh access tokens を有効にします。
- Allow client credentials flow を有効にします。Role(s) には
Skill Userを推奨します。
設定済み API クライアントの例
設定済み API クライアントの例
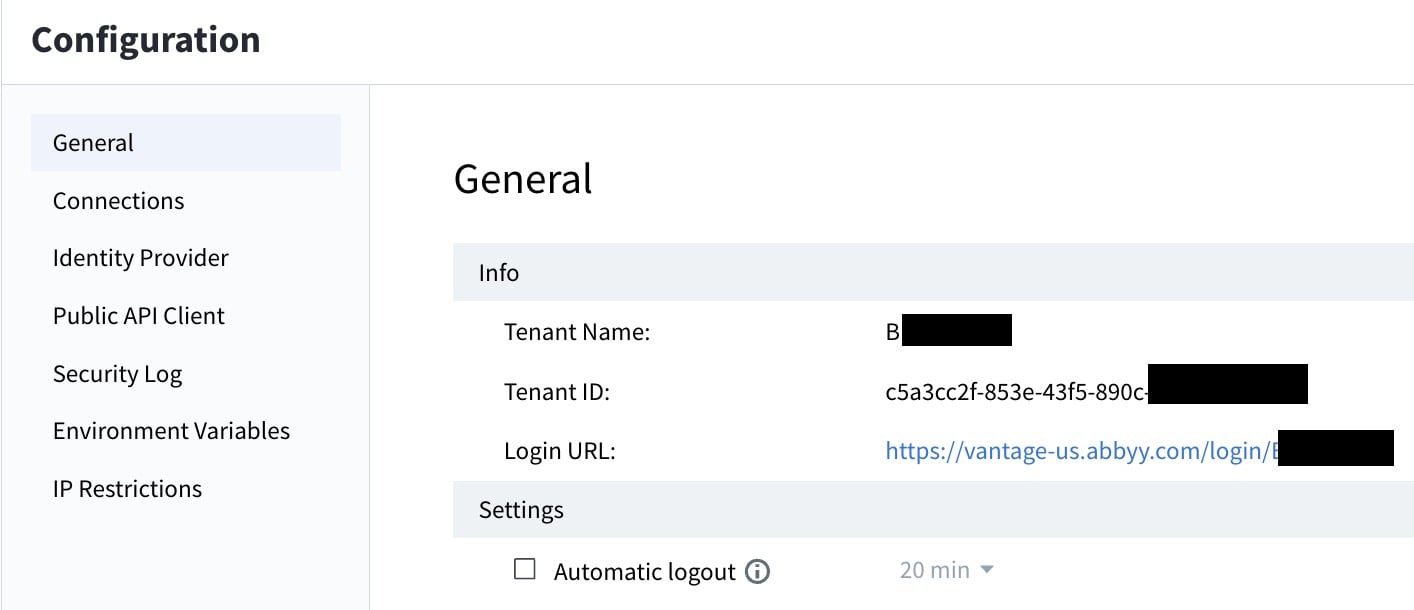
テナント ID を確認する
テナント ID を確認する
コネクタのインストール
- Microsoft Power Automate を開き、左側のメニューで Data > Custom connectors を選択します。見当たらない場合は、More を選択してください。
- + New custom connector をクリックし、Import an OpenAPI file を選択します。
- コネクタ名 (例: “ABBYY Vantage”) を入力します。
-
ABBYY-Vantage-ProcessingAPI.swagger.jsonファイルを参照して開きます。
一般情報を設定する
-
[任意] コネクタのダウンロードに含まれている ABBYY Vantage ロゴ (
Vantage-Square-icon.png) を、コネクタアイコンとしてアップロードします。 - Host URL を Vantage server のアドレスに変更します。同じホストアドレスを Authorization URL フィールドと Token URL フィールドでも使用する必要があります。
セキュリティを設定する
- Client ID: 公開 API クライアント の ID。
- Client secret: 公開 API クライアント の クライアントシークレット。
- Authorization URL:
https://vantage-[region].abbyy.com/auth2/[tenant-id]/connect/authorize - Token URL:
https://vantage-[region].abbyy.com/auth2/[tenant-id]/connect/token - Refresh URL:
https://vantage-[region].abbyy.com/auth2/[tenant-id]/connect/token - Scope:
openid permissions global.wildcard offline_access
- ページ上部の Create Connector をクリックして、コネクタを作成し、リダイレクト URL を生成します。
- リダイレクト URL をコピーします。Vantage 公開 API クライアント の Authorized Redirect URLs で Add Redirect URL をクリックし、その URL を貼り付けます。
-
Vantage 公開 API クライアント の OAuth 2.0 Flows Settings で、次のように設定します。
- Require PKCE for Authorization Code Flow を無効にします。
- Allow issuing refresh tokens to refresh access tokens を有効にします。
接続を作成する
接続をテストする
ListAllAvailableSkills を選択し、Test operation をクリックします。動作しない場合は、すべてのフィールドが正しく設定されていることを確認するため、前の手順を見直してください。