Prerequisites
- A Classification skill created and opened in the Skill Designer.
- Documents to use as training samples, in a supported file format.
Create a training set
Create the appropriate classes
Use the Create Class command in the Actions pane, or click Create class above the class list on the left side of the screen.
Upload documents to each class
Select a class from the class list, then upload documents using one of the following:
- Upload documents in the center of the Classification Skill screen
- The Upload button in the toolbar
- Upload Documents in the Actions pane
Training set size
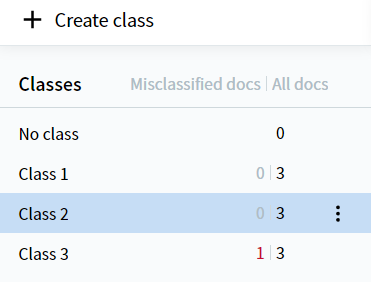
For each class, the number of documents in that class is displayed. Aim for the following:- If your document set contains very few classes, or the classes differ significantly from each other, you can have a small number of documents per class.
- If you have many classes, or the differences between classes are subtle, upload between 10 and 100 documents for each class. Fewer documents in this case may result in classification errors.
- Do not upload more than 1,000 documents for a single class.
- To maximize accuracy, include one sample document per common variant of each class.
View and preview documents
By default, uploaded documents are displayed as a list, which is easy to navigate if files have informative names. You can also switch to thumbnail view, which may be preferable for visually distinct documents. Use the toolbar buttons to switch between List view and Thumbnail view. If more than 50 documents are uploaded, they are displayed across multiple pages. To preview a document, click the button to the left of its name. Drag the left border of the preview window to resize it.Rotate document pages
To rotate document pages:- Click Rotate in the toolbar to rotate 90° counter-clockwise.
- Or pick Rotate Left, Rotate Right, or Rotate 180° from the drop-down list.
- You can also rotate a single document from its preview window.
Change a document’s assigned class
- Mark one or several documents by selecting the checkbox to the left of their names.
- In the Actions pane, select the appropriate class and click Assign. If the correct class does not appear in the list, enter a new name in the Search for class field and click Create.
Remove documents from the set
You can remove documents in one of the following ways:- Mark one or several documents by selecting the checkbox to the left of their names. You can mark all documents of a specific class by selecting the checkbox next to the class name above the document list (if the class spans several pages, only documents on the current page are marked). Click the icon next to one of the marked documents and then click Delete. Confirm your choice in the dialog box.
- Click the icon next to a class name in the class list and then click Delete All Documents. Confirm your choice. This deletes all documents in the selected class. Alternatively, click Delete Class with All Documents to delete the class itself along with its documents.
Train the classifier
The training set must contain at least two different non-empty classes. Until that’s true, the Train button stays disabled.
Troubleshooting
If the trained classifier produces poor results, open the Result tab and review the per-class accuracy. Common causes and how to fix them:- Incorrectly assigned reference classes. Reassign the affected documents to the correct class and retrain.
- Not enough training documents, or an uneven distribution across classes. Add more samples — aim for 100–1,000 per class, with roughly one document per common variant.
- Confused classes that don’t differ enough in their parameters. Merge them into a single class and, if needed, separate the documents later in the pipeline based on extracted data.
Related topics
Analyze classification results
Review per-class accuracy in the Result tab and fix common training-set errors.
ABBYY Support walkthrough
Step-by-step ABBYY Support article on creating and training a Classification skill in Vantage.