
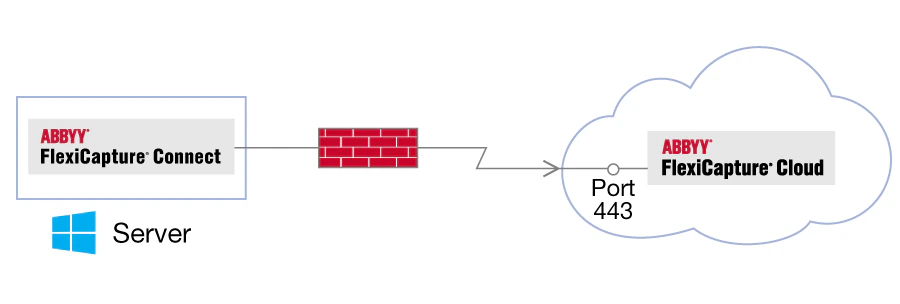
System requirements
Install and configure ABBYY FlexiCapture Connect
Use your service account to install and configure ABBYY FlexiCapture Connect.1
Download and run the installer
If ABBYY FlexiCapture Connect is already installed and you are updating an existing version, first create a backup copy of the
config.json file, which is located in C:\Program Files (x86)\ABBYY FlexiCapture Connect\config.json.Download and run the FlexiCapture_Connect_Installer_*.msi file from https://www.abbyy.com/flexicapture-downloads/cloud/.2
Modify the configuration file
Modify the
config.json file to suit your needs. For more information, see Configuration file reference.3
Test the new configuration
- Pause the ABBYY FlexiCapture Connect service.
- Run the
ABBYY.FlexiCapture.Connect.exefile. A console window with a detailed log opens.
4
Restart the service
Restart ABBYY FlexiCapture Connect.
Configuration file reference
This exampleconfig.json file imports documents into one project, exports the processing results, and synchronizes one data set.
General settings
The top-level properties identify the tenant and the service account.
To import and export documents, set up the tenant account as an External User. To synchronize data sets, the tenant account needs either the Administrator role or both the Project Settings Editor and External User roles.
By default, all projects are accessible to the tenant account. To change this, adjust the access rights granted to specific user roles. For more information, see Set up user roles and access rights.
Project settings
Each object in theprojects array defines one project.
Import settings
Theimport object of a project defines how and when documents are imported.
A new batch is created each time files are imported. The batch name contains the current date and time.
Export settings
Theexport object of a project defines where and when processing results are exported.
When documents are exported, a folder is created for each batch in the project that is currently at the Processed stage. These destination folders have the same names as their respective batches and contain all the processing results. If a destination folder is deleted, the program creates a new one with the same name and places the processing results there.
Document Definition settings
Each object in thetemplates array identifies a Document Definition and its data sets.
Data set synchronization settings
Each object in thedatasets array defines one data set to synchronize.
Synchronization replaces the current data sets with the new ones. Existing records modified by a verification operator (by editing, adding, or deleting values) are saved and synchronized. New records added manually are deleted and not synchronized. For very large data sets, synchronization may take several hours.
In this example CSV file for a Vendors data set, the first vendor has multiple IBANs.
Store service account credentials in Windows Vault
Service account credentials can be stored either in theconfig.json file in the ABBYY FlexiCapture Connect service directory or, more securely, in Windows Vault. For more information, see the Microsoft documentation on Credential Manager and cmdkey.
Add credentials to Windows Vault
To let ABBYY FlexiCapture Connect retrieve service account credentials from Windows Vault, register them withcmdkey and run the service under the same Windows account.
1
Create or choose a Windows account
Create a new Windows account, or choose an existing Windows account.
2
Register the credentials with cmdkey
Run
cmd.exe under that Windows account, and run this cmdkey command. In the command, https://europe.flexicapture.com#tenant is a combination of the ABBYY FlexiCapture URL and the tenant name.3
Remove the credentials from the configuration file
Delete the user name and password from the
config.json file located in the ABBYY FlexiCapture Connect service directory.4
Run the service under the Windows account
Configure ABBYY FlexiCapture Connect to launch under the same Windows account you used to run 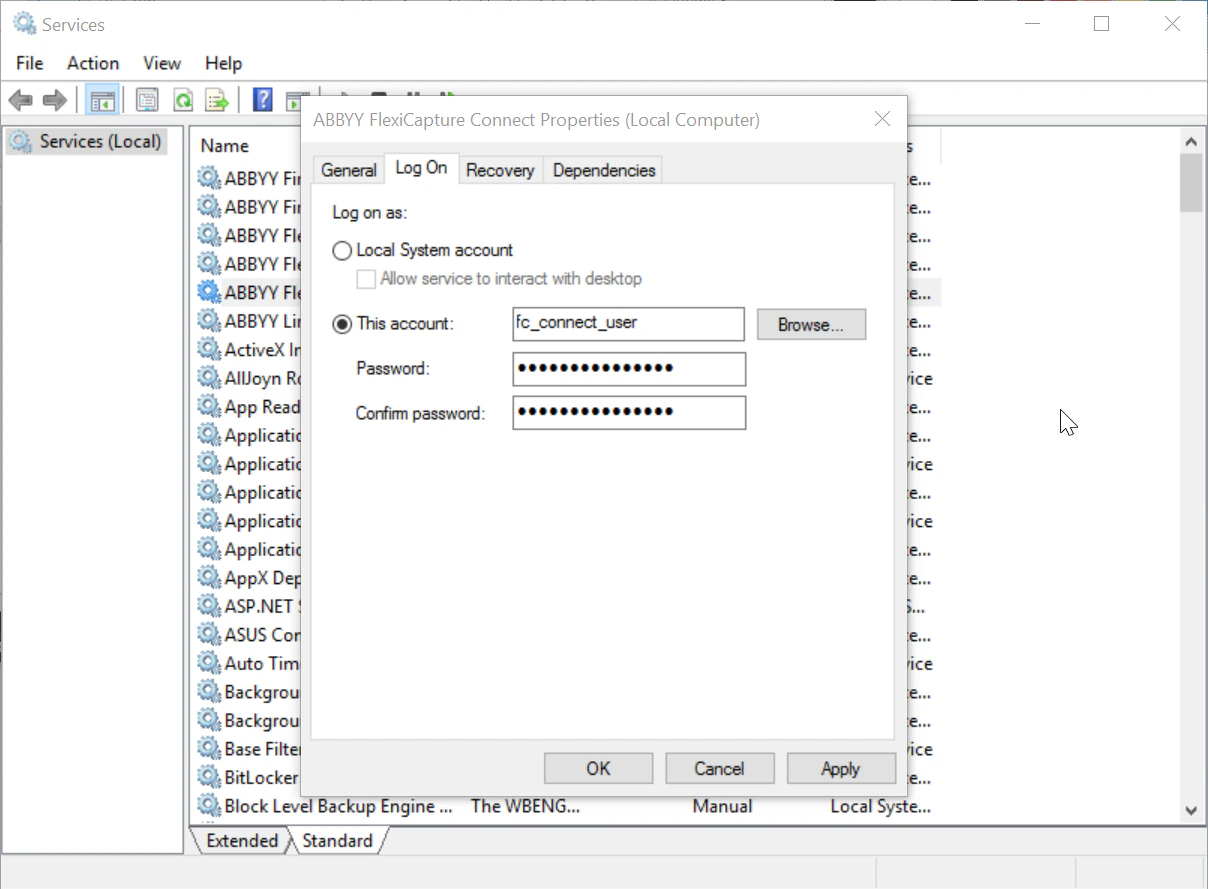
cmdkey.- Run Windows Service Manager (
services.msc). - In the Services properties, open ABBYY FlexiCapture Connect.
- On the Log On tab, select This account and enter your Windows account credentials.
Remove credentials from Windows Vault
1
Open Credential Manager
Open Credential Manager.
2
Remove the credential
On the Windows Credentials tab, expand the credentials that you want to remove and click Remove.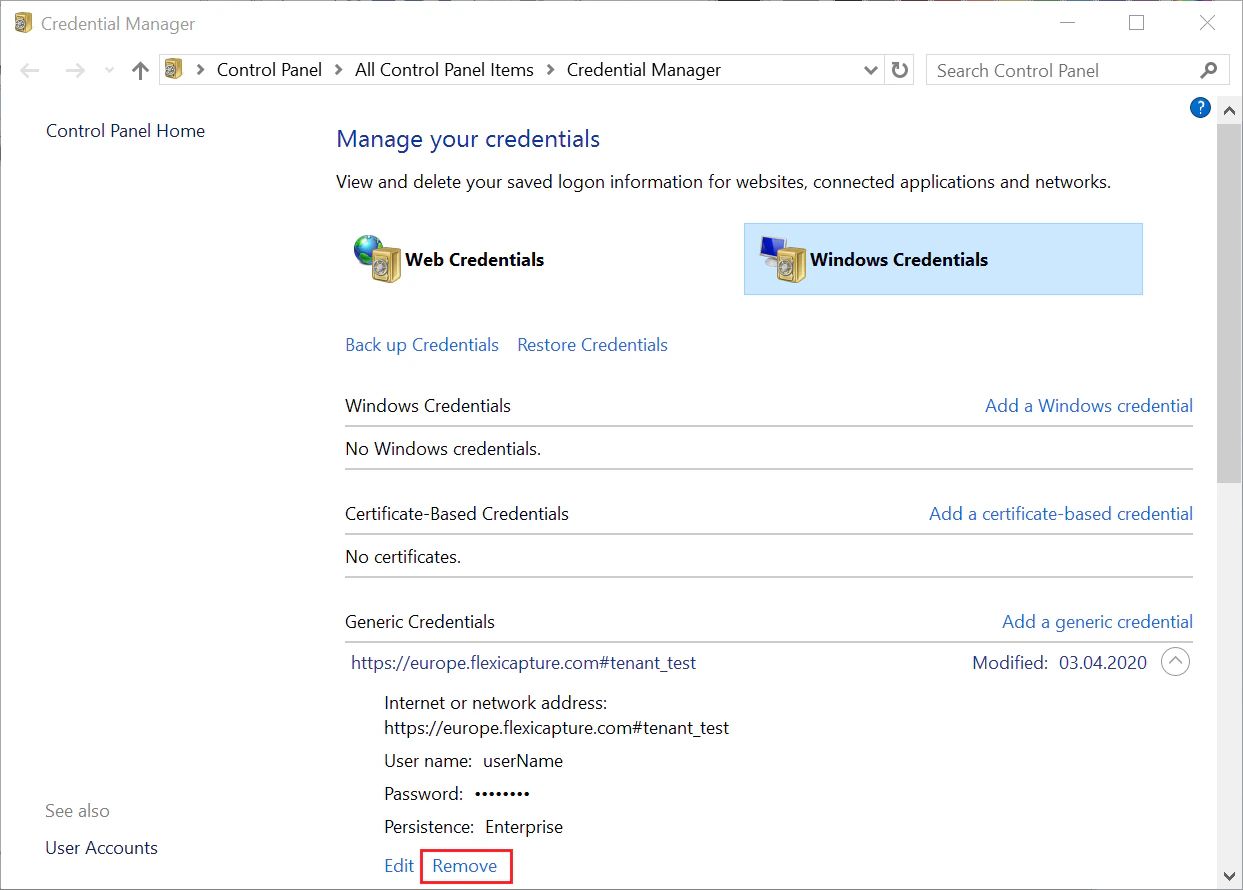
Set up project export paths
To use ABBYY FlexiCapture Connect to export files from ABBYY FlexiCapture Cloud, adjust the export paths in your project.1
Clear the export root path
On the General tab of the <project> Properties dialog box, make sure that the Export root path field is left empty. For more information, see Project properties.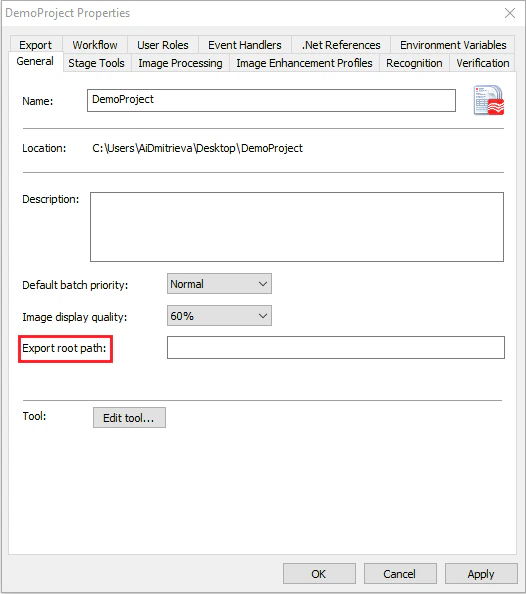
2
Specify a relative export path
In the Export Settings dialog box, specify the export path relative to the root path specified on the General tab of the <project> Properties dialog box. Because you left this root path empty, specify the directory without the exact root path.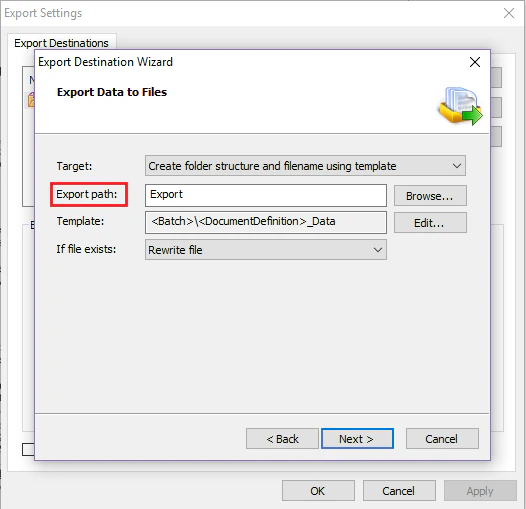
Limitations of ABBYY FlexiCapture Connect
- Only data sets of up to approximately 500,000 records can be synchronized.
- While a data set is updating, users cannot look up vendors on the web stations.
- ABBYY FlexiCapture Connect does not recognize Hot Folder import profiles that are based on project settings.
- ABBYY FlexiCapture Connect exports documents from all the batches available on the server. The project settings do not affect the name of the destination directory, which always has the same name as the originating batch.
- ABBYY FlexiCapture Connect can only export an entire batch. If you disable the Wait for all documents in a batch option in the project’s Workflow Settings, the documents are still not exported separately.
- ABBYY FlexiCapture Connect cannot export the results from all the documents in a batch into a single file. A separate file is created in the export directory for each document from the batch.
- ABBYY FlexiCapture Connect cannot export the results from all the batches into a single file. A separate file is created in the export directory for each document from each batch.
- The size of imported and exported files is limited to 199 MB.
- Proxy servers are not supported.
Troubleshoot ABBYY FlexiCapture Connect errors
If you encounter an error, first review the log file, which you can find in%LocalAppData%\ABBYY\FlexiCapture\Connect\Logs. Errors can also be caused by incorrect or incomplete settings specified in the configuration file, so review the config.json file for any inconsistencies or omissions.
If an error persists, contact ABBYY Support. Support may ask for both your config.json file and the log file.