Before you begin
Open the activity in the Activity Editor
- Open the “Sick Note DE” activity in the Activity Editor.
- Select one of the documents from the document set.
Extracting the patient’s data
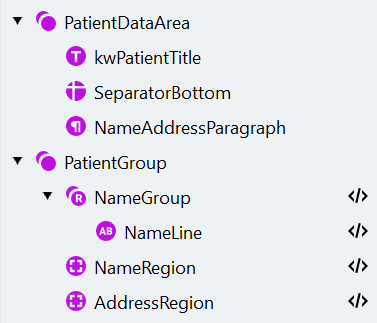
Extract the missing patient data by creating several search elements. Group elements that relate to one entity. Search elements are matched one after another — if a top element fails, hypothesis quality drops for the rest of its chain. Groups, however, are processed independently with their own hypothesis, so grouping gives you control over how elements influence each other and lets you evaluate matching results at a glance. Grouping can also reduce matching time.Create the PatientDataArea group
- Click Create Element and select the Group element from the drop-down list. Change its name to “PatientDataArea”.
- In the Under what conditions section, change the Element is value to Optional.
Find the patient label with a Static Text element
- Click Create Element and select the Static Text element from the drop-down list. Change its name to “kwPatientTitle”.
- Enter the text “Name, Vorname” in the Text to find field on the Properties pane.
- Click Match. When processing is finished, you will see the Tree of Hypotheses below the document. Make sure that Advanced Designer has successfully found the desired static text — a green dot next to the element name indicates a successful match. Click the element name in the Tree of Hypotheses to see a violet frame around the corresponding region on the document.
Find the lower boundary with a Separator
- Add a Separator element to the group and call it “SeparatorBottom”. Set its minimum length to 200.
- Right-click the element and select Match Element in the context menu. The Tree of Hypotheses contains many green dots — they correspond to different separators that fit the search criteria. Click each dot to see the corresponding object on the image.
- To narrow down the search criteria, specify the search area for the separator. Click Match to find the “kwPatientTitle” element that will be used as an anchor element. In the Where to search section of the Properties pane, click Draw on Image. Select the “kwPatientTitle” element on the document and click the down arrow icon to specify the search area below the keyword and the nearest icon to look for the separator nearest to the keyword.
- Click Match and check that Advanced Designer has found the separator below the “kwPatientTitle” element.
Find the name and address Paragraph
- Create a Paragraph search element and call it “NameAddressParagraph”.
- Change Text alignment to Left.
- The patient’s data occupies from two to five lines, so specify the Line count from 2 to 5.
- Specify the search area for the paragraph using the Add menu in the Where to search section. The element should be located below the “kwPatientTitle” element and above the “SeparatorBottom” element.
- Click Match.
Create the PatientGroup
Configure the NameGroup repeating group
- Create a Repeating Group search element and call it “NameGroup”. Specify 2 as the maximum number of repetitions. Make the element optional.
-
To restrict the search area to the lines that are part of the “NameAddressParagraph” paragraph, click the code editor icon below the document image and paste the following script in the Search Conditions section of the Code Editor:
- Inside the repeating group, create a Character String element designed to capture a line of characters. Call it “NameLine”.
-
The text we are looking for may contain upper- and lower-case letters and a set of punctuation marks. Configure two separate character sets:
- The first set contains all Latin upper- and lower-case letters. To add characters with diacritical marks, change the Unicode subrange or paste the characters directly into the Selected characters field.
- The second set contains the punctuation marks: ,-.()’. To prevent the string from containing only punctuation marks, set the Portion in text, % for the second set to 40%.
- Disable the Search for parts of words option.
- Specify the search area for the “NameLine” element: below the “kwPatientTitle” element and nearest to it.
- Click Match and review the Tree of Hypotheses. Two character strings are found, but the second string contains the patient’s address.
-
To exclude the address from the search results, add a script search condition. Select the “NameLine” search element and open the Search Conditions code editor. Paste the following script — it assumes that the first line contains a full name if it contains a comma and a whitespace, and if a full name is found, the repeating group stops searching for a second instance:
- Click Match and make sure that the name is found correctly.
Create the NameRegion Region element
- Create a Region search element in the “PatientGroup” group and rename it to “NameRegion”.
-
Open the Code Editor and paste the following script in the Search Conditions section:
Create the AddressRegion Region element
Create and map the patient fields
| Name | Type | Search element |
|---|---|---|
| Full Name | Text field in the “Patient” group | NameRegion |
| Address | Text field in the “Patient” group | AddressRegion |
Extracting the type of sick note
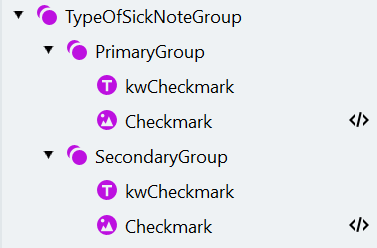
The type of sick note field has two checkboxes. They are labeled as “Erstbescheinigung” and “Folgebescheinigung”. The task is to find the labels and then to check whether there are filled checkmarks next to them.Create the TypeOfSickNoteGroup and PrimaryGroup
Configure the PrimaryGroup
- Inside the “PrimaryGroup” group, create a Static Text element called “kwCheckmark” (text to find: “Erstbescheinigung”).
- This element is not related to the elements we searched for previously. Instead of matching the whole element tree, match only the new element by clicking Match Element in the “kwCheckmark” element context menu. Make sure that the keyword has been found successfully.
- Now find the checkmark using an Object Collection element, which is used to find various graphic objects such as checkmarks, barcodes, and images.
- Add an Object Collection element called “Checkmark”.
- In the Type drop-down list on the Properties pane, deselect all options except Checkmark.
- Set the minimum width and height of the object to 30, and the maximum width and height of the object to 130.
- Specify the search area for the checkmark to the left of the “kwCheckmark” element.
-
The checkmark should be located roughly on the same line as the keyword. Specify where the top and bottom borders of the element should be located with respect to the keyword by pasting the following code to the Search Conditions section of the Code Editor:
- Click Match.
Create and configure the SecondaryGroup
- Copy the “PrimaryGroup” group and rename the copy to “SecondaryGroup”.
- When copying a group, you also copy all its elements with their properties. Select the “kwCheckmark” element in the “SecondaryGroup” group and change the text to find to “Folgebescheinigung”.
- The Object Collection search element finds a collection of all suitable objects within the search area. If the checkmarks are located on the same line, the “Checkmark” element of the “SecondaryGroup” may also find the Primary checkmark. To avoid this, exclude the primary checkmark (“Checkmark” element of the “PrimaryGroup”) from the search area for the “Checkmark” element from the “SecondaryGroup”.
- Click Match.
Create and map the type-of-sick-note fields
| Name | Type | Search element |
|---|---|---|
| Type of Sick Note | Checkmark group | |
| Primary | Checkmark in the “Type of Sick Note” checkmark group | PrimaryGroup -> Checkmark |
| Secondary | Checkmark in the “Type of Sick Note” checkmark group | SecondaryGroup -> Checkmark |
Extracting the doctor’s data
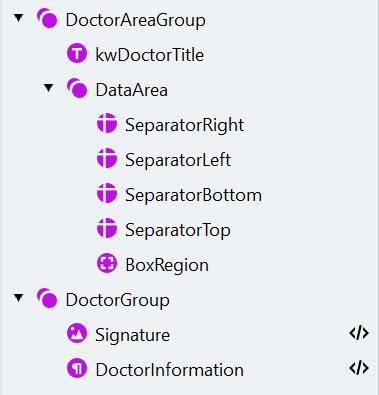
We now have to process the last block of data on these documents. It contains the doctor’s data and signature. We’ll first find the box which holds the data and then extract a paragraph with the doctor’s information and an image region containing the signature.Create the DoctorAreaGroup and DataArea
- Create a Group element called “DoctorAreaGroup” and make the element optional.
- To find the box label, create a Static Text element called “kwDoctorTitle” (text to find: “Unterschrift des Arztes”).
- Inside the “DoctorAreaGroup” group, create another group called “DataArea”.
Add the four boundary Separators
| Name | Orientation | Minimum length | Search area |
|---|---|---|---|
SeparatorRight | Vertical | 180 | Right of “kwDoctorTitle”, Nearest to the right page edge |
SeparatorLeft | Vertical | 180 | Left of “kwDoctorTitle”, Left of “SeparatorRight” (in case “kwDoctorTitle” wasn’t found), Nearest to “SeparatorRight”, Below “SeparatorRight” (click the icon to the right of the separator name and select Top Boundary of Region), Exclude “SeparatorRight” |
SeparatorBottom | Horizontal | 200 | Below “kwDoctorTitle” (with adjustment of -10 points), Right of “SeparatorLeft”, Left of “SeparatorRight”, Nearest to the bottom page edge (this setting will be useful in case “kwDoctorTitle” wasn’t found) |
SeparatorTop | Horizontal | 200 | Above “kwDoctorTitle”, Right of “SeparatorLeft”, Nearest to “TypeOfSickNoteGroup”, Exclude “SeparatorBottom” |
Create the BoxRegion
Create the DoctorGroup
Add the Signature Object Collection
| Property | Value |
|---|---|
| Name | Signature |
| Type | Picture |
| Minimum width | 15 |
| Minimum height | 15 |
| Maximum width | 600 |
| Maximum height | 350 |
| Search Conditions section of the Code Editor | The signature may be partly located outside the box. To find the whole image, expand the search area by 100 dots in each direction: RSA: DoctorAreaGroup.DataArea.BoxRegion.Rect.GetInflated(100dot,100dot); |
Add the DoctorInformation Paragraph
| Property | Value |
|---|---|
| Name | DoctorInformation |
| Maximum line count | 6 |
| Search area | Above “kwDoctorTitle”, Exclude “Signature” |
| Search Conditions section of the Code Editor | RSA: DoctorAreaGroup.DataArea.BoxRegion.Rect; |
Verify the elements are found
Create and map the doctor fields
| Name | Type | Search element |
|---|---|---|
| Doctor Information | Text field in the “Doctor” group | DoctorInformation |
| Signature | Image field in the “Doctor” group | Signature |