
1
Open the Activities tab
Go to the Activities tab.
2
Add a Classify By Text and Image activity
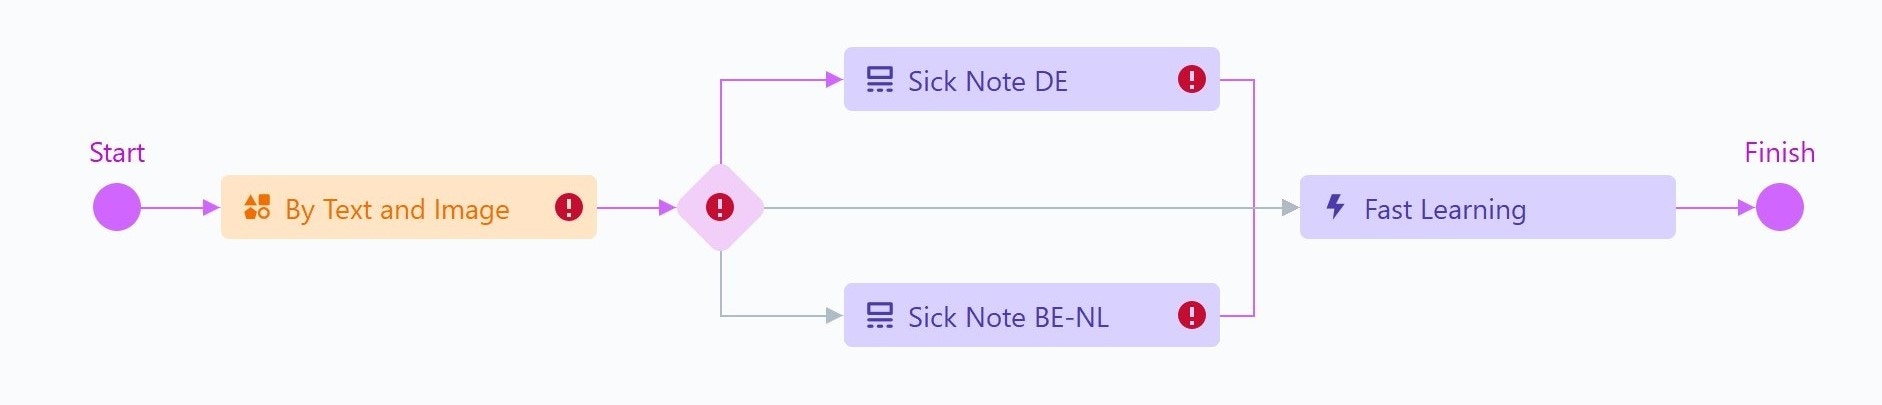
First, determine the document class. Click the Classify By Text and Image activity on the Activities pane — it will be added to the workflow.When you add this activity, a new field is created in the skill structure to record the classification results. The field is hidden and not editable, but you can rename it in the Activity Properties pane on the Activities tab. Rename the field to “Layout”.
3
Add an IF activity to fork the flow
Documents should be routed to different activities based on classification results.
- Click the Classify By Text and Image activity in the workflow.
- In the pop-up window, select the IF item. It will be added to the workflow after the Classify By Text and Image activity.
4
Add Extraction Rules activities for each class
Add the activities for extracting data from documents of different classes.
- Select the Extraction Rules activity as the next item. Rename it to “Sick Note DE” — this activity will extract data from the German documents.
- Click the IF activity and add another Extraction Rules activity. Rename it to “Sick Note BE-NL”. This handles Belgian and Dutch documents (variants inside this class can be handled by a single activity).
5
Add a Fast Learning activity at the end
The Fast Learning activity enables further skill training during production via Online Learning.
- Click “Sick Note BE-NL” in the processing flow.
- In the pop-up window, select the Fast Learning activity. It is added after “Sick Note BE-NL”, but “Sick Note DE” is still connected to Finish.
- Hover over the arrow connecting “Sick Note DE” and Finish. The arrow turns orange.
- Drag and drop this arrow onto the Fast Learning activity.
- Hover over the arrow connecting the IF activity and Finish. Drag and drop this arrow onto the Fast Learning activity as well.
What’s next
Step 3. Configure and train the Classify activity
Upload training documents, assign classes, and train the classification activity.
Tutorial overview
Back to the tutorial introduction.