Extracting the issue date
Dates in these documents can be easily extracted using the Date element, so this time we will use the search element that was created automatically for this field.Add the Date field
- Open the Manage Fields dialog on the Fields tab and select a “Date” field to be used in this activity. Click Save.
- Go to the Search Elements tab. A search element of type Date has been created for the “Date” field and mapped automatically.
Create the IssueDateGroup with the kwDate label
- Create a Group search element called “IssueDateGroup” and make it optional.
- Add a Static Text element called “kwDate” inside the group — this finds the label that helps locate the actual date.
- Since this document class contains documents in Dutch or French, enter the label text options on separate lines in the Text to find dialog: “Date” on the first line and “Datum” on the second line.
- Disable the Search for parts of words option.
Add the Date element to the group
Configure the Date element's search area
- Delete the Nearest to relation that was automatically added when the element was created.
- Select the “kwDate” element as the one nearest to the element being searched for.
- The date can be located to the right of the keyword or below it. Specify the search area below the “kwDate” element.
- The search area should also include the line on which the keyword is located. Click the bottom boundary icon to the right of the element name and select Top Boundary of Region. The lines may be uneven, so set the Below value to -10 to extend the search area slightly above the line.

Extracting the sickness dates
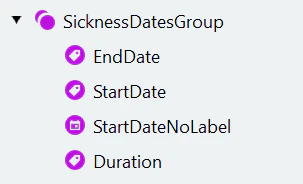
We’ll extract these dates using Key value elements. The Key value element allows to search both for a static text label and the value. However, it doesn’t allow too much variation in the value location and properties.Create the SicknessDatesGroup and the EndDate element
- Create a Group element called “SicknessDatesGroup”. Make the element optional.
- The static text for the start date can sometimes be omitted, so first we’ll search for the end date. Create and configure a Key value element called “EndDate”: a. Enter the lines “au”, “jusqu’au”, and “tot en met” in the Text to find field. b. Disable the Gap between key and value option. c. Set the value type to Date.
Create the StartDate element as a copy
- Copy and paste the “EndDate” element. Rename it to “StartDate”.
- Adjust the Text to find. This time we will look for the word “du” or “van”.
- Click Match and make sure Advanced Designer has found the dates correctly.
Add the StartDateNoLabel element for documents without a start-date label
Extract the sick leave duration
- Create a Key value element called “Duration”.
- Paste the strings “durée de :” and “Gedurand” in the Text to find field.
- Disable the Gap between key and value option.
- Set the value type to Character String and edit the character set. It should only contain digits.
- Set maximum character count to 3.
- Click Match and make sure that the value was successfully found.
Create fields and map them
- Open the Manage Fields dialog and create a new text field called “Duration”. Change its data type to Number.
- Select the “Start Date” and “End Date” fields to be used in this activity. Click Save.
-
Map the fields:
For the “Start Date” field, there are two search elements that may provide a region to this field. We will use code to check if each of the elements was found and pass the corresponding region to the field. Select Code in the Get region from list and paste the following code in the Code Editor:
Name Search element End Date EndDate Duration Duration Start Date See below - Delete the elements that were automatically created when enabling the fields.
Extracting the patient’s data
The patient’s data in these documents is less structured than in the German sick notes. Many pieces of data may be missing. The only part that is always present is the patient’s full name.Locate the paragraph containing the patient's data
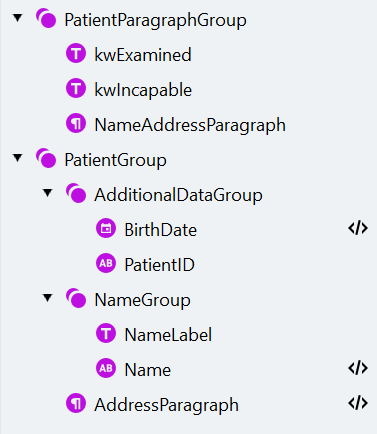
- Create a Group element called “PatientParagraphGroup”. Make the element optional.
- The patient’s data is preceded by the sentence where the doctor states that he has examined the patient. To locate this statement, we’ll search for the words that occur in this sentence. Create a Static Text element called “kwExamined” (Text to find: “interrogé” or “ondervraagd”).
- The patient’s data is followed by the conclusion where the doctor states what the patient is incapable of. To locate this conclusion, create a Static Text element called “kwIncapable” (Text to find: “incapable”, “niet in staat”, “onbekwaam”, “déclare que :”).
-
The paragraph containing the patient’s data is located between the two keywords we have just found. Create a Paragraph element with the following settings:
Property Value Name NameAddressParagraph Minimum line count 1 Maximum line count 4 Minimum line width 200 Search area Below “kwExamined”, Above “kwIncapable”, Nearest to “kwExamined” - Click Match.
Create the PatientGroup and AdditionalDataGroup
- Create an optional group called “PatientGroup” to extract data from the paragraph.
- First, we’ll extract additional data that is easy to find and is present on some documents. Create an optional group called “AdditionalDataGroup” inside the “PatientGroup” group.
- To extract the patient’s birth date, create a Date element called “BirthDate”. Adjust its Min. hypothesis quality so that this element can be extracted successfully if data is missing from the document.
-
Use the code editor to specify the search area inside the “NameAddressParagraph”:
-
In some cases the patient’s name is followed by a numerical ID that consists of 11 digits and is usually enclosed in brackets. To extract this ID, create a Character String element with the following settings:
Property Value Name PatientID Method Regular Expression Regular Expression ("("|)N{11}(")")Character count {11, 11, 13, 13}Search for parts of words Disabled The Regular Expression Editor uses specific syntax. For more information, see the Character String topic or click Syntax help in the editor.
Search for the patient's name
- Create an optional group called “NameGroup” inside the “PatientGroup” group.
- First, we want to exclude the label that occurs on some documents. Create a Static Text element called “NameLabel” (Text to find: “Nom, prénom du patient :” or “Patiente”). Enable the Match case option and change the Min. hypothesis quality to 1.
-
We consider that a name consists of 2 or 3 capitalized words, so we will search for it using a regular expression. Create a Character String element with the following settings:
Property Value Name Name Method Regular Expression Regular Expression (([A-Z])(C|"-"){1-}s)Allowed errors 0% Word count {2, 2, 3, 3}Search for parts of words Disabled Search area Nearest to the top page edge, Exclude “PatientID” and “NameLabel” Search Conditions section of the Code Editor RSA: PatientParagraphGroup.NameAddressParagraph.Rects;
Search for the patient's address
| Property | Value |
|---|---|
| Name | AddressParagraph |
| Search area | Below “Name”, “BirthDate”, “AdditionalDataGroup” |
| Search Conditions section of the Code Editor | RSA: PatientParagraphGroup.NameAddressParagraph.Rects; |
Map the patient fields
-
Open the Manage Fields dialog, select the following fields in the “Patient” group to be used in this activity, and map them to search elements as follows:
Name Search element Full Name PatientGroup -> NameGroup -> Name Date of Birth PatientGroup -> AdditionalDataGroup -> BirthDate Insurance ID PatientGroup -> AdditionalDataGroup -> PatientID Address PatientGroup -> AddressParagraph - Delete the elements that were automatically created when enabling the fields.
Extracting the doctor’s data
Information about the doctor is usually located at the bottom of the sick note and usually includes an ID. We’ll first locate the signature and then search for the ID. Finally we’ll search for the paragraph that contains the ID.Create the SignatureGroup and locate the signature
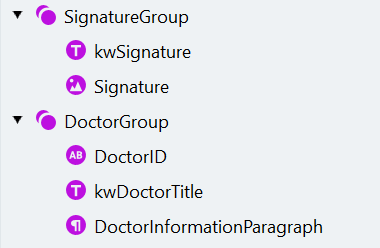
- Create a Group element called “SignatureGroup”. Make the element optional.
- Most documents contain a label for the signature. To find it, create a Static Text element called “kwSignature” (Text to find: “Signature” or “handtekening”).
-
To locate the signature itself, create an Object Collection element with the following settings:
Property Value Name Signature Type Picture Minimum width 15 Minimum height 15 Maximum width 600 Maximum height 350 Search area Below the top boundary of “kwSignature”, Nearest to “kwSignature”
Locate the doctor's ID
- Create a Group element called “DoctorGroup”. Make the element optional.
-
First, we’ll search for the doctor’s ID which has a strict format and can therefore be defined by a regular expression. Create a Character String element with the following settings:
Property Value Name DoctorID Method Regular Expression Regular Expression N{1-1}n{1-1}N{5-5}n{1-1}N{2-2}n{1-1}N{3-3}Character count {13, 13, INF, INF}Search area Nearest to top page edge -
Some documents also contain the doctor’s title. We will locate it in order to exclude it from the paragraph with the doctor’s data. Create a Static Text element with the following settings:
Property Value Name kwDoctorTitle Text to find Cachet du prescripteur, Médecin, Stempel van de voorschrijver, Identification du médecin (each on a new line) Match case Enabled Allowed errors 10% Null hypothesis quality 1 You may insert recognized text from the document to this field. To do this, simply draw an area that includes the desired words on the document image when the Text to find dialog is open. The text will be automatically inserted on a new line. -
To locate the doctor’s data, create a Paragraph element with the following settings:
Property Value Name DoctorInformationParagraph Text alignment Left Line count 4 - 6 Search area Below “kwDoctorTitle”, Nearest to “DoctorID”, Exclude “IssueDateGroup”
Map the doctor fields
-
Open the Manage Fields dialog, select all fields in the “Doctor” group to be used in this activity, and map them to search elements as follows:
Name Search element Doctor Information DoctorInformationParagraph Signature Signature Doctor ID DoctorID - Delete the elements that were automatically created when enabling the fields.
Extracting the sick note type
In contrast to German documents, in Dutch and Belgian sick notes this information is not presented in a uniform way. Some of the checkmark labels may be missing, and the checkmarks’ appearance may vary.Create the TypeOfSickNote group and PrimaryGroup
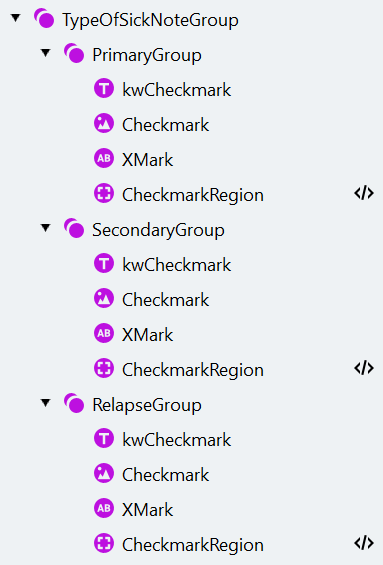
- Create a Group element called “TypeOfSickNote”. Make the element optional.
- We’ll use the same algorithm to extract each checkmark. We’ll configure one group of elements and then copy it and adjust the necessary properties. a. Create an optional group called “PrimaryGroup”. b. First, we have to locate the keyword. Create a Static Text element called “kwCheckmark” (Text to find: “le début de” or “Eerste ongeschiktheid”). c. Make this element Required. If the keyword is not found, Advanced Designer will not search for the corresponding checkmark.
Create the Checkmark, XMark, and CheckmarkRegion elements
| Property | Value |
|---|---|
| Object Collection search element: | |
| Name | Checkmark |
| Type | Checkmark |
| Maximum height | 100 |
| Search area | Below the “kwCheckmark” top boundary, Below value = -15, Left of “kwCheckmark”, Above the “kwCheckmark” bottom boundary, Above value = -15, Nearest to “kwCheckmark” |
| Min. hypothesis quality | 1 (we adjust this setting because we don’t want the hypothesis chain quality to decrease if the checkmark wasn’t found) |
| Character String search element: | |
| Name | XMark |
| Method | Characters |
| Character set | []|Xx |
| Word count | {1, 1, 1, 1} |
| Character count | {1, 1, 3, 3} |
| Search for parts of words | Disabled |
| Search area | Below the “kwCheckmark” top boundary, Below value = -15, Left of “kwCheckmark”, Above the “kwCheckmark” bottom boundary, Above value = -15, Nearest to “kwCheckmark” |
| Under what conditions | Do not find element if “Checkmark” is found |
| Region search element: | |
| Name | CheckmarkRegion |
Create the SecondaryGroup and RelapseGroup
- Create a copy of “PrimaryGroup” and rename it to “SecondaryGroup”. Change the text to find of its “kwCheckmark” element to “prolongation”, “verlenging”.
- German sick notes were divided into two types. As opposed to them, Dutch and Belgian sick notes are divided into three types (‘relapse’ is an additional type). Hence create another copy of the “PrimaryGroup” group and rename it to “RelapseGroup”.
- Change the text to find of its “kwCheckmark” element to “Herval” and enable the Match case option to exclude words occurring in the middle of a sentence.
Add the Relapse checkmark and map fields
- Open the Manage Fields window and add a “Relapse” checkmark to the “Type of Sick Note” checkmark group. Enable all checkmarks in the group to be used in the current activity and click Save.
- Map the checkmarks to the corresponding Region elements and delete the elements that were automatically created when enabling the fields.