Prerequisites
- The Active Directory Federation Service (ADFS) needs to be installed.
- A user group must be created in Active Directory. This group is used to manage the list of users permitted to access Vantage.
- Create a Redirect URI to receive the authentication responses. The URI is:
https://<your-vantage-url>/auth2/signin-oidc
Setup
To set up Active Directory via the AD FS management console, follow these steps:Add a new application group
Add a new application group and select the Web browser accessing a web application template.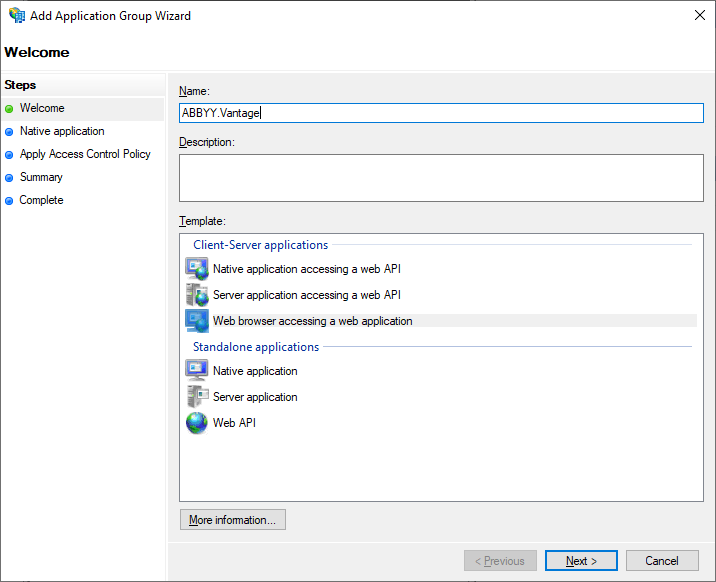
Configure the Native Application
In the Native Application tab, enter your Redirect URI and save the generated Client Identifier — you’ll need it later. You can also view it again in the application group properties.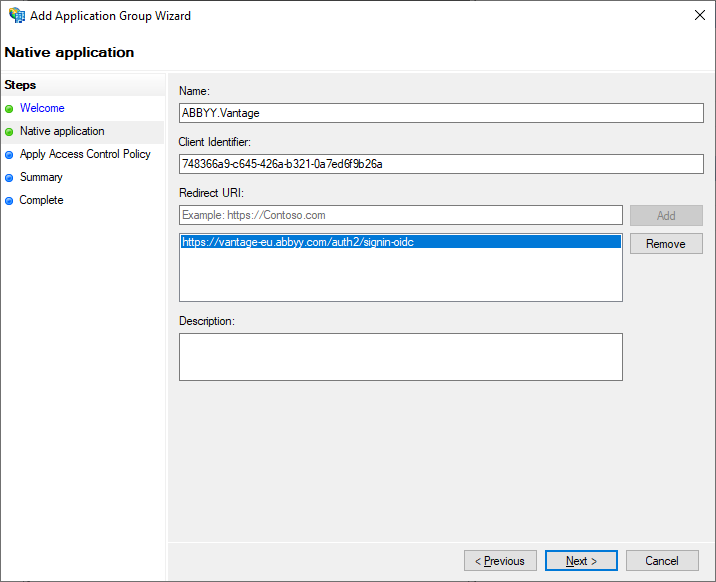
Apply an Access Control Policy
In the Apply Access Control Policy tab, select a user group to grant access to Vantage. Leave the default value of Allow everyone if you don’t want to restrict access yet.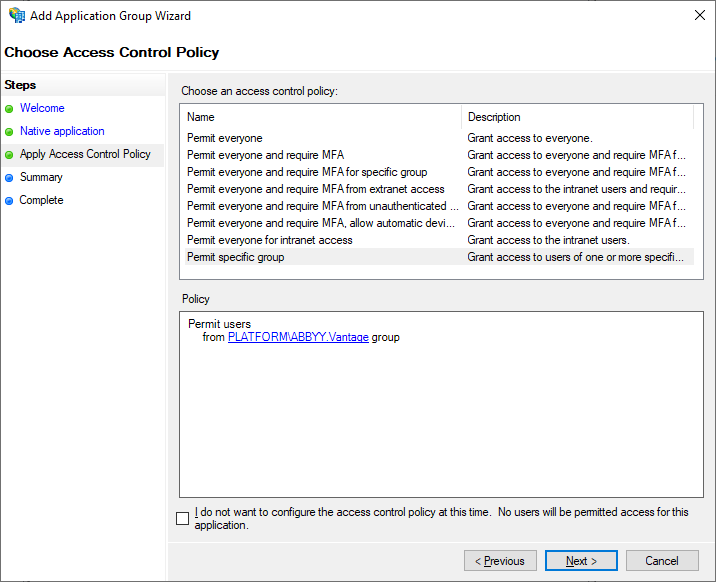
Skip the Summary and Complete tabs
The Summary and Complete tabs aren’t required to set up Active Directory. Navigate through them and click Close.
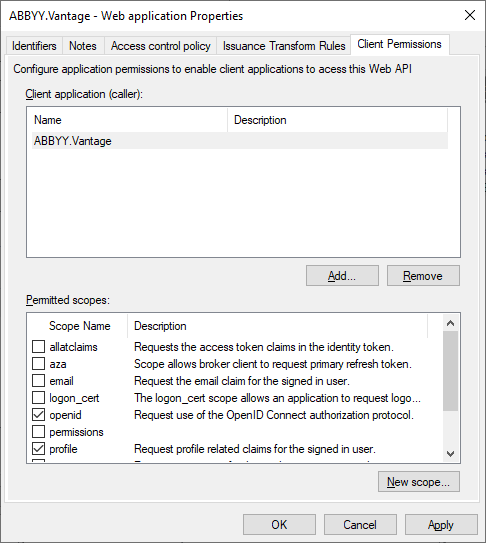
Save the Application ID
Open the properties of the application group you created. You can also manage Redirect URI and Client ID via Server application Properties. For advanced settings, use Web application Properties — this is also where you’ll find the Application ID. Save it, since it’s required later in the setup.
Add a Transform Claim Rule
In the Add Transform Claim Rule dialog, add a claim rule that ensures the email address and name are included in the token.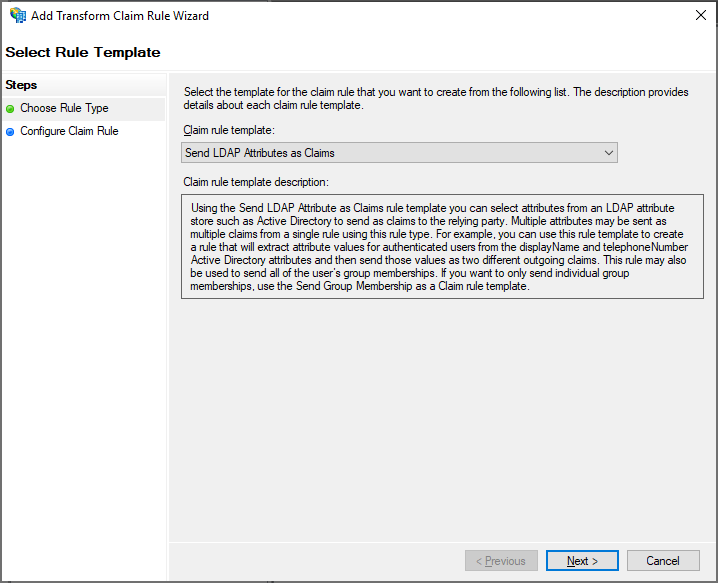
Configure the Claim Rule
In the Configure Claim Rule tab, select Active Directory in Attribute Store.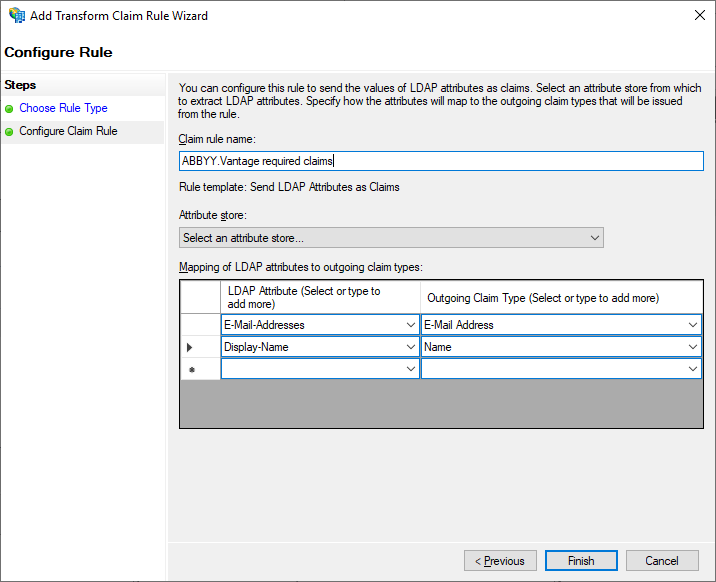
Next steps
Once AD FS is configured, connect it to your Vantage tenant. You’ll need:- The Application (Client) ID (from step 6 above).
- The AD FS URL in the format
https://<full-computer-name>/adfs. The Full computer name is in the machine’s system settings — for example,https://adfs.platform.local/adfs.
Related topics
Configuring an OAuth 2.0 External Identity Provider
Overview of OAuth 2.0 setup for AD FS or Azure AD
Azure Active Directory as an OAuth 2.0 External Identity Provider
Configure Azure AD instead of on-premises AD FS
Setting up an External Identity Provider for a tenant
Connect AD FS to your Vantage tenant
Testing external authentication
Verify the External Identity Provider before users sign in