Prerequisites
Before configuring Azure Active Directory to be used as an External Identity Provider, create an application registration. Registering your application establishes a trust relationship between your application and the External Identity Provider. To create the application, follow these steps:Open the Azure Portal
Go to Azure Portal and sign in. In the pane on the left, select Azure Active Directory.
Open App registrations
In the pane on the right, select App registrations and click New registration.
Fill in the registration form
Specify the following:
- Name — a name for the application.
- Supported account types — select Accounts in this organizational directory only (ABBYY only - Single tenant).
- Redirect URI — for each Vantage URL that should authenticate using this account, enter
https://<your-vantage-url>/auth2/signin-oidc.
Set up Azure Active Directory
To set up Azure Active Directory, follow these steps:Open the application Overview page
On the Overview page of your application, save the values of Application ID URI and Directory (tenant) ID, then click the value of Redirect URIs.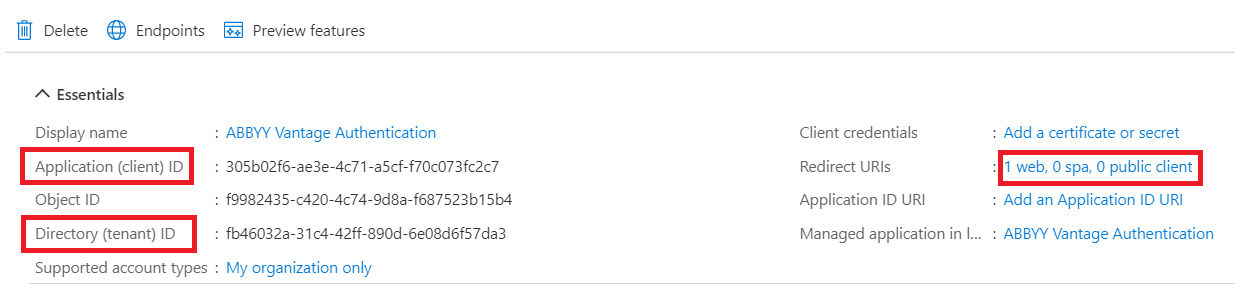

Next steps
Once Azure AD is configured, connect it to your Vantage tenant. You’ll need:- The Application (Client) ID (from step 1 above).
- The Azure AD URL in the format
https://login.microsoftonline.com/<Directory-tenant-ID>.
Related topics
Configuring an OAuth 2.0 External Identity Provider
Overview of OAuth 2.0 setup for AD FS or Azure AD
Active Directory as an OAuth 2.0 External Identity Provider
Configure on-premises AD FS instead of Azure AD
Setting up an External Identity Provider for a tenant
Connect Azure AD to your Vantage tenant
Testing external authentication
Verify the External Identity Provider before users sign in