Scan & Send Tools
The buttons on this toolbar perform the basic operations: scanning, stopping scanning, exporting scanned documents, and rescanning.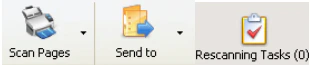
Batch Type Tools
The buttons on this toolbar select a batch type, display its properties, and change the appearance of the Batches window.
| Button | Description |
|---|---|
| Selected Batch Type (drop-down list) | Selects a batch type and makes it current. The default batch type is Unsorted. |
 | Opens the Batch Type Properties dialog box, where you can view and edit the settings of the selected batch type. This button is unavailable for Unsorted batches. To view the default options, select Tools → Options… |
 | Click this button to display only the batches of the current type in the Batches window. |
This toolbar is hidden if there are no user-created batch types.
Batch Editing Tools
The buttons on this toolbar change the structure of a batch.
| Command | Button | Description |
|---|---|---|
| Create New Batch |  | Creates a new batch of the current type. The name of the new batch is determined by the batch naming rule specified in the batch type properties. To change the name of a batch, select the batch in the Batches window and then click its name or press F2. |
| Create New Document |  | Creates a new document in the current batch that contains the selected pages. The name of the new document is determined by the document naming rule specified in the batch type properties. To change the name of a document, select the document in the Batches window and then click its name or press F2. |
| Disassemble Document |  | Disassembles a document: the pages of the document are placed in the current batch and the document itself is deleted. |
| Delete |  | Deletes the selected items. |
Image Editing Tools
Use these buttons to edit images.
| Command | Button | Description |
|---|---|---|
| Rescan Pages |  | Rescans the selected pages. |
| Insert Pages |  | Scans images and places the scans into the selected batch. |
| Enhance Image |  | Opens the image enhancement panel. |
Document Navigation Tools
Use these buttons to move between documents.
| Command | Button | Description |
|---|---|---|
| Go to Previous Document |  | Moves the selection to the previous document. |
| Go to Next Document |  | Moves the selection to the next document. |
Rescan Tools
Use these buttons to move between documents in a rescanning task, confirm rescanning results, and open the Rescanning Tasks dialog box.

| Command | Button | Description |
|---|---|---|
| Previous Document to Rescan |  | Opens the previous document of the current batch. |
| Next Document to Rescan |  | Opens the next document of the current batch. |
| Confirm Rescanned Document |  | Confirms results of rescanning a document. |
New rescanning tasks are available. appears when information about newly added rescanning tasks is received from the server. Click the link to open the Rescanning Tasks dialog box.
Scripts toolbar
Use these buttons to run the scripts associated with each button.