Note: Any changes to the image would lead to the loss of all regions and a new extraction being required.Image editing operations that can be performed in manual review include:
Manually cropping document images
If automatic cropping did not work correctly, the user can go back to the original image to crop it manually. The user can manually crop the image for the following purposes:- To improve the appearance of the document.
- To re-extract data from the document if part of the data was accidentally cut off in the document image.
- To crop several images from the original page image. For example, you may need to crop document images from:
- Several W2 tax forms.
- Both sides of a driver’s license or two pages of a passport.
- Multiple different documents for a single person, such as a driver’s license and an insurance certificate placed on a scanner and scanned together.
- Multiple checks photographed together.
- Click the edit image icon in the toolbar and then select Crop Image in the Actions pane.
- Draw rectangular areas for one or more regions (if there are multiple documents on the page). Adjust their borders and corners.
- Click Apply Crop or press Enter. Each area will be converted into a separate page.
- Click Save & Close. Once the page image is cropped, it is imported and undergoes standard import operations, while the crop operation follows the user’s specified coordinates and orientation.
- In the window that will open, click Extract Data.
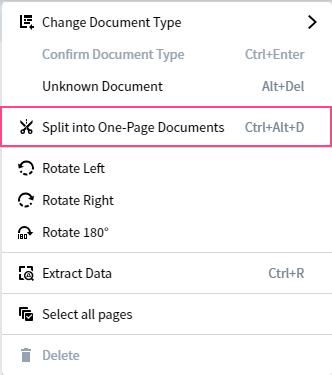
- If you need to split a multipage document into separate documents, click the more options icon next to the document and select Split to One-Page Documents.

- In the window that will open, click Extract Data.
Note: The document list cannot be empty, for example, it must always contain at least one document. You will not be able to delete the last page of a document that is the only document in the list.
