Setup
Set up a document processing workflow
Either set up a custom workflow manually, or select one of the preset workflows.
The Try option for launching a transaction is not available for Process skills.
Preset workflows
Preset workflows are available in the Actions pane of the Skill Designer. Vantage offers the following presets.Simple Document skill workflow
For processing documents of a single type. Imports documents, extracts fields, and uploads results.Multiple Document skills after Classification
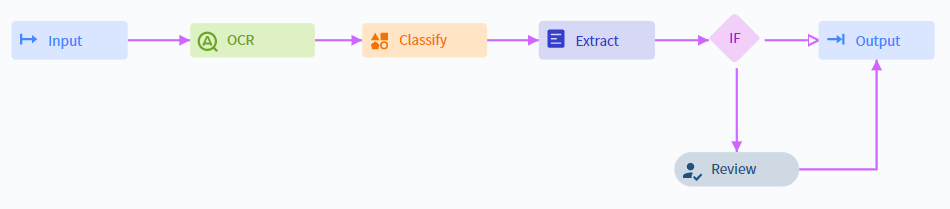
For processing various document types in one workflow. Imports documents, classifies them, routes each type to the right Document skill, and uploads results.Multiple Document skills after Classification with manual review
Same as above, plus a Manual Review step that verifies only documents that fail specific business rules defined by the workflow designer.Modify a workflow
Add an activity
Remove an activity
Create a custom workflow
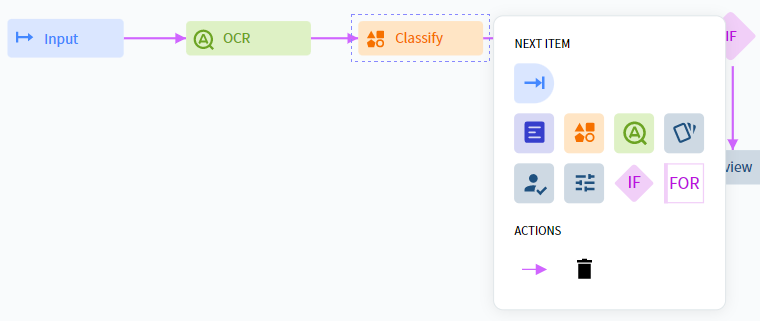
Add an activity
Select an activity in the Activities pane and drag it into the Skill Designer window.
Configure the block
Click the block and select the required activity from the menu that appears. Click the block again to close the menu.
Available activities
You can use the following activities in a custom Process skill workflow:Most activities can access all documents in a transaction at once. Skill-based activities (Classify, Extract, OCR) process each document separately. You can branch the workflow implicitly by mapping Document skills in an Extract activity to classes assigned by a Classify activity. Use For Each Document to apply Custom or Condition activities to one document at a time.
Related topics
Process skill
Orchestrate document processing workflows by chaining activities and skills.
Input activity
Bring documents into a Process skill from email, shared folders, or other sources.
Output activity
Export processed documents to external systems or shared folders.
Classify activity
Identify document types and route each document to the correct downstream process.
Extract activity
Extract field values from documents using a Document skill.
Skill Catalog
Discover, publish, and reuse skills across your tenant.