
エクスポート プロファイルを作成する
1
Document Definition を開く
- ABBYY FlexiCapture Project Setup Station で Project → Document Definitions をクリックし、プロジェクトで使用可能な Document Definition の一覧を開きます。
- 新しいエクスポート設定を指定する Document Definition を選択します。
- Edit をクリックします。
2
エクスポート プロファイル ウィザードを開始する
- Document Definition → Export Settings をクリックします。
- Add をクリックします。
3
宛先の種類を選択する
Select the Type of Destination ステップで、次の操作を行います。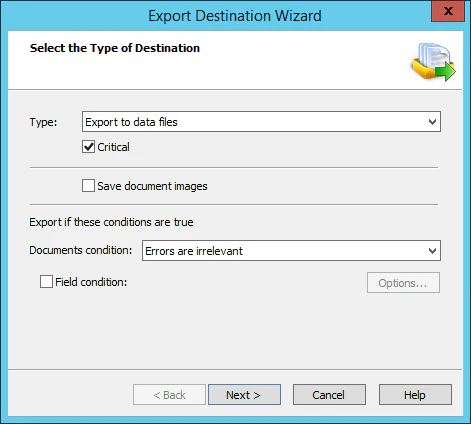
- Type ドロップダウンリストから Export to data files を選択します。
- Critical オプションを選択します。
- Document condition ドロップダウンリストから Errors are irrelevant を選択します。
- Next をクリックします。
4
エクスポート パスとファイル名を設定する
Export Data to Files ステップで、Export path フィールドが空であることを確認し、ファイル名テンプレートを指定します。Next をクリックします。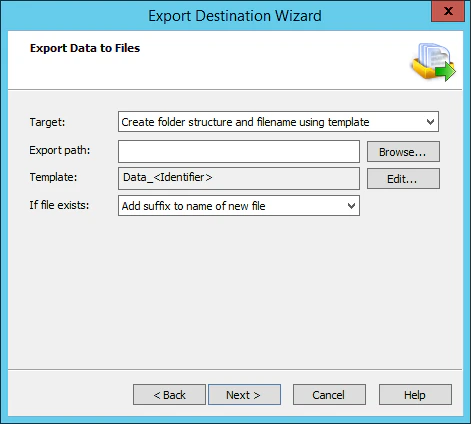
5
データ ファイル形式を選択する
Data File Format ステップで、File type フィールドから必要な出力形式を選択し、Next をクリックします。
6
エクスポート プロファイルに名前を付ける
新しいエクスポート プロファイルの名前を入力し、Finish をクリックします。
7
エクスポート プロファイルを有効にする
Export Settings ダイアログで、新しいエクスポート プロファイルの Enabled チェックボックスを選択します。Apply をクリックしてから、OK をクリックします。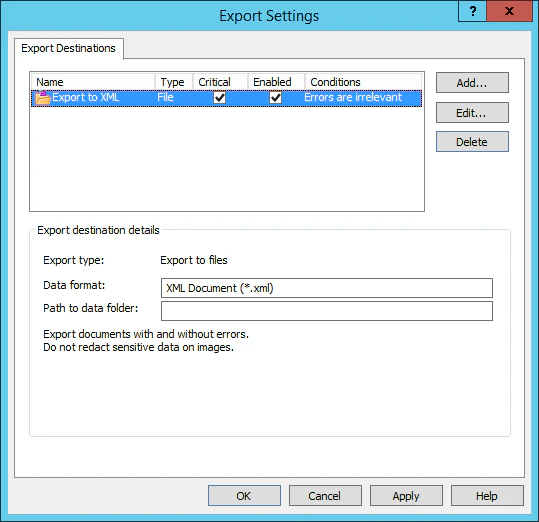
8
Document Definition を公開する
Document Definition エディターを保存して閉じ、Publish をクリックします。