前提条件
1
Azure Portal を開く
Azure Portal にアクセスしてサインインします。左側のペインで、Azure Active Directory を選択します。
2
App registrations を開く
右側のペインで、App registrations を選択し、New registration をクリックします。
3
登録フォームに入力する
次の項目を指定します。
- Name — アプリケーション名。
- Supported account types — Accounts in this organizational directory only (ABBYY only - Single tenant) を選択します。
- Redirect URI — このアカウントを使用して認証を行う Vantage の URL ごとに、
https://<your-vantage-url>/auth2/signin-oidcを入力します。
4
アプリケーションを登録する
Register をクリックします。
Azure Active Directory を設定する
1
アプリケーションの Overview ページを開く
アプリケーションの Overview ページで、Application ID URI と Directory (tenant) ID の値を控えておき、Redirect URIs の値をクリックします。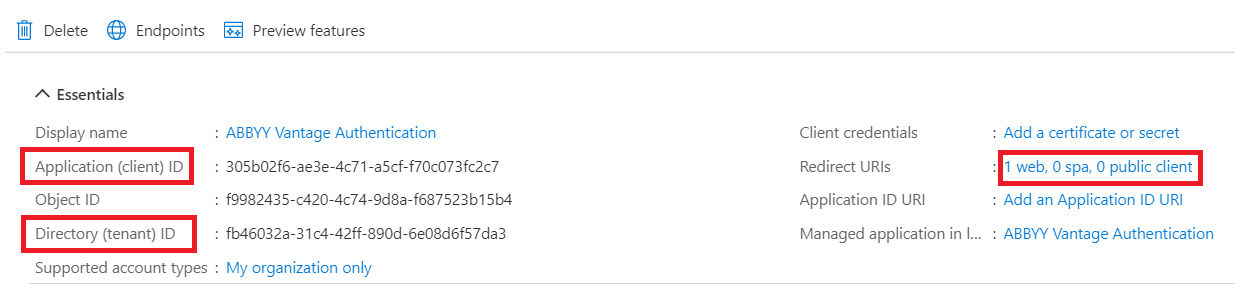
2
トークンを構成する
Access tokens と ID tokens を選択し、Save をクリックします。
次のステップ
- Application (Client) ID (上記の手順 1 で取得) 。
https://login.microsoftonline.com/<Directory-tenant-ID>形式の Azure AD の URL。