Set up an NLB cluster for the Application Server
In this section, you will find step-by-step instructions for setting up an NLB cluster for the Application Server. The Administration and Monitoring Console and the web stations are clustered together with the Application Server. A detailed overview of NLB cluster settings can be found on the Microsoft website.The addresses, computer names, domain names, and so on used below are not mandatory and may be changed by the administrator.
Set up the cluster
1
Install the Application Server on each cluster node
Install the Application Server on each cluster node. The database, file storage folder, Processing Server, Licensing Server, and Application Server clients must be located on a different computer, which must be accessible to all nodes in the cluster.
2
Add the Network Load Balancing feature
In Windows Features, add Network Load Balancing to each node in the cluster. This is done by clicking the Add Features link in the main window of the Server Manager (click Start → Administrative Tools → Server Manager).
3
Assign a virtual IP address to the cluster
Assign an IP address to the cluster via which the cluster can access the nodes as a unit (this will be a virtual cluster address). To do this, open the Network Load Balancing Manager on any of the nodes (click Server Manager → Tools → Network Load Balancing Manager), right-click the cluster, and select the Cluster Properties item on the shortcut menu.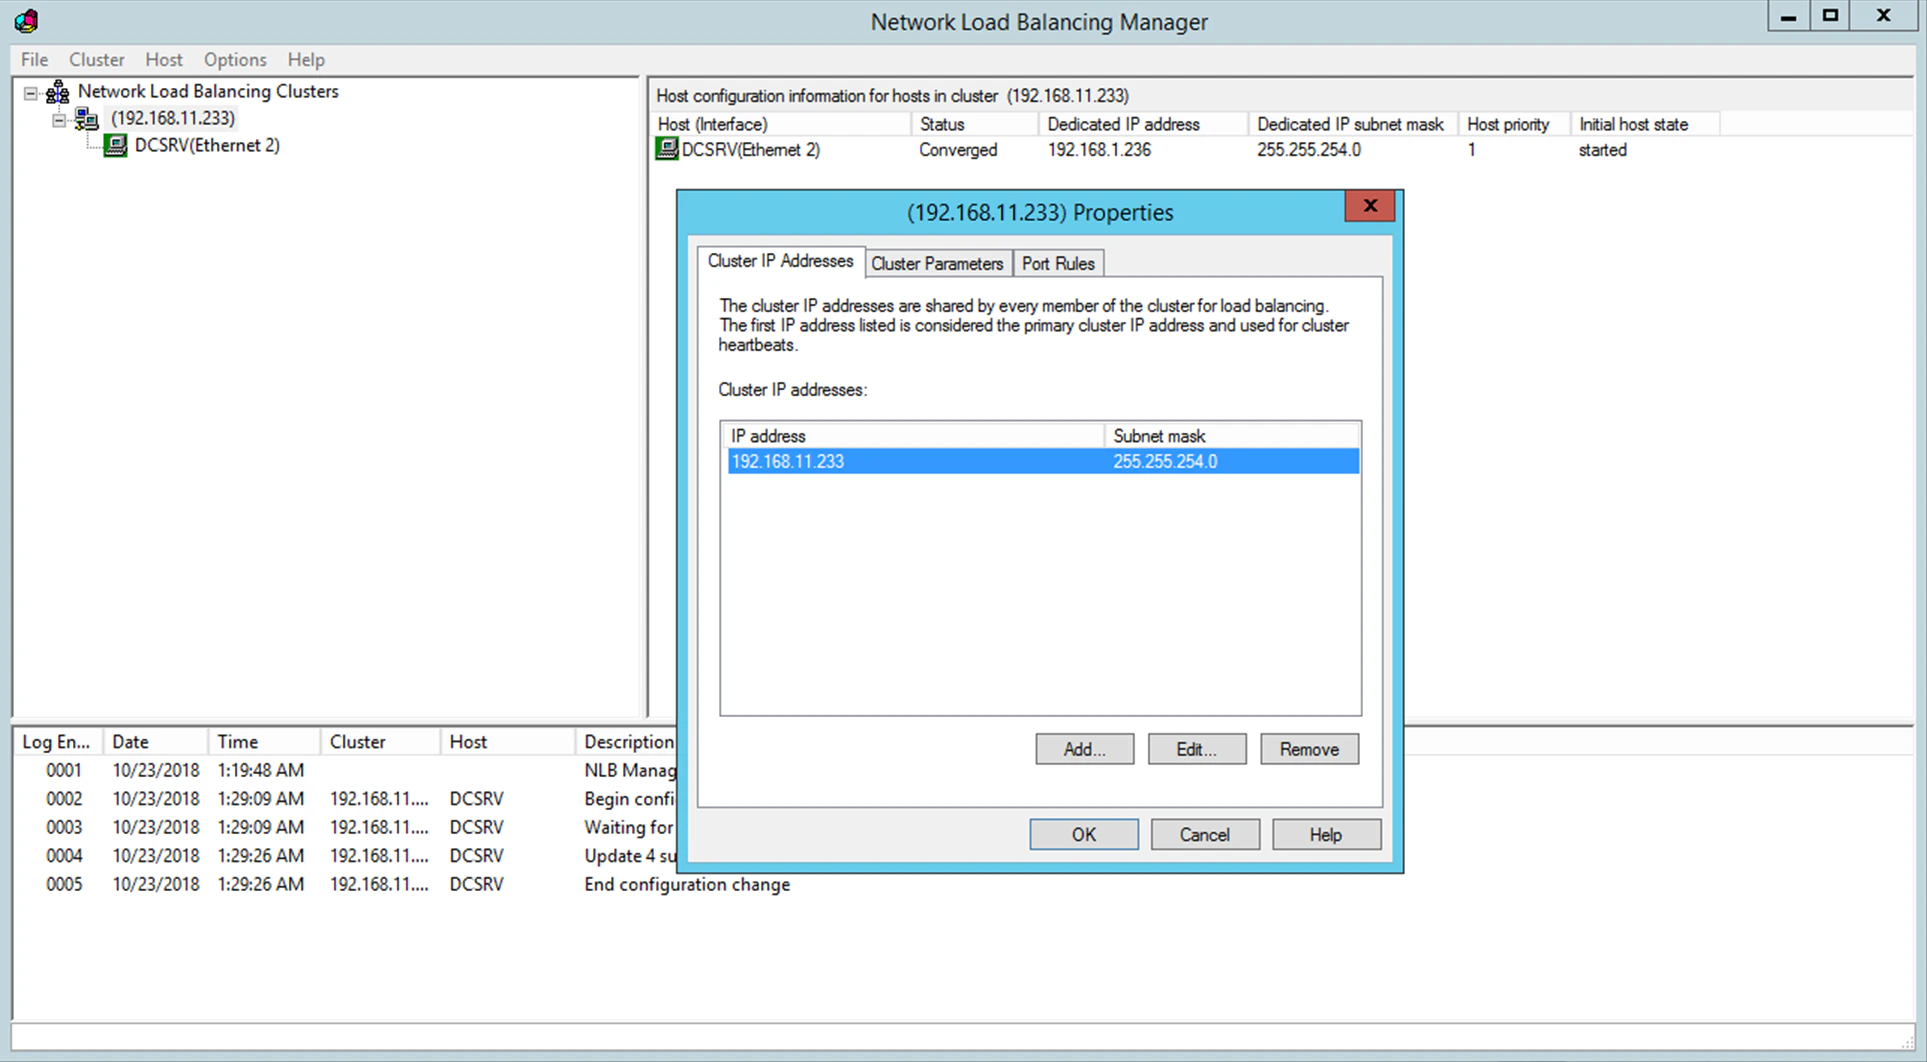
Operating mode of the cluster
The choice between the Unicast and Multicast methods depends on your network configuration. A detailed description of the two methods can be found on this page on the Microsoft website.Balance the workload and set up hosts
You can set up cluster traffic to be balanced and filtered by port. ABBYY FlexiCapture requires the TCP protocol for its operation. There are two filtering modes, single host and multiple host.- Single host
This mode provides fault tolerance but does not allow workload balancing. Only one cluster node is active at a time. - Multiple host
Traffic from a predefined range of ports is handled by the node with the highest priority in the cluster. All cluster nodes function simultaneously. This mode provides both workload balancing and fault tolerance.
- None (not recommended)
If this option is selected, multiple connections (TCP sessions) from a single client can be handled by different nodes. - Single (recommended)
If this option is selected, all connections from a single client are handled by one node. - Network (Class C) (recommended)
If this option is selected, all queries from the TCP/IP Class C address space are handled by one node. This may be necessary if there is a proxy server between the client and the cluster.
Configure the Application Server
1
Create a shared folder
Create a shared folder that can be accessed by all of the nodes in the cluster.
2
Install the database server
Install Microsoft SQL Server, an Azure server, an Oracle server, or a PostgreSQL server. The server must be available to all cluster nodes.
3
Install the Application Server on all cluster nodes
Install the Application Server on all cluster nodes.
4
Create a database on the first node
On the first cluster node, run the Administration and Monitoring Console, create a database, and specify a shared folder for file storage.
5
Connect the remaining nodes to the database
On each of the remaining cluster nodes, run the Administration and Monitoring Console and connect to the database you created.
For this operation, SQL authentication must be used.
6
Grant database permissions
On the SQL Server, the Azure server, the Oracle server, or the PostgreSQL server, give full access permissions for the database to all users on all of the cluster nodes under whose accounts IIS is running (the World Wide Web Publishing Service must be running in the service list). Permissions for the first node are given automatically when the database is created. Other permissions must be given manually.By default, IIS runs under the user Network Service. In this case, assuming IIS is running on a computer named NodeN, you must give full access permissions to the user
DomainName\NodeN$ on the server.7
Verify that IIS is available in the cluster
If the Application Server is not available in the cluster but PING requests still reach the cluster, check whether IIS is available in the cluster. To do this, place a static
*.html file in the folder %systemdrive%\inetpub\wwwroot (this folder typically already contains an iisstart.htm file) and open the file in a browser: \\ClusterAddress\iisstart.htm. Check the proxy server settings in your browser when opening the file.Run Application Server clients
For Application Server clients, we recommend the following:- Recommended — place all cluster nodes in one domain and run the clients under domain user accounts.
- Not recommended — running the clients under local user accounts, for the reason explained below.
node1\User, while on the node2 computer, the user name will be node2\User. This may disrupt the operation of the system.
Running Application Server clients under domain users avoids this problem.
Connect clients outside the domain
To connect clients on remote computers that are not in the domain, you can use basic authentication and a user account in the domain to which the cluster belongs. Suppose the clustered Application Server is in the cluster domain and the computer of the verification operator is not in this domain. Create an account for the usercluster\VerificationOperator in the cluster domain and communicate the account name and password to the verification operator. The verification operator can then connect to the Application Server using this account and basic authentication on the Verification Station.
To use basic authentication for clients, be sure to enable basic authentication for the folder
FlexiCapture12\Server in IIS. Otherwise, users will get an HTTP 401 error when attempting to connect.